This group hadn’t cycled together in a long time. I was excited to join them on a ride to Kundang.
Photograph courtesy of KBS
A few kilometres into the ride my left foot started wobbling. It felt like either the Speedplay cleat was loose on my shoe or a float adjustment screw had unwound.
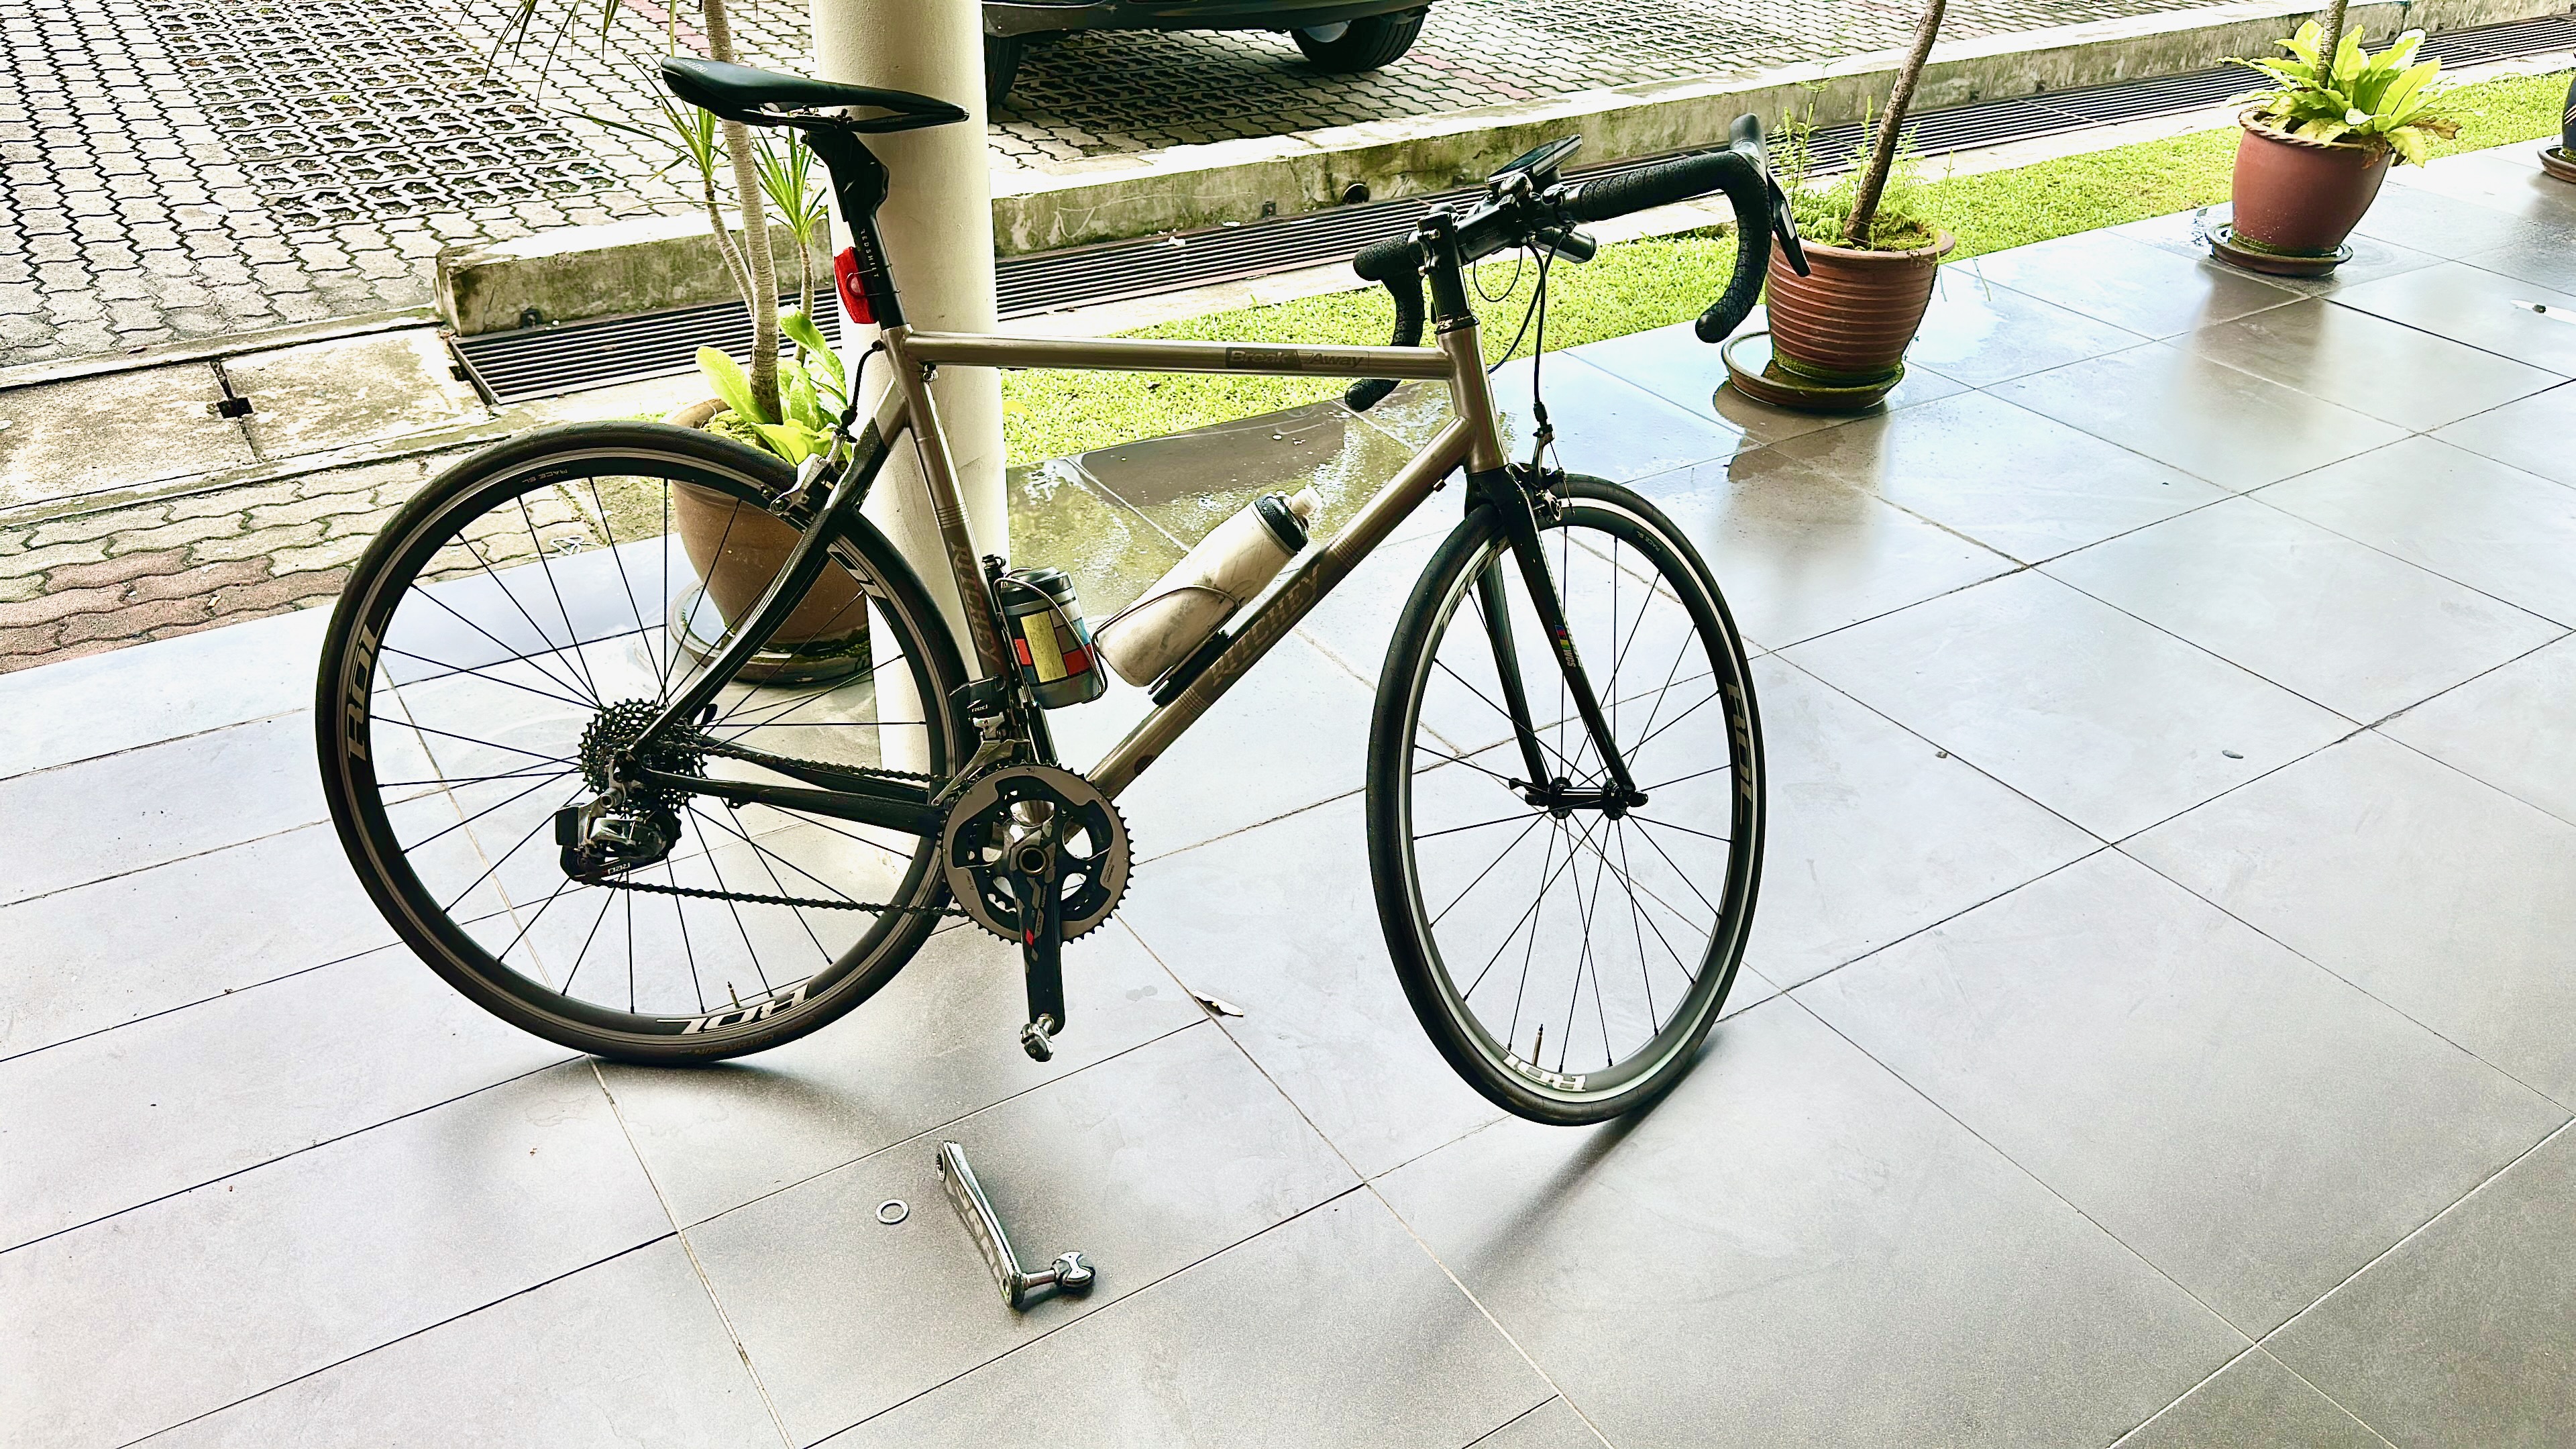
At 6 km my left crank arm, attached to my shoe by the pedal, came off the axle. I spent a minute trying to reattach the crank arm, to no avail. Not having the tool I needed, a 10mm hex key, didn’t help.
Later I realised that having the right-sized hex key would not have helped. The self-extracting bolt on my SRAM crankset had snapped.
Photograph courtesy of singletrackworld.com
I had a single-leg workout to get back to the car park. Left crank arm in hand. With the additional need to apply an inward force to stop the chainring from moving outward and disengaging from the chain.
Photograph courtesy of ML
Fortunately, the 6 km back to the start was mostly downhill. ML was with me and provided a very helpful push on the inclines. I did have to walk up the hill at the 9 km point.
Map courtesy of Ride With GPS
It was lucky we were only 6 km from the start when the crank arm came off.
Over to my LBS to get a replacement self-extracting crank bolt.
When you buy a complete road bicycle, including pedals, it is ready to ride. Sort of. To ride safely, you need front and rear lights and a bell. To ride for more than thirty minutes, you need bottle cages and some bottles. If you don’t want to fill your jersey pockets, you need a saddle bag to carry a spare inner tube, a multi-tool, etc. And if you want to keep track of how far and how fast you rode, you need a cycling computer.
Thus equipped, you are ready to tackle most rides. You will be tempted to upgrade various components, but you don’t need to add anything else to your bike. But when did “need” get in the way of “want?”
You may want a power meter. A valid reason to add a power meter to your bike is you are a competitive cyclist who wants to train using power. Most of us want to add power meters because they are cool pieces of technology. And we like cool technology.
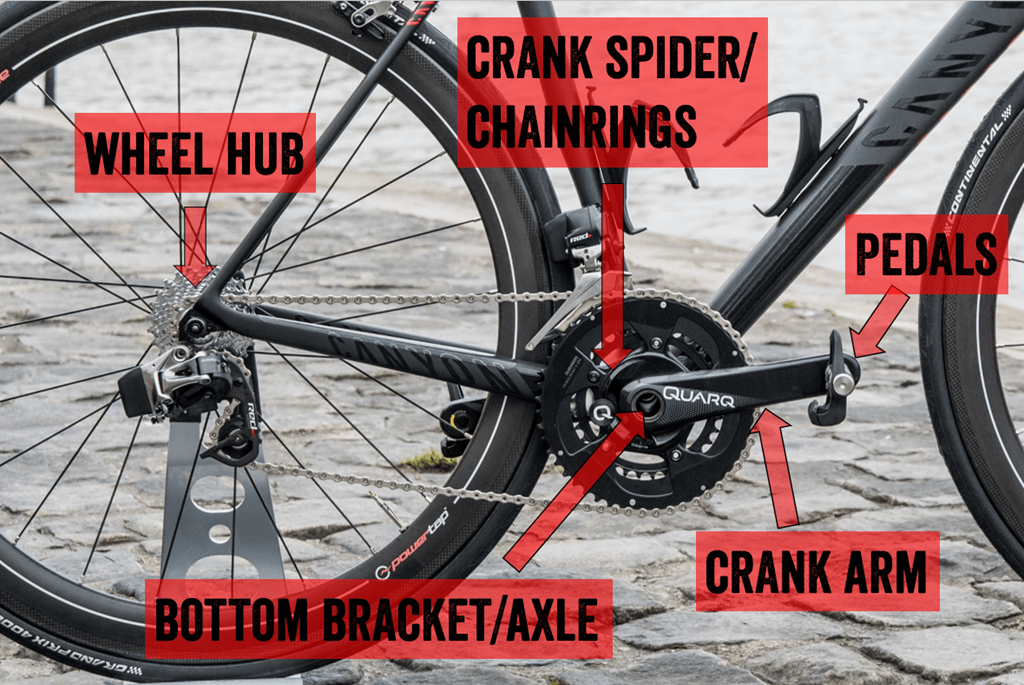
Power meters came into being in 1989 when Ulrich Schoberer started selling crank spider-based power meters. At the time Schoberer Rad Messtechnik (SRM) was the only power meter game in town. And the prices were eye-wateringly high.
Since then the power meter market has grown to include hub-based, crank arm-based, bottom-bracket based and pedal-based power meters.
Graphic courtesy of dcrainmaker.com
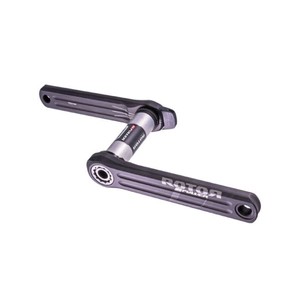
Examples of the various types of power meter are pictured below.
Prices have come down. SRM is still the price leader at about USD2,350 for the SRM Origin. Alternatively, a Quark DZero spider-based power meter costs USD399. At this price, you need to supply the chainrings and crank arms.
One downside of hub, spider, crank arm and bottom bracket-based power meters is that they cannot easily be switched between bicycles.
Pedal-based power meters are increasingly popular because they can be swapped from one bike to another with minimum fuss. However, power meter pedals are not available for all pedal interfaces. The Assioma Favero Duo, Garmin Vector, and SRM Look Exakt are Look pedal compatible only.
Lately, there has been a buzz around pedal-based power meters. In February, SRAM announced that it acquired Time, a French pedal manufacturer. SRAM owns Quark and Powertap. They have announced that the Powertap P2 power meter pedal will no longer be available. Will a Powertap P3 power meter pedal come soon, or even a Time pedal-based power meter?
Favero has hinted that it will launch a version of its Assioma Duo that will be compatible with Shimano SPD-SL pedal bodies.
Photograph courtesy of cyclingtips.com
Also, on the compatibility front, it seems Garmin is about to expand its range of power meter pedals to encompass the three most popular systems: Shimano SPD-SL road, Look Keo road, and Shimano SPD mountain bike interfaces. With a new name – Rally, instead of Vector.
Photograph courtesy of cyclingtips.com
Finally, Wahoo just announced the launch of its Speedplay pedal range. Wahoo acquired Speedplay two years ago, and there has been much speculation about the platform’s future. Along with four updated pedals, Wahoo announced the Powrlink Zero. Few details are available, apart from a Summer 2021 launch and the photograph below.
Graphic courtesy of dcrainmaker.com
If a SRAM Time-compatible power meter pedal hits the market, users of almost all pedal interface types – Shimano SPD-SL, Look Keo, SpeedPlay, and Time – will have a power meter pedal option.
Price remains a barrier to entry to the world of power meter pedals. A set of SRM Exakts cost USD1,699. Garmin Vector 3s go for USD1,000. There is no word yet on the pricing for the various Garmin Rally power meter pedals. A set of Favero Assioma Duo pedals costs about USD650. The expected retail price for the Wahoo Powrlink Zero is USD1,000.
Despite being a life-long SpeedPlay user, I don’t think a set of Wahoo Powrlink Zeros will be on my Watts Next list.
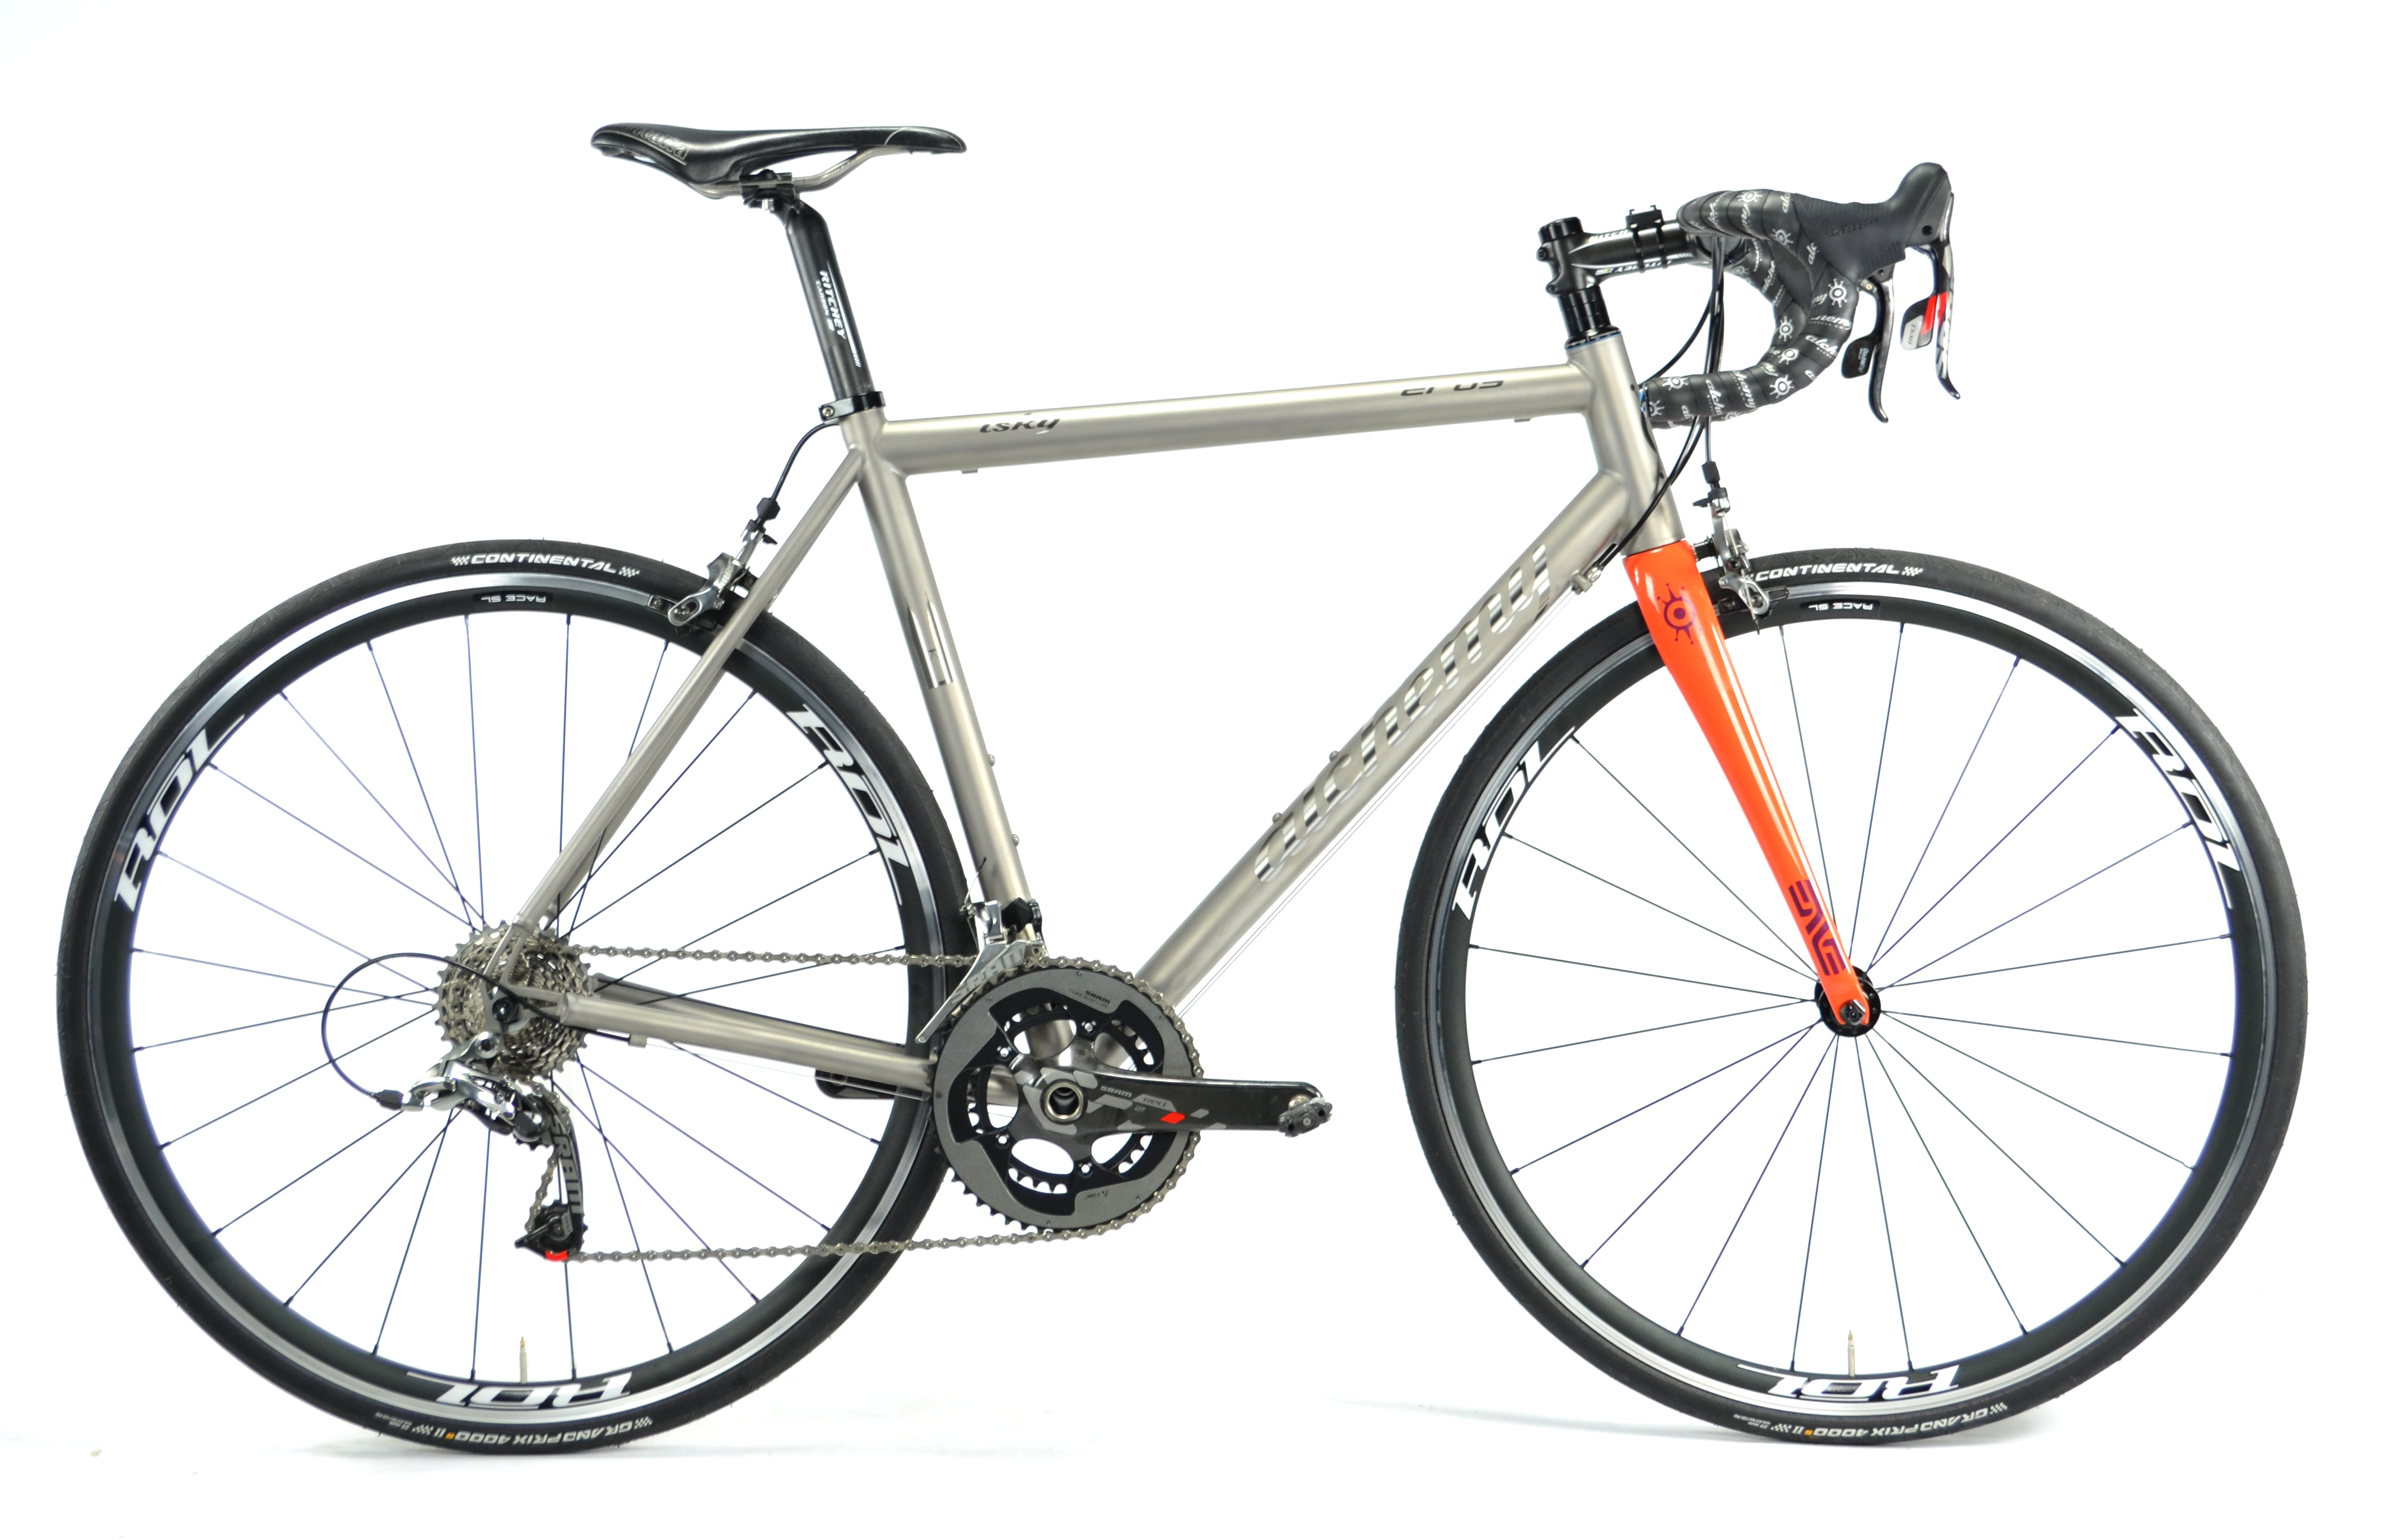
I wrote an early review of my Alchemy Eros in October 2015. At that time I had ridden the bike 1,400 km / 870 mi. Today it has more than 4,000 km / 2,500 mi on it. I have had some long days on this bike, including a 220 km / 137 mi brevet.
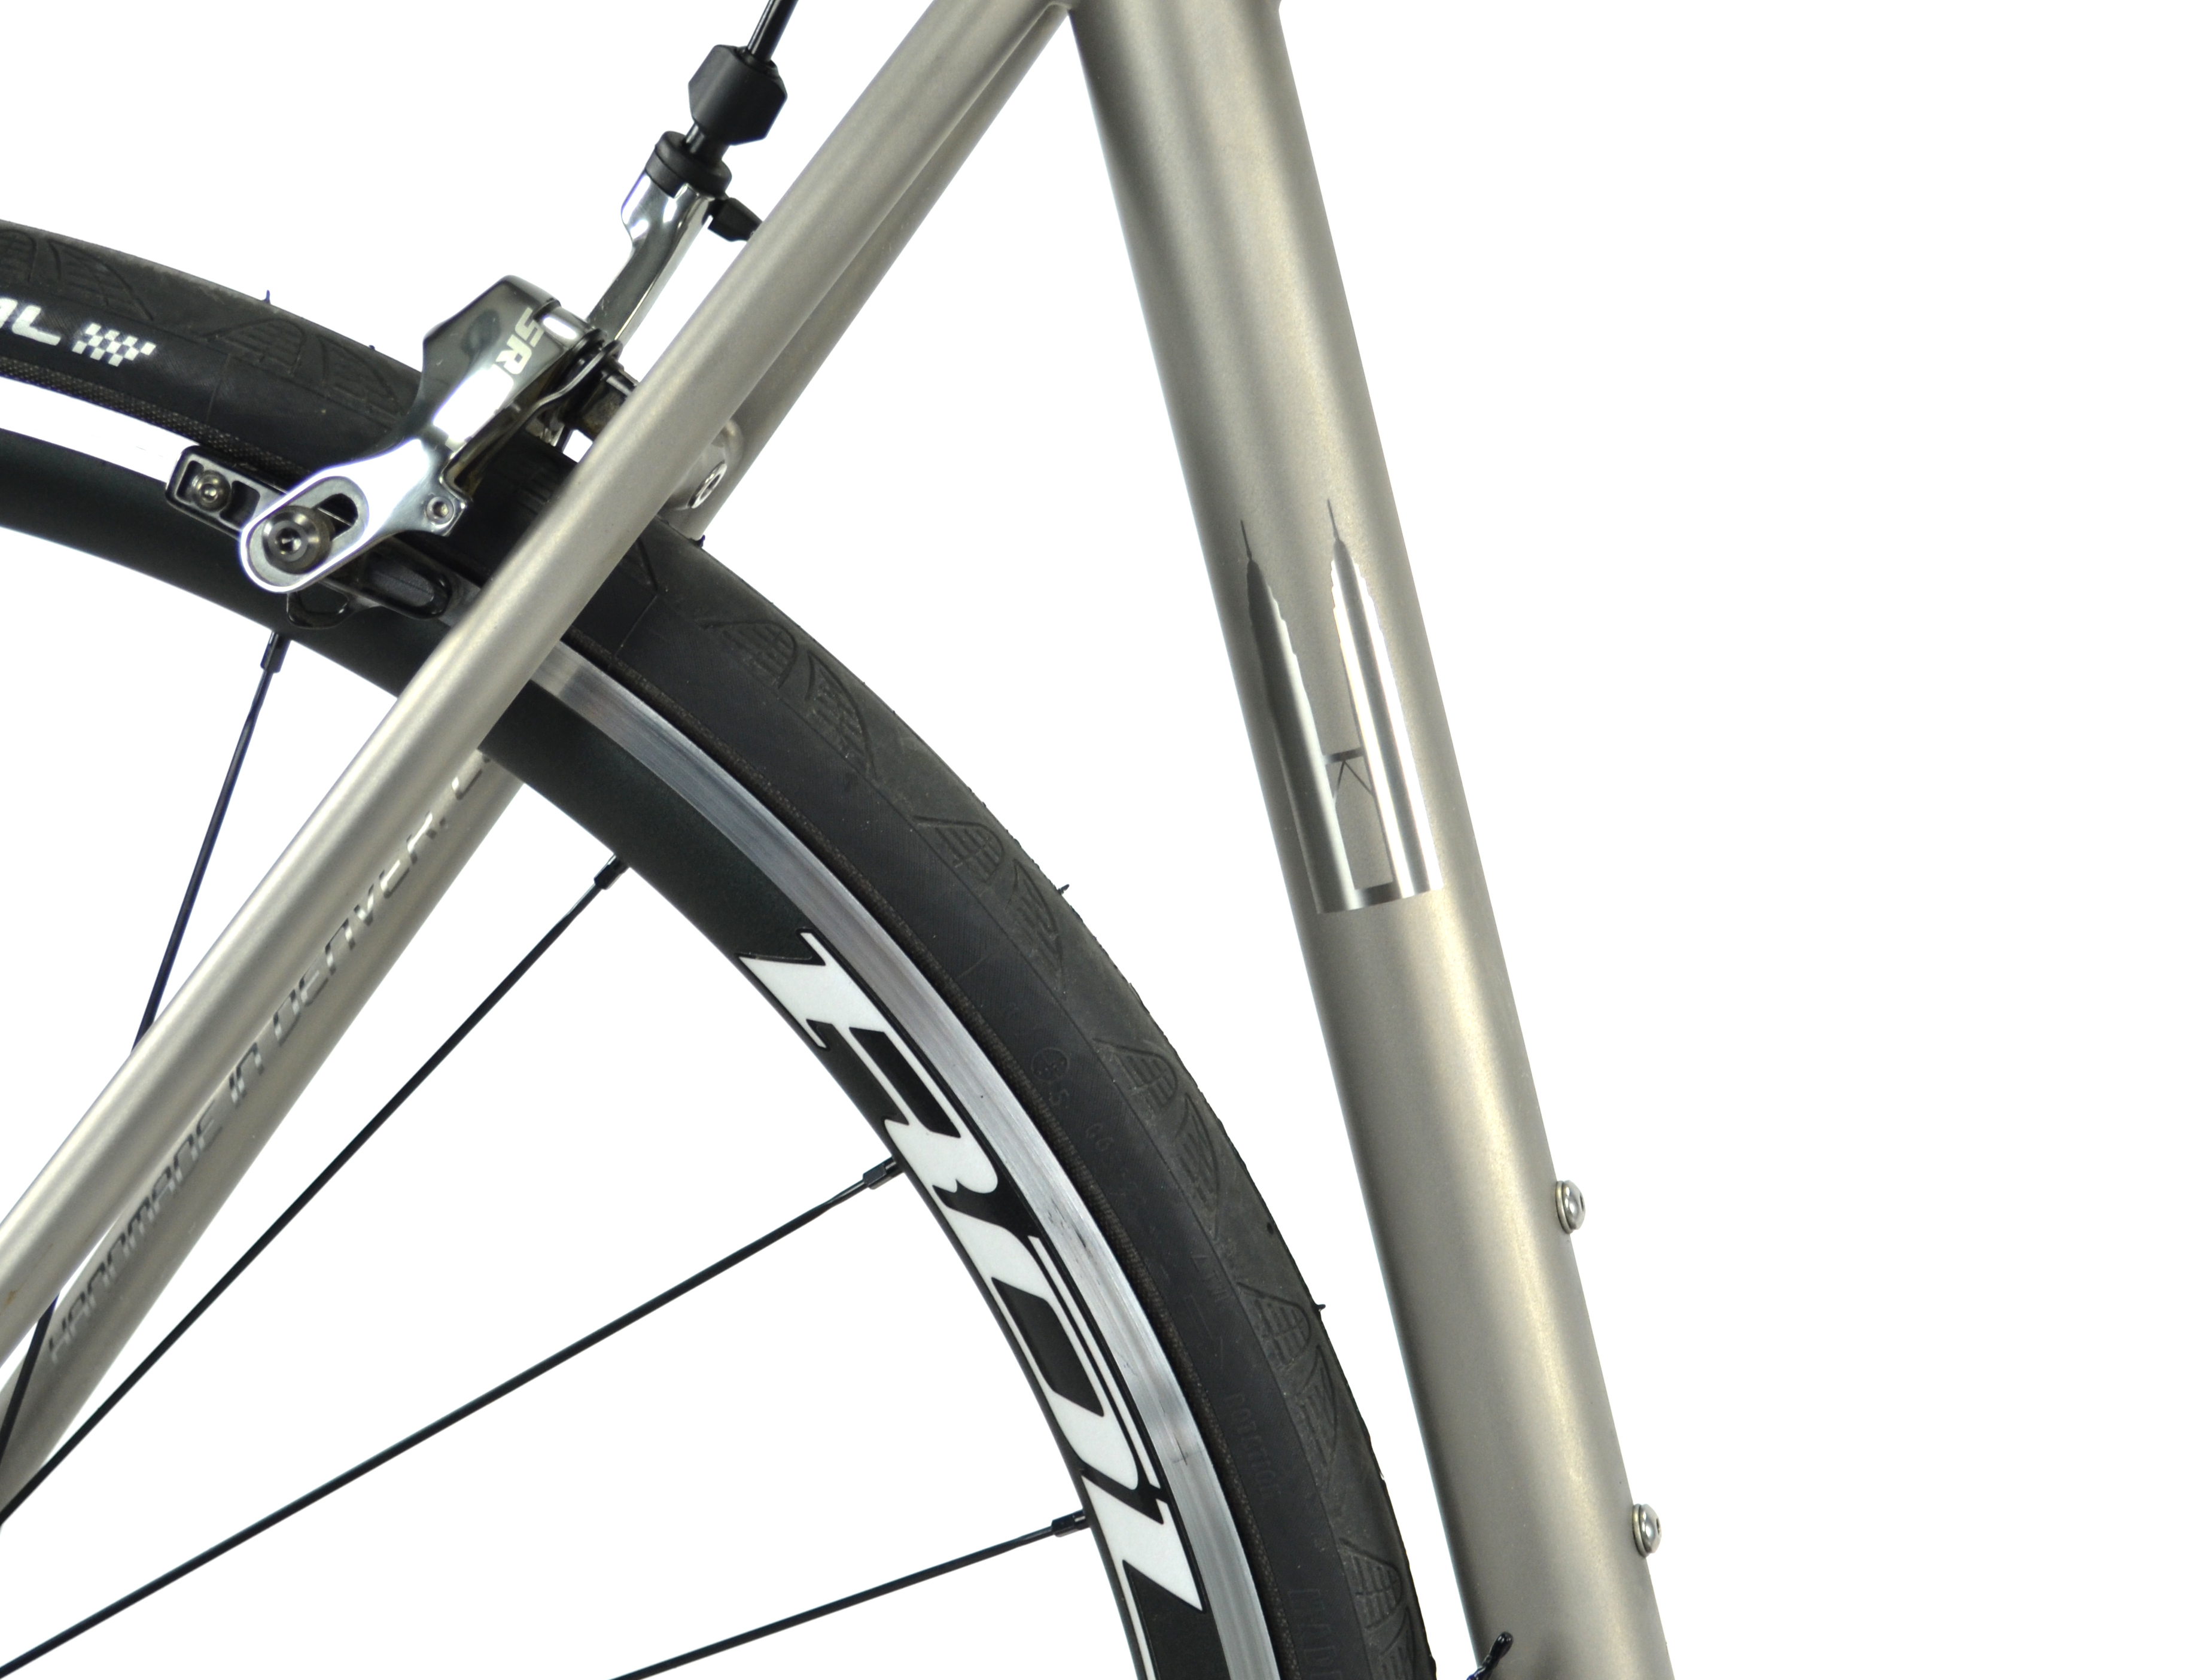
My impressions from last October still hold true. This is a stiff frame with sharp handling, thanks to the large-diameter titanium tubes and the excellent welds, which meet the American Welding Society guidelines. It tracks precisely through turns. I have yet to induce any shimmy at high speeds. This frame flexes very little, if at all. The integrated rear derailleur dropout helps in that regard.
The tradeoff for this degree of stiffness is that the frame does transmit road vibration to the saddle and bar. This is not a silky-smooth riding Ti bike. I continue to steer around as many of the ruts, cracks, patches and other rough stuff on the roads as I can.
Fortunately the wheels that were specified with the bike, ROL Race SLs, certainly help to smooth out the ride quality of this frame.
Photograph courtesy of ROL Wheels
The rims are 23mm wide, which allow me to use 25mm Continental Grand Prix 4000s. I can run 80psi in the rear and 70psi in the front, which certainly helps dampen road chatter. The ROL Race SLs are not super light at 1,555grams for the wheel set , but they are excellent value for the USD675 asking price. The build quality is excellent, and the wheels have taken some significant hits – potholes and the like – without any ill effects. The wheels are as true today as they were when I took delivery of this bike.
A few days ago the bike went in for its first tuneup since it left the Alchemy Bicycle Company. The SRAM drivetrain needed a slight adjustment to offset the normal cable stretch / housing compression that happens during a new drivetrain break-in period. And the Cane Creek 40-Series IS headset that came with the frame had loosened slightly, probably from clattering over speed bumps and the like.
I reckon it will be another 4,000 km before this bike needs another tuneup. Assuming I don’t inflict any damage on the bike by dropping it, or, heaven forbid, crashing it. By then I will be looking to replace the chain, and perhaps the brake pads. In the meantime, this “Twin Towers” Eros will continue to be my ‘go to’ bike.
I have not been regularly checking my bicycle chains for wear. I have no excuse for not doing so. I have the necessary tool for the job. Two of them in fact.
The purist will argue that a steel ruler or steel tape measure is the most accurate tool for measuring chain wear. Using a ruler can however be error-prone because it is necessary to hold the ruler precisely and measure one end while making sure the other does not slip. So tools like these ones have been created. They are not as accurate as a properly-used ruler, but they are an easier and faster way to measure chain wear.
Chain wear is often referred to as chain stretch, but this is a misnomer. The side plates of a chain do not deform under pedalling forces. Rather it is wear to the pins, bushes and rollers that causes the distance between the pins to increase, thus giving the illusion of stretch.
This diagram shows A. pin/bushing wear, and C. bushing/roller wear. B shows an unworn chain. Note that roller wear does not affect pin spacing.
In short, chain wear is indicated by an increase is the spacing between pins. When I finally put my BBB chain checker to use it showed that the chain on my titanium Alchemy bike had reached the point where it needed to be replaced. What I didn’t know was when the chain had reached that point. Had I been riding for too long on a worn chain, and perhaps damaged the drive train in the process?
Some of my Racun Cycling Gang had recommended Meng Thai Bicycle Centre for bike parts and service. So I took the bike there to have a new chain installed. Labor costs are still relatively low here as compared to the Netherlands, so I had less incentive to do it myself. When I say low I mean a labor charge of RM 30 / USD 9 to have a new chain installed and to get the bike serviced and tuned up.
My first ride with the new chain was up to Genting Sempah. It quickly became obvious that I had waited too long to replace the chain. The chain was skipping on one cog. It didn’t matter which chain ring I was in. The chain skipped on that one cog.
At first I couldn’t tell from looking at the cassette that there was anything wrong with it.
A closer look revealed where the problem lay.
That shark-tooth profile on the fourth cog is not normal., The new chain rides too high up the ramp of the tooth and slips off. The only solution was a new cassette. I went with a SRAM PG 1070 cassette at RM 250 / USD 76 rather than replacing this SRAM OG 1090 cassette at RM 650 / USD 198.
The moral of this tale is to regularly check your chain for wear. I now know, thanks to the late and great Sheldon Brown, that a chain that has just 1% of wear should be replaced. Anything more than 1% chain wear and the sprockets are probably already damaged.
What is 1% of chain wear? Ten links of a new chain are 25.4 cm long, measured from pin to pin. If the last pin in link ten is just past 25.5 cm the chain needs to be replaced. If the last pin is approaching 25.7 cm away then the most-used sprockets are already damaged.
I got 10,000 km / 6,214 mi out of the cassette. I wonder how many more kilometers it would have lasted if I had replaced the chain as soon as it showed 1% wear.
I replaced the chain on the steel Alchemy a few days ago. The cassette on that bike has 13,300 km / 8,265 mi on it so far. Including 115 km / 71.5 mi with the new chain.
I began collecting bike tools the day after I had my first flat tire. To be ready for my next flat tire I bought a Genuine Innovations Ultraflate Plus, some CO2 canisters, inner tubes, a patch kit and a set of Pedro’s tire levers. Blaine G. at West End Bicycles recommended the orange tire levers because they were easier to find if you dropped one in the dark. I also bought a Park Tool MT-1 Multi Tool. Having a multi tool seemed like a good idea, not that I knew what to do with it at the time.
I am a DIYer so the need for another tool presented itself often enough. I would then visit West End Bicycles, credit card in hand. I decided it would be a good idea to remove the chain to clean it so I bought a Park Tool chain tool. I needed a hex wrench to change bottle cages. I thought that while I was at it I might as well get a set of Park Tool 3-Way Hex Wrenches. I kept stabbing myself on the sharp ends of the MT-1 multi tool so I picked up a Topeak Toolbar Multi Tool. Who knew that you could never own enough multi tools?
My collection of bike tools continued to grow. A pedal wrench. Various screwdrivers. Some bigger ticket items like a Feedback Sports Pro-Classic Work Stand and a Guistaforza torque wrench. I got to the point where I could remove, degrease and replace pedals. I could remove and replace a chain using SRAM Powerlock connectors instead of a chain tool. Does anyone by chance want to buy a lightly used chain tool? I knew about torque settings for various parts like stem bolts and seat post binder bolts. I was able to adjust a rear derailleur.
But some jobs were beyond me. Removing a cassette for example. Or disassembling chain rings. I didn’t have the know how to do those things, let alone the tools. So when my two year old steel bike was due for a full service, having carried me about 8,000 km / 5,000 mi, I sent it to Tom Schouten Wielersport in Scheveningen. It felt like a new bike when I got it back. All the cables had been replaced. The hubs, bottom bracket and headset had been cleaned and greased. The wheels had been trued. It had new bar tape. It was cleaner than it had been since the day I took delivery of it. The only downside? It cost me €175 / USD225 / RM685.
That got me to thinking that I should be able to do everything that Tom’s shop did. Which is how I ended up at Downland Cycles in Canterbury for their 5 day Bike Maintenance course. Bryan and Martyn take five students at a time and share the instructor’s role. My fellow course mates were Delma E., Chris D, Ralph S. and Dave S. This is Delma and Chris on a lunch break outside the retail shop.
The course is run in Downland’s e training center next to the retail shop. We each had a fully-equipped work bench and work stand. There were tools on that work bench that I didn’t recognize, let alone know how to use. A particularly mysterious item on our work benches was this.
You can opt to bring your own bicycle to work on during the course. Bryan and Martyn must trust their teaching abilities enough to be confident that a student will leave with their bike in better working condition than it was upon arrival. Chris and I had flown to London, so we didn’t bring our bikes. Neither had Delma nor Ralph. Dave rode his bike to Downland’s every morning.
Bryan and Martyn were excellent teachers. The course was comprehensive and covered road and mountain bike maintenance. We even had a session on wheel building and truing. We all learned a lot. Including the fact that the bicycle maintenance universe is divided into the Shimano and SRAM galaxy and the Campagnolo galaxy. We lost count of the number of times Bryan and Martyn said something along the lines of “This is how you remove Shimano and SRAM cranks, but not Campagnolo,” or “This is the tool you use to remove a Shimano or SRAM cassette lock ring, but not Campagnolo.” It quickly became apparent that a full-service shop needed two sets of tools. One set for most bikes and one set for Campagnolo.
We spent a lot of time ensuring that bolts were tightened to the proper torque. This is particularly important with carbon parts, which will crack if bolts are overtightened. Dave had to unlearn the habit he developed while working on motorbikes. Which was his “Full Muller” approach to tightening bolts. That is to say, tighten until you can’t tighten anymore.
We all gave it the Full Muller over the five days. There was a lot to take in to be ready to face the Friday challenge. Which was to completely strip a bike down, including removing the fork, disassemble the chain rings etc., clean and lubricate all the parts, replace cables as required, reassemble the bike, adjust the shifting and brakes, and do a systematic safety check of the bike when we were finished.
Dave even replaced a part or two on his bike and rode away that evening on a testament to his newly acquired wrenching skills.
I do most of the maintenance work on my bikes myself now. Which of course means that I own even more tools. So many that I needed to get a workbench with a peg board for them.
And a shelf for the ultrasonic cleaner. And a drawer for the Syntace Torque Tool 10-80. Which I need to ensure that I don’t “give it the Full Muller” and ruin a bottom bracket cup or a crank bolt.
And what of the British one penny coin? It turns out that the coin is 2 mm thick. The perfect tool for measuring the correct gap between the chain and the inner cage plate of a front derailleur.