RSS Feed

Monthly Archives: March 2020

International Commerce: The Tale of a Derailleur Hanger

Graphic courtesy of pangeanic.com

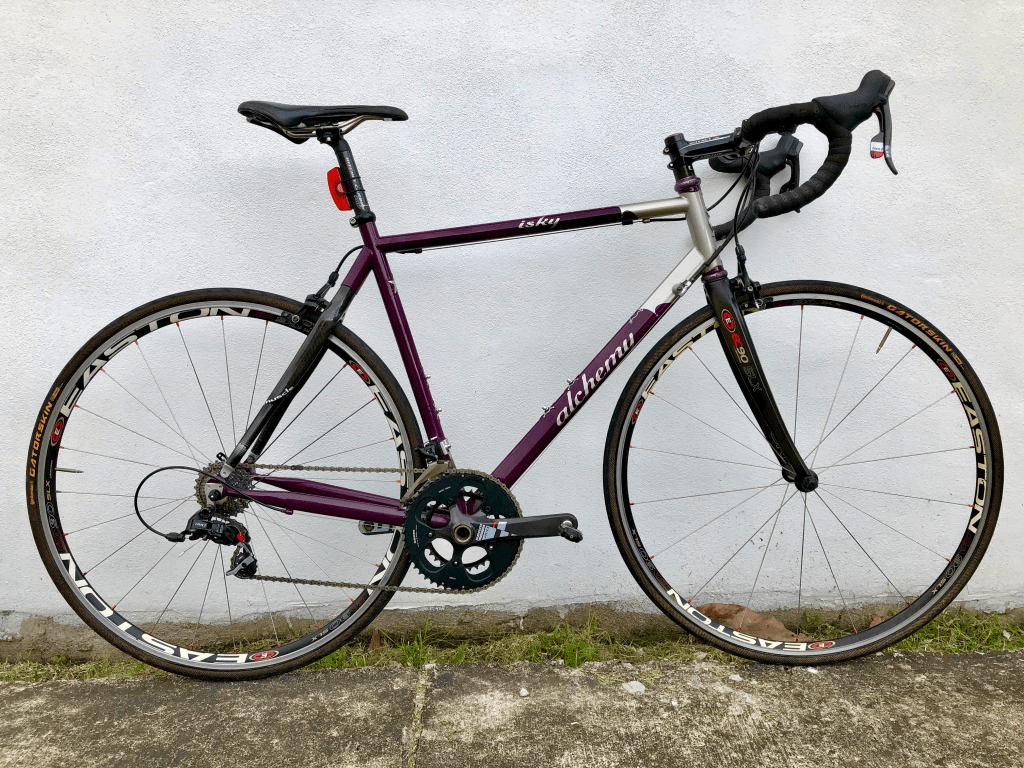
This bicycle was built by Alchemy Bicycles, then in Austin, Texas. At the time I lived and worked in Houston, Texas.

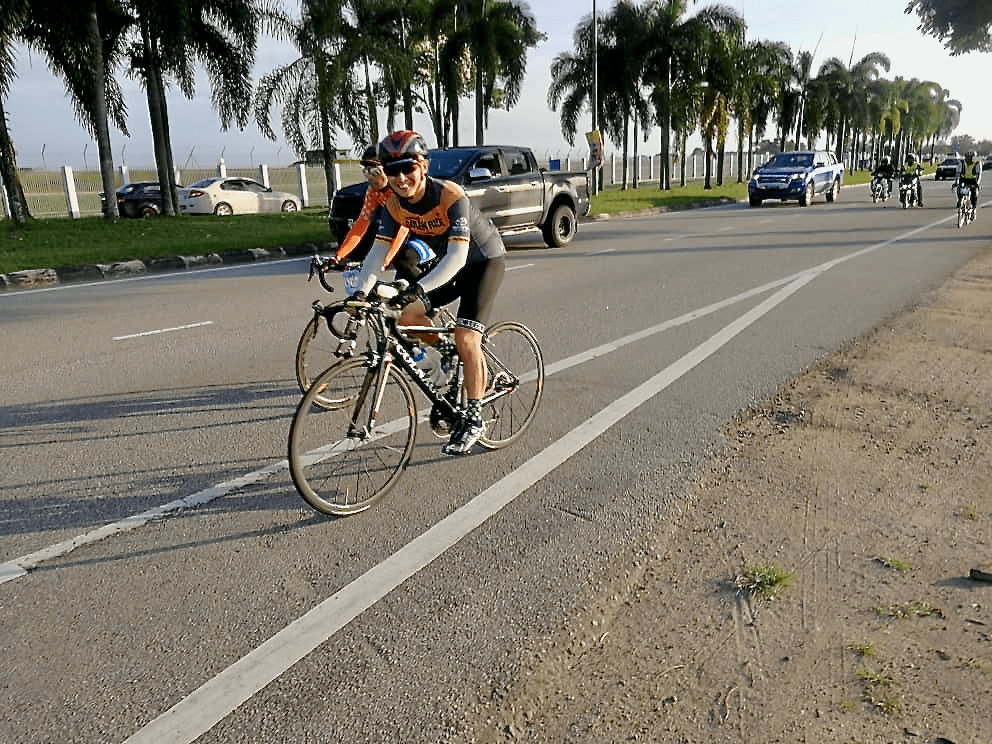
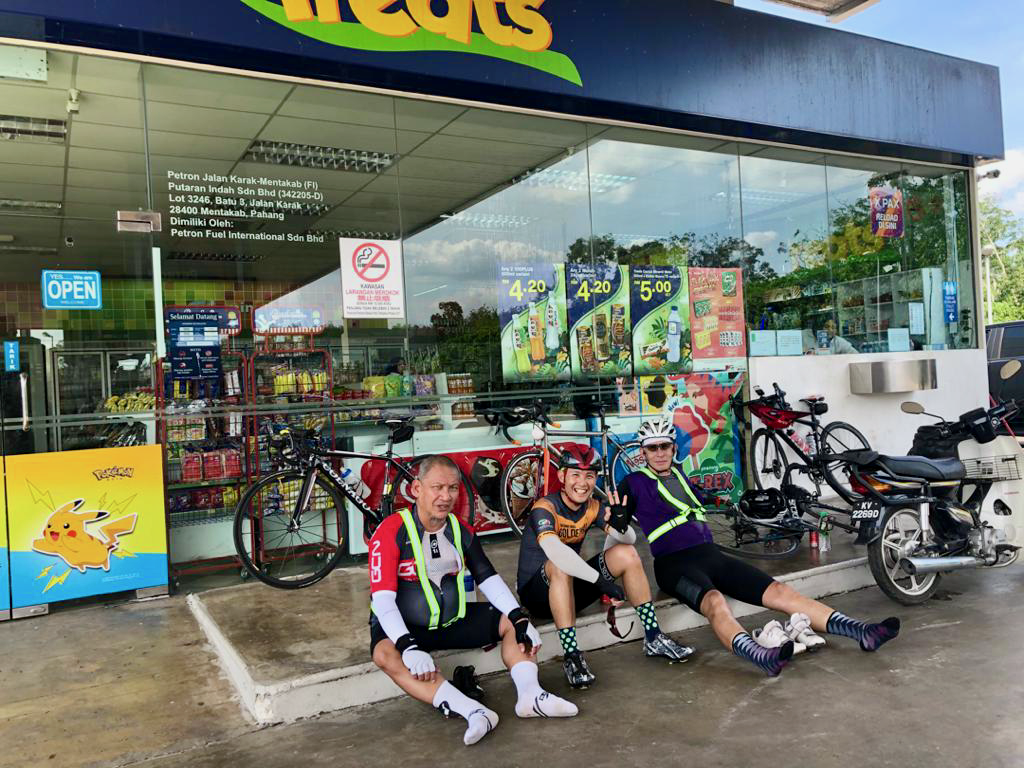
My bike followed me on my travels to Den Haag in the Netherlands, and finally to Kuala Lumpur.

Map courtesy of Google

The travels of this bike had something to do with international commerce. I would not own it if I hadn’t been working in Texas. My Bike Chick and I were able to live outside Malaysia because we worked for organizations trading in multiple countries. Organizations that encouraged the international relocation of some of their staff.

Keeping the bike running depended on international commerce. A new saddle from an Italian manufacturer. Chains and cassettes from an American company with manufacturing in Taiwan. Tires from Germany.

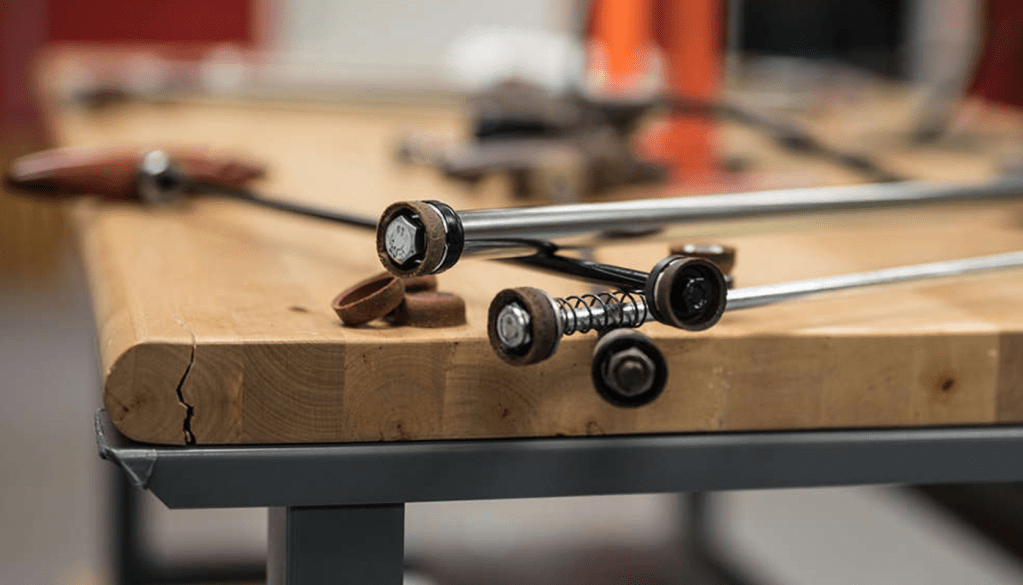
The rear derailleur hanger did its job for ten years. Cut to a month ago. I had just started a ride when I heard a “crrrrrruuuuunch”. The rear derailleur had over-shifted into the spokes and snapped at the lower knuckle. The hanger had bent as it tried to do its job of protecting the derailleur.

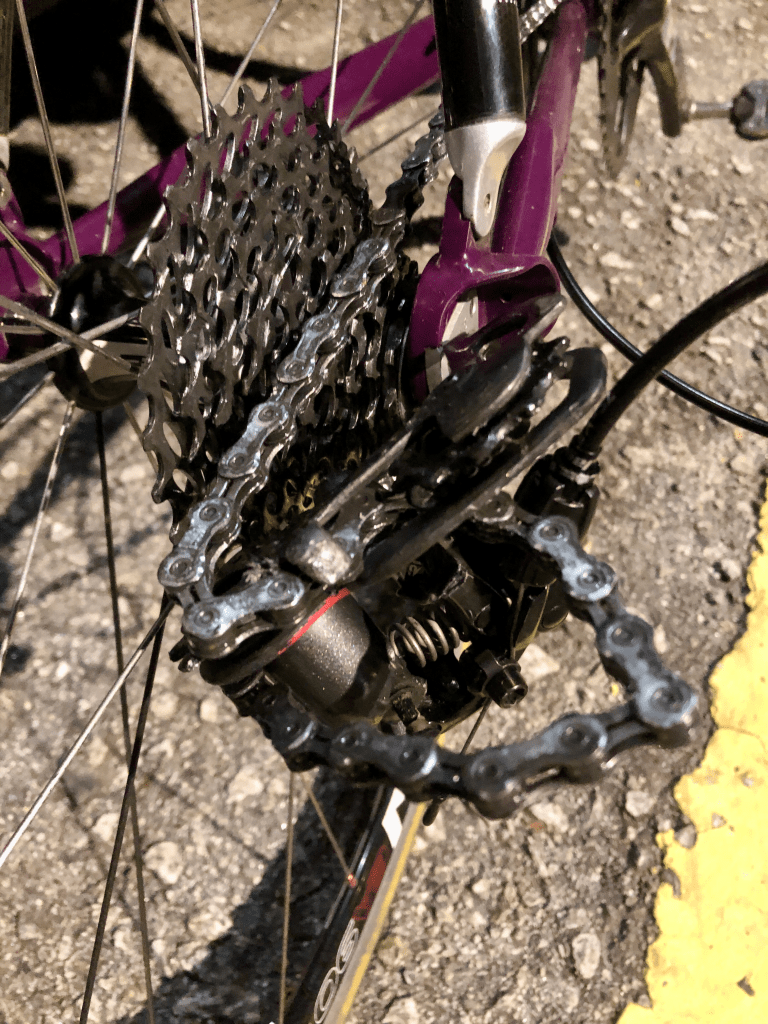
I had a spare derailleur on hand. I did not have a spare hanger.

The mechanics at my local bike shop managed to bend the hanger back enough for it to be usable. There were signs of a crack, and it would be just a matter of time before the hanger broke in two.

There are hundreds of derailleur hangers available. No bike shop stocks them all. International commerce to the rescue.

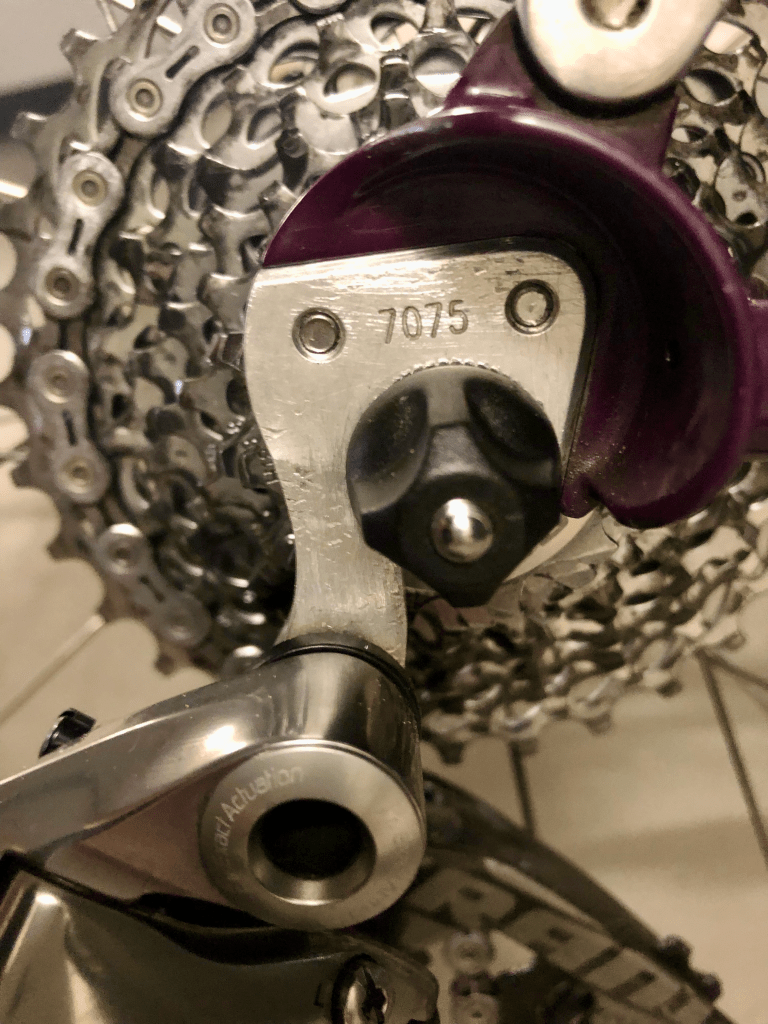
First, I had to identify the hanger I needed. Wheels Manufacturing LLC is in Louisville, Colorado. Their website lists more than 350 different hangers. Alchemy is not among the bike brands in the Wheels Manufacturing database. I searched for hangers with two fasteners. There are more than 160 to choose from.

I was not sure if I found the one I needed. Wheels Manufacturing warns that an incorrect hanger will not fit.

Next, I did what I should have done to start with. I emailed Alchemy Bicycles Inc, which is now in Boulder, Colorado. I got a quick reply with a link to Paragon Machine Works in Richmond, California and the hanger that I needed.

It is a good thing I checked. The hanger I needed was shorter than the one I had initially identified.

Photographs courtesy of Wheels Manufacturing LLC and Paragon Machine Works

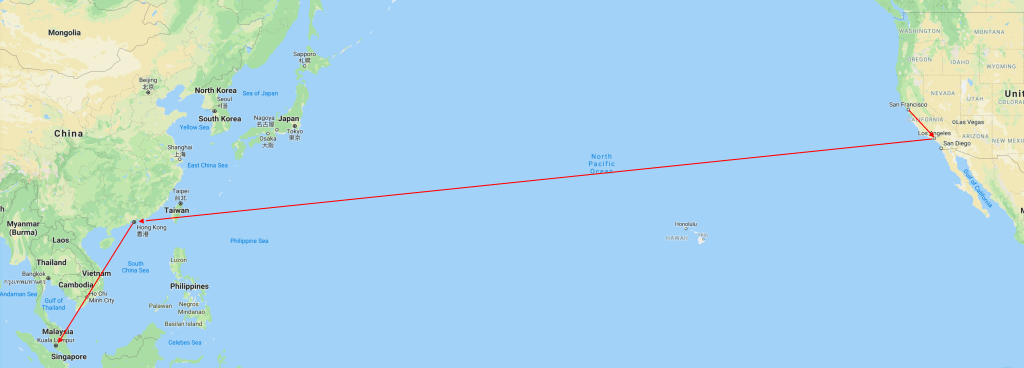
A few minutes later, I placed an order on the Paragon website for two hangers. International commerce in action again via the magic of the Internet.

Map courtesy of Google

By the end of that day, a package was on its way to me from Richmond via Los Angeles and Hong Kong. The two hangers were in my hands four days after I had placed the order.

Map courtesy of Google

Up until a month or so ago, I took international travel and the Internet for granted. Globalization, despite its drawbacks, was here to stay.

Then the novel coronavirus spilled out across the world. The COVID-19 pandemic has already badly affected global trade. International travel is at a standstill. Economies worldwide are staggering. It may be well into 2021 before we see the end of this pandemic.

Cracks have already appeared in the global economy. How big will those cracks become? How will international trade be affected?

In the meantime, all the local bike shops are closed until at least the end of March. Thank goodness the Internet still works.

Graphic courtesy of bbvaopenmind.com

Product Review: Redshift ShockStop Suspension Seatpost

My first review of a Redshift product was for their ShockStop suspension stem. At the time the ShockStop suspension seatpost had just been launched on Kickstarter. I pre-ordered one and have been using it for a few months now. It was on my bike during the 280km IIUM Endu-ride at the end of last month.

Appearance

One knock against suspension seatposts is they are not particularly attractive. The Redshift ShockStop is fairly minimalist compared to, from left, the Cane Creek Thudbuster ST, the Kinekt-BodyFloat, the Suntour NCX and the Specialized CG-R suspension seatposts.

Construction

The ShockStop seatpost is made of 6060 T6 aluminium alloy. It is 350mm long and 27.2mm in diameter. Shims are available to fit 30.9mm or 31.6mm seat tubes. The saddle clamps are compatible with 7mm round and 7x9mm oval saddle rails.

This seatpost weighs 497gm.

Photograph courtesy of amazon.com

Mechanism

The 35mm of suspension travel is provided by a main spring. A second inner spring can be combined with the main spring to provide a stiffer spring rate, up to the rider weight limit of 110kg.

The spring stiffness can be fine-tuned by adjusting the preload plug at the bottom of the seatpost.

Diagram courtesy of Coldroket.com

Installation

Installation is straightforward. A comprehensive set of printed instructions comes with the seatpost. An installation video is also available on the redshiftsports.com website.

Graphic courtesy of redshiftsports.com

Ride Quality

The Redshift website says that the ShockStop suspension seatpost “lets you float over rough terrain – ride further, faster, and more comfortably on the bike you already own.”

This seatpost delivers on that promise. Saddle movement is fluid, without any jerkiness as it moves through the 35mm of available travel. This creates a plush feel that is effective at isolating the rider from vibrations and larger impacts.

The four-bar linkage keeps the saddle angle constant throughout the range of movement.

A nice touch is a fender or cover that attaches magnetically to the rear of the suspension linkage. This keeps the moving parts of the linkage and saddle clamp bolts clean when riding on wet roads.

Animation courtesy of redshiftsports.com

Conclusion

The Redshift ShockStop suspension seatpost is well-engineered, easy to adjust and has a smooth and impressive suspension action you can tune to your own personal preference.

I like this suspension seatpost so much that I bought a second one for my other bike.

Purchase online at Redshift.

Product Review: Silca SuperPista Digital Floor Pump

Almost five years ago, I wrote a blog post titled Pump It Up, about the inflation devices I use. My floor pump then was the Lezyne Classic Floor Drive.

Photograph courtesy of Lezyne

That floor pump still works well. But five years on, the floor level needle gauge has become difficult for me to read (damn you older age 😩).

So I replaced the Lezyne with a Silca SuperPista Digital Floor Pump.

Photograph courtesy of Silca

For me, the standout feature is the high mount backlit digital gauge.

Photograph courtesy of road.cc

The gauge sits at the top of the pump barrel. The backlight comes on automatically when you start inflating a tire. The red numbers are about 12mm high and are easy for my sixty-plus-year-old eyes to read.

This pump is not a one-trick pony. The list of features is impressive.

The Gauge

The gauge can display one of three different measurement units: psi, bar, or kg/cm2.

You can set a target pressure alert using the “+” and “-” buttons. When you reach your desired pressure, the display flashes.

Silca claims the gauge is accurate to within 1%.

The Chuck

The SuperPista Digital includes Silca’s Hiro chuck. This all-metal chuck seals completely on Presta valves as short as 10 mm. The chuck is rated up to 220psi or 15.1 bar. The locking lever can be operated with one hand.

Photograph courtesy of road.cc

The Pump

The SuperPista combines a full metal shock piston design with the classic Italian leather plunger washer that has been a feature of Silca pumps since 1917.

Photograph courtesy of Silca

An alloy barrel and German Igus linear bearings create the highest efficiency, smoothest running Silca floor pump to date.

The pump has a top-mount hose design with a magnetic dock beside the gauge for the Hiro chuck. A strap holds the handle in place for storage or transport.

Photograph courtesy of Silca

The hose is 130cm long, which is enough to reach the valves of bikes clamped in repair stands or car racks.

The pump stands about 76cm tall. The handle extends to 132cm. By extending the handle all the way, a tire can be inflated to 90psi in 24 strokes. The pump is rated to 220psi.

The Base

The three-footed base exceeds 28cm at its widest point. Rubber feet ensure that the stable base does not slide around on the floor. The weight of the pump and the wide base make the SuperPista difficult to accidentally knock over.

Is the SuperPista Digital Worth the Price?

This is an expensive pump. There are no rivals in this price range to compare it with. What do you get for your money?

You get Silca’s outstanding build quality and attention to design. The SuperPista is handcrafted from first-rate materials and is a pleasure to use.

This pump is covered by Silca’s Lifetime Warranty, which covers defects in materials and workmanship for the life of the user, plus 7 years of coverage for non-defect reasons such as fatigue, wear and tear, etc.

With the proper care and maintenance using Silca-supplied replacement parts, the SuperPista digital will probably be the last floor pump you will ever buy.

Conclusion

The high price makes it impossible to recommend the Silca SuperPista Digital on a pure value for money basis. There are lots of cheaper pumps that do a fine job of inflating tyres. But the way this pump is designed and constructed makes it a joy to use. It has beautiful touches all around. If money is no object, this pump scores 10 out of 10.

Photograph courtesy of racefietsblog.nl

IIUM Endu-ride 2020

Graphic courtesy of IIUM

During a R@SKLs ride in November last year we met a group from the International Islamic University Malaysia (IIUM) who were doing a recce for a planned 280km / 1,200km cycling event. They invited us to take part. “Not a chance,” we all thought to ourselves.

Photograph courtesy of Hamzah Abu Samah

Never say “never.” Fast forward to this weekend and Johan S, Kenneth, Mokhtar and I had signed up for the 280 km / 174 mi ride from the IIUM campus in Kuantan to the IIUM campus in Gombak via the IIUM campus in Gambang. We had 26.5 hours to complete the ride.

The 1,200 km / 746 mi Ultra-ride event includes a visit to the IIUM campus in Pagoh. That event (going on as I write this) is many kilometres too far and many hours too long (105 hours) for us.

The logistics were painless thanks to Mokhtar. He has an apartment in Kuantan where we stayed on Friday night and a pickup truck that transported our bikes. He even drove us from KL to Kuantan.

We got to Kuantan at about 1:00 pm. We had some time to burn before collecting our ride packs, so we got a head start on carbo-loading at lunch.

Photograph courtesy of Mokhtar Nadzri

The ride pack collection and briefing went very well.

Photograph courtesy of Ali shamsul Bahar

I don’t know why my name was the only one not in all capitals.

I’m not sure that we needed to carbo-load as much as we did at dinner.

Photograph courtesy of Mokhtar Nadzri

We were ready to roll out of the IIUM campus in Kuantan as scheduled at 7:30 am. Fazwan was a great help driving the pickup and loading and unloading our bikes.

Photograph courtesy of Johan Sopiee

We had a detailed plan for the ride. Our strategy was to take short breaks every 25 km or so and to maintain a pace which would get us to the Suria Hot Spring Resort on Bentong by 6:15 pm. That was the plan anyway!

The route to the IIUM campus in Gombak from Bentong is via Genting Sempah. That road is unlit and in need of resurfacing. It would be a risky ride in the dark, so we chose to spend the night at the Hot Spring Resort.

The first checkpoint was at the IIUM campus in Gambang.

Photograph courtesy of MY1200

We got there on schedule but stayed much longer than planned. The organiser was serving cendol, and we had to have some after we got our MyPassports (akin to a brevet card) stamped.

Photograph courtesy of Johan Sopiee

The cendol was worth lingering for. From that point, we fell further and further behind our schedule as each five minute stop stretched to ten or fifteen minutes.

Our next stop was at Restoran Mak Lijah in Kampung Berkelah. We ran into Brian, who was doing the Ultra-ride.

Photograph courtesy of Johan Sopiee

I have driven to Kuantan and back along these roads many times. Passing through places like Kampung New Zealand. I don’t know why it is so named, but now I have cycled through it.

Photograph courtesy of Kenneth Lim
Photograph courtesy of Johan Sopiee

Our next scheduled stop was the just after we rode through Kampung New Zealand. The Two Brothers café was closed, but we made ourselves at home anyway.

Photograph courtesy of Mokhtar Nadzri

About 10 km later we pulled over to chat with AiLin and Mark, who were on their way to Kuantan by scooter.

Photograph courtesy of Johan Sopiee

We got to Taman Jaya near Temerloh at about 1:45 pm. It was 36ºC / 97ºF, so we lingered at over lunch for an hour and fifteen minutes.

Despite it being even hotter at 3:00 pm – 38ºC / 100ºF – we had to get moving if we were to have any hope of getting to Bentong before nightfall.

We only made it about 20 km down the road before we needed to cool down at the Petron station in Mentakab. By which time we had resigned ourselves to getting into Bentong after dark.

Photograph courtesy of Mokhtar Nadzri

We had 45 km to cover before the next checkpoint at Mempaga. Those kilometres happened to be some of the hilliest of the day, with gradients approaching 10%.

We got to the Mempaga checkpoint at about 6:30 pm.

Photograph courtesy of MY1200

We all needed fluid, and in some cases, food. It wasn’t until 7:15 pm before we turned on our front and rear lights and left the Petronas station in Mempaga.

The run into Bentong includes a nasty little climb which rises 125 metres over 5.8 km. Welcome to Bentong!

Photograph courtesy of Mokhtar Nadzri

The last 10 km to the Suria Hot Spring Resort is along an unlit road. I would not like to be riding on that road alone at night. Which is what Johan did. He stopped to eat as soon as he got to Bentong town. We planned to eat dinner at the resort. Johan told us to proceed without him. He made it to the resort unscathed.

Photograph courtesy of Johan Sopiee

234 km in the bag.

Map courtesy of ridewithgps.com

We all slept like babies that night, despite the children carousing outside our rooms at 1:00 am.

We were ready to get going again at 6:20 am. We had to be at the IIUM campus in Gombak by 10:00 am to make the time cutoff. 46 km and 570 metres of climbing away. We couldn’t afford to dilly-dally today.

Photograph courtesy of Johan Sopiee

We stuck to our plan of short stops at the Bukit Tinggi and Janda Baik junctions. We made such good time to the McDonald’s at the Genting Sempah R&R that we were able to have breakfast there.

Photograph courtesy of Mokhtar Nadzri

A McDonald’s scrambled egg sandwich always tastes better during a ride.

Photograph courtesy of McDonald’s® Malaysia

All that was left between us and the 19 km descent to Taman Permai Jaya was the 1 km 7.9% average gradient climb up what is known as Hamburger Hill.

Success!

Photograph courtesy of Fazwan

There was a slight sting in the tail on the final 3 km to the finish at the IIUM Gombak Sport Complex. A small matter of a few 6.5% slopes to get over. We got a bit lost inside the campus too, but that didn’t dampen our sense of achievement as we got our MyPassports stamped at the finish.

Photograph courtesy of Mokhtar Nadzri

Hamzah was of the guys who last November invited us to take part in this event. He was at the finish line.

Photograph courtesy of Hamzah Abu Samah

46 km on the day.

Map courtesy of ridewithgps.com

280 km over the two days. Thumbs up all round!

Photograph courtesy of Johan Sopiee