RSS Feed

Tag Archives: Shimano

Watts Next?

Graphic courtesy of outsideonline.com

When you buy a complete road bicycle, including pedals, it is ready to ride. Sort of. To ride safely, you need front and rear lights and a bell. To ride for more than thirty minutes, you need bottle cages and some bottles. If you don’t want to fill your jersey pockets, you need a saddle bag to carry a spare inner tube, a multi-tool, etc. And if you want to keep track of how far and how fast you rode, you need a cycling computer.

Thus equipped, you are ready to tackle most rides. You will be tempted to upgrade various components, but you don’t need to add anything else to your bike. But when did “need” get in the way of “want?”

You may want a power meter. A valid reason to add a power meter to your bike is you are a competitive cyclist who wants to train using power. Most of us want to add power meters because they are cool pieces of technology. And we like cool technology.

Power meters came into being in 1989 when Ulrich Schoberer started selling crank spider-based power meters. At the time Schoberer Rad Messtechnik (SRM) was the only power meter game in town. And the prices were eye-wateringly high.

Since then the power meter market has grown to include hub-based, crank arm-based, bottom-bracket based and pedal-based power meters.

Graphic courtesy of dcrainmaker.com

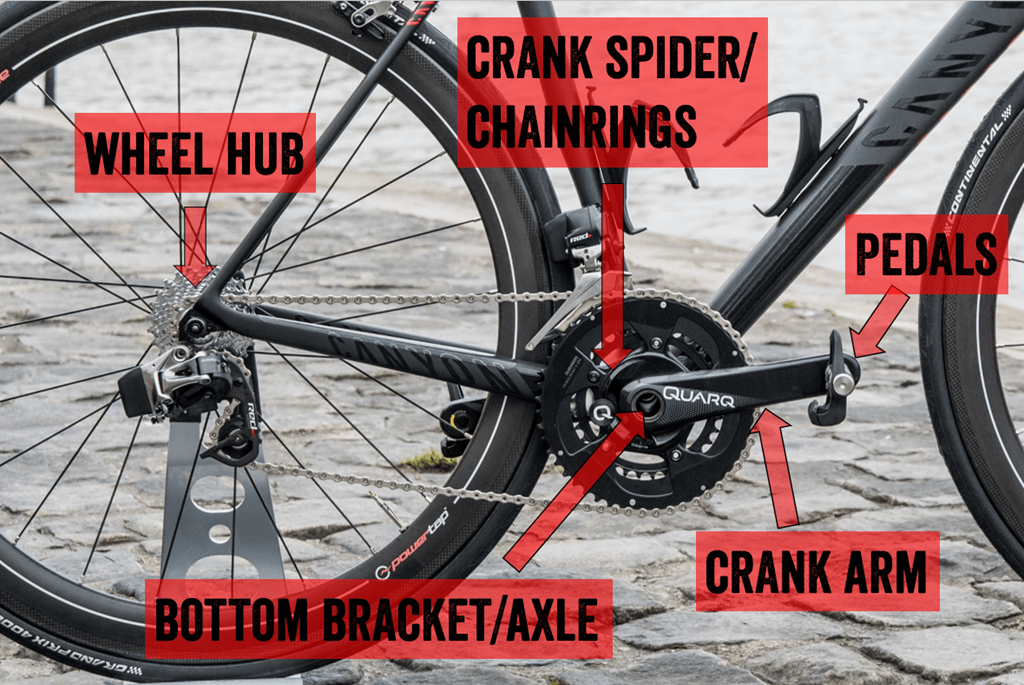
Examples of the various types of power meter are pictured below.

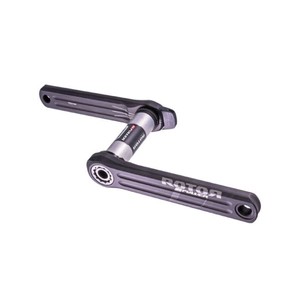
Prices have come down. SRM is still the price leader at about USD2,350 for the SRM Origin. Alternatively, a Quark DZero spider-based power meter costs USD399. At this price, you need to supply the chainrings and crank arms.

One downside of hub, spider, crank arm and bottom bracket-based power meters is that they cannot easily be switched between bicycles.

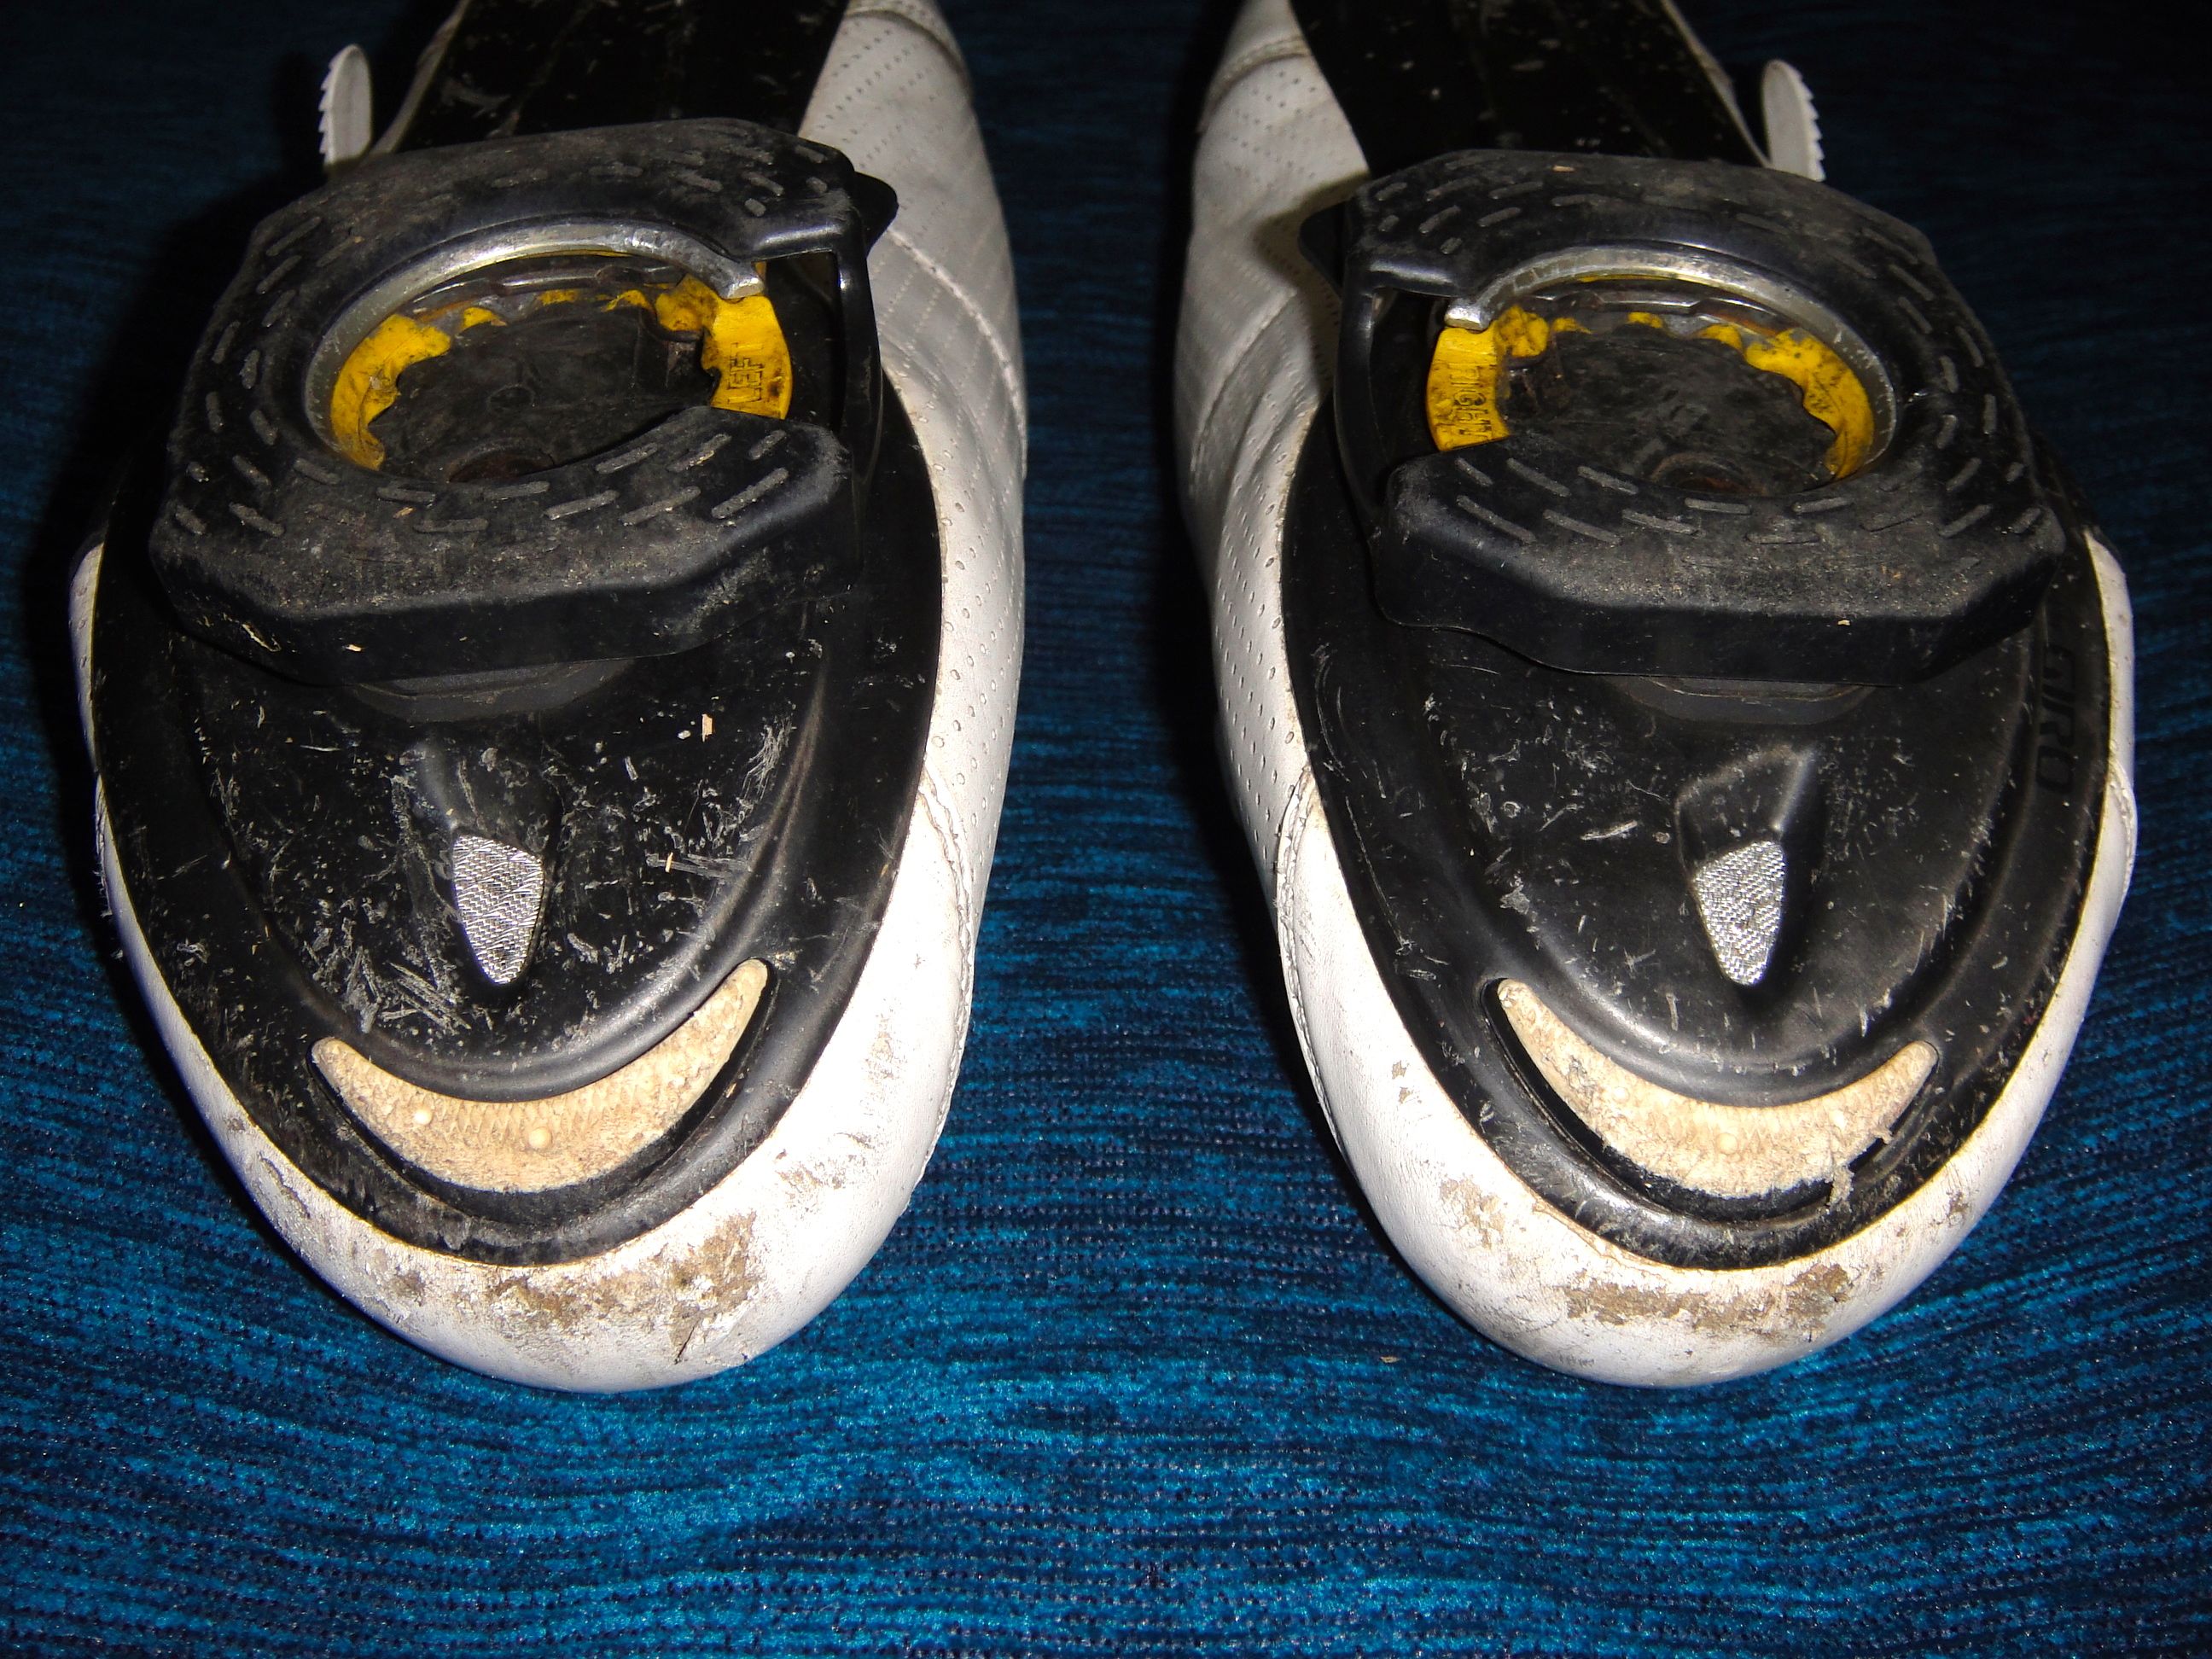
Pedal-based power meters are increasingly popular because they can be swapped from one bike to another with minimum fuss. However, power meter pedals are not available for all pedal interfaces. The Assioma Favero Duo, Garmin Vector, and SRM Look Exakt are Look pedal compatible only.

Lately, there has been a buzz around pedal-based power meters. In February, SRAM announced that it acquired Time, a French pedal manufacturer. SRAM owns Quark and Powertap. They have announced that the Powertap P2 power meter pedal will no longer be available. Will a Powertap P3 power meter pedal come soon, or even a Time pedal-based power meter?

Favero has hinted that it will launch a version of its Assioma Duo that will be compatible with Shimano SPD-SL pedal bodies.

Photograph courtesy of cyclingtips.com

Also, on the compatibility front, it seems Garmin is about to expand its range of power meter pedals to encompass the three most popular systems: Shimano SPD-SL road, Look Keo road, and Shimano SPD mountain bike interfaces. With a new name – Rally, instead of Vector.

Photograph courtesy of cyclingtips.com

Finally, Wahoo just announced the launch of its Speedplay pedal range. Wahoo acquired Speedplay two years ago, and there has been much speculation about the platform’s future. Along with four updated pedals, Wahoo announced the Powrlink Zero. Few details are available, apart from a Summer 2021 launch and the photograph below.

Graphic courtesy of dcrainmaker.com

If a SRAM Time-compatible power meter pedal hits the market, users of almost all pedal interface types – Shimano SPD-SL, Look Keo, SpeedPlay, and Time – will have a power meter pedal option.

Price remains a barrier to entry to the world of power meter pedals. A set of SRM Exakts cost USD1,699. Garmin Vector 3s go for USD1,000. There is no word yet on the pricing for the various Garmin Rally power meter pedals. A set of Favero Assioma Duo pedals costs about USD650. The expected retail price for the Wahoo Powrlink Zero is USD1,000.

Despite being a life-long SpeedPlay user, I don’t think a set of Wahoo Powrlink Zeros will be on my Watts Next list.

Rapha Grand Tour Shoes Review

My Trek FX 7.5 had platform pedals.  I didn’t need special shoes to ride it.  My steel Alchemy would be delivered with clipless pedals.  Any shoe would no longer do.  I needed cycling shoes.  Some research on the internet pointed me toward the Sidi Genius 5-Pro Mega.  The “Mega” designation indicates that this shoe is wider than the standard Sidi Genius 5-Pro.

Sidi Genuis 5

I was guilty of showrooming with this purchase.  I tried the shoes for size at a bike store, but bought online.  A practice that does not support local retailers.  A practice that I try not to repeat.

Despite being “Mega” the Sidis are slightly narrow in the forefoot for me.  This isn’t a problem on shorter rides, but I develop “hot foot” once the ride exceeds about 60 km / 37 mi or so.  At times I have had to completely unfasten the caliper buckles and loosen the velcro straps to get some relief.

The Sidis came with me to Den Haag.  I swapped out the insoles, which helped a bit with the “hot foot” problem.  Perversely the shoes didn’t keep my feet warm enough in the Dutch winters.  There wasn’t enough room in them for thick woolen socks.  A pair of Endura neoprene  shoe covers delayed, but didn’t prevent, the onset of frozen toes.

My next cycling shoe purchase was the Shimano SH-RW80 Winter Road Shoe.  I liked those shoes so much that I wrote a review that appeared on roadbike review.com.  I took the advice of other reviewers and went two sizes larger than my Sidis.  That gave me plenty of room in the toe box for my wide feet and thick socks.

20080_1_Shimano_SH_RW80GORE_TEXRennrad_Winterschuh-700x525

As Spring 2012 approached I saw posts in cycling blogs about a new shoe.  The Rapha Grand Tour shoe.  First John Watson posted thirty nine captioned photographs of these shoes in his excellent Prolly is Not Probably.  Soon after Wade Wallace ran a review and posted more photographs in his equally excellent Cycling Tips.

I looked at the Rapha site.  I was smitten with the version of the shoes in white.  My biker chick liked them too.  All of a sudden I needed new shoes!

Rapha Grand Tour New 2

It was my good fortune to be in the UK in April 2012.  I went into Condor, Rapha’s retail partner in London.  They had a pair in my size.  The shoes smelled soft and warm in the way that only leather does.  The perforated uppers had style.  The single black strap and the absence of large logos gave the shoes a minimalist look.

I love my Grand Tours.  I still have the Genius Pro-5s, but they are very much my back-up shoes.  The only time I wear them is when the Grand Tours are sitting in a cool airy spot, tongues flipped up and insoles removed, drying out after a wet ride.

You can read the online reviews of these shoes or go to the Rapha site to get all the technical details.  For me the winning qualities are the fit and comfort that make these shoes unnoticeable when I am riding.

I have put almost 11,000 km / 6,835 mi into these shoes in fourteen months.  They get better with age.  Like the leather in Brooks saddles, the leather in these shoes breaks in with use.  The Grand Tours have moulded to the contours of my feet.  The customizable cork / EVA footbeds have also formed themselves to the soles of my feet.  These shoes fit like gloves.

Robust gloves at that.  This is what the sole of the shoe looks like out of the box.

Rapha Grand Tour Sole 1

These are the soles of my shoes today.

Rapha Grand Tour Sole Now

The heel cups and toes are scuffed, and the soles are scratched from the times I walked on stones and gravel.  The white rubber bumpers on the heels show the most wear.  These are non-replaceable so it will be interesting to see how long it is before they wear down to the carbon soles.

Rapha Grand Tour Toe

One buckle bears evidence of a low-speed fall.

Rapha Grand Tour Buckle Now

Apart from that the shoes are holding up very well.

Rapha Grand Tour Now

Even the insoles, with their homage to Fausto Coppi on the left and Jacques Anquetil on the right, show little sign of wear.  These are the insoles before any use.

Rapha Grand Tour Insole New

These are mine now.  The images and text are still legible despite thousands of kilometers in all weathers.

Rapha Grand Tour Insole Now

The Grand Tours have not needed any special care.  Just a wipe down with a damp cloth, careful drying when they get soaked, and the application of some shoe cream once in a while has kept them looking good.   I expect to get at least another 11,000 km out of these excellent shoes.

Apart from a proper bike fit and quality bib shorts, shoes are the key to a comfortable ride.  In that regard the Rapha Grand Tour shoes are worth their weight in gold.

Giving it the Full Muller

I began collecting bike tools the day after I had my first flat tire.  To be ready for my next flat tire I bought a Genuine Innovations Ultraflate Plus, some CO2 canisters, inner tubes, a patch kit and a set of Pedro’s tire levers.  Blaine G. at West End Bicycles recommended the orange tire levers because they were easier to find if you dropped one in the dark.  I also bought a Park Tool MT-1 Multi Tool.  Having a multi tool seemed like a good idea, not that I knew what to do with it at the time.

I am a DIYer so the need for another tool presented itself often enough.  I would then visit West End Bicycles, credit card in hand. I decided it would be a good idea to remove the chain to clean it so I bought a Park Tool chain tool.  I needed a hex wrench to change bottle cages.  I thought that while I was at it I might as well get a set of Park Tool 3-Way Hex Wrenches.  I kept stabbing myself on the sharp ends of the  MT-1 multi tool so I picked up a Topeak Toolbar Multi Tool.  Who knew that you could never own enough multi tools?

My collection of bike tools continued to grow.  A pedal wrench.  Various screwdrivers.  Some bigger ticket items like a Feedback Sports Pro-Classic Work Stand and a Guistaforza torque wrench.  I got to the point where I could remove, degrease and replace pedals.  I could remove and replace a chain using SRAM Powerlock connectors instead of a chain tool.  Does anyone by chance want to buy a lightly used chain tool?  I knew about torque settings for various parts like stem bolts and seat post binder bolts.  I was able to adjust a rear derailleur.

But some jobs were beyond me.  Removing a cassette for example.  Or disassembling chain rings.  I didn’t have the know how to do those things, let alone the tools.  So when my two year old steel bike was due for a full service, having carried me about 8,000 km / 5,000 mi,  I sent it to Tom Schouten Wielersport in Scheveningen.  It felt like a new bike when I got it back.  All the cables had been replaced.  The hubs, bottom bracket and headset had been cleaned and greased.  The wheels had been trued.  It had new bar tape.  It was cleaner than it had been since the day I took delivery of it.  The only downside?  It cost me €175 / USD225 / RM685.

That got me to thinking that I should be able to do everything that Tom’s shop did.  Which is how I ended up at Downland Cycles in Canterbury for their 5 day Bike Maintenance course.  Bryan and Martyn take five students at a time and share the instructor’s role.  My fellow course mates were Delma E., Chris D, Ralph S. and Dave S.  This is Delma and Chris on a lunch break outside the retail shop.

The course is run in Downland’s e training center next to the retail shop.  We each had a fully-equipped work bench and work stand.  There were tools on that work bench that I didn’t recognize, let alone know how to use.  A particularly mysterious item on our work benches was this.

You can opt to bring your own bicycle to work on during the course.  Bryan and Martyn must trust their teaching abilities enough to be confident that a student will leave with their bike in better working condition than it was upon arrival.  Chris and I had flown to London, so we didn’t bring our bikes.  Neither had Delma nor Ralph.  Dave rode his bike to Downland’s every morning.

Bryan and Martyn were excellent teachers.  The course was comprehensive and covered road and mountain bike maintenance.  We even had a session on wheel building and truing.  We all learned a lot.  Including the fact that the bicycle maintenance universe is divided into the Shimano and SRAM galaxy and the Campagnolo galaxy.  We lost count of the number of times Bryan and Martyn said something along the lines of  “This is how you remove Shimano and SRAM cranks, but not Campagnolo,” or “This is the tool you use to remove a Shimano or SRAM cassette lock ring, but not Campagnolo.”  It quickly became apparent that a full-service shop needed two sets of tools.  One set for most bikes and one set for Campagnolo.

We spent a lot of time ensuring that bolts were tightened to the proper torque.  This is particularly important with carbon parts, which will crack if bolts are overtightened.  Dave had to unlearn the habit he developed while working on motorbikes.  Which was his “Full Muller” approach to tightening bolts.  That is to say, tighten until you can’t tighten anymore.

We all gave it the Full Muller over the five days.  There was a lot to take in to be ready to face the Friday challenge.  Which was to completely strip a bike down, including removing the fork, disassemble the chain rings etc., clean and lubricate all the parts, replace cables as required, reassemble the bike, adjust the shifting and brakes, and do a systematic safety check of the bike when we were finished.

Dave even replaced a part or two on his bike and rode away that evening on a testament to his newly acquired wrenching skills.

I do most of the maintenance work on my bikes myself now.  Which of course means that I own even more tools.  So many that I needed to get a workbench with a peg board for them.

And a shelf for the ultrasonic cleaner.  And a drawer for the Syntace Torque Tool 10-80.  Which I need to ensure that I don’t “give it the Full Muller” and ruin a bottom bracket cup or a crank bolt.

And what of the British one penny coin?  It turns out that the coin is 2 mm thick.  The perfect tool for measuring the correct gap between the chain and the inner cage plate of a front derailleur.