Monthly Archives: December 2012

Keeping Something in Reserve

Last week I rode up to Genting Sempah for the first time since my Racun Cycling Gang friends hauled me up there on my maiden Kuala Lumpur ride three months ago.  Moon, Farah, Farid, Syihan, Wan and I started a bit further down the hill this time.  “So we can have a warm-up” was the reason Syihan gave me for the extra kilometers.

We must have had fun last week (I admit the 20 kilometer / 12 mi descent is a blast) because Syihan, Wan and I did that ride again this morning.  Azhar, who works with Syihan, rode with us.  So did Galvin, Qiao, Rama and Jamali, whom we linked up with via that living map of human connections that is Facebook.  We started the ride together but it wasn’t long before Azhar, Syihan, Galvin and Qiao rode up the hill away from me.

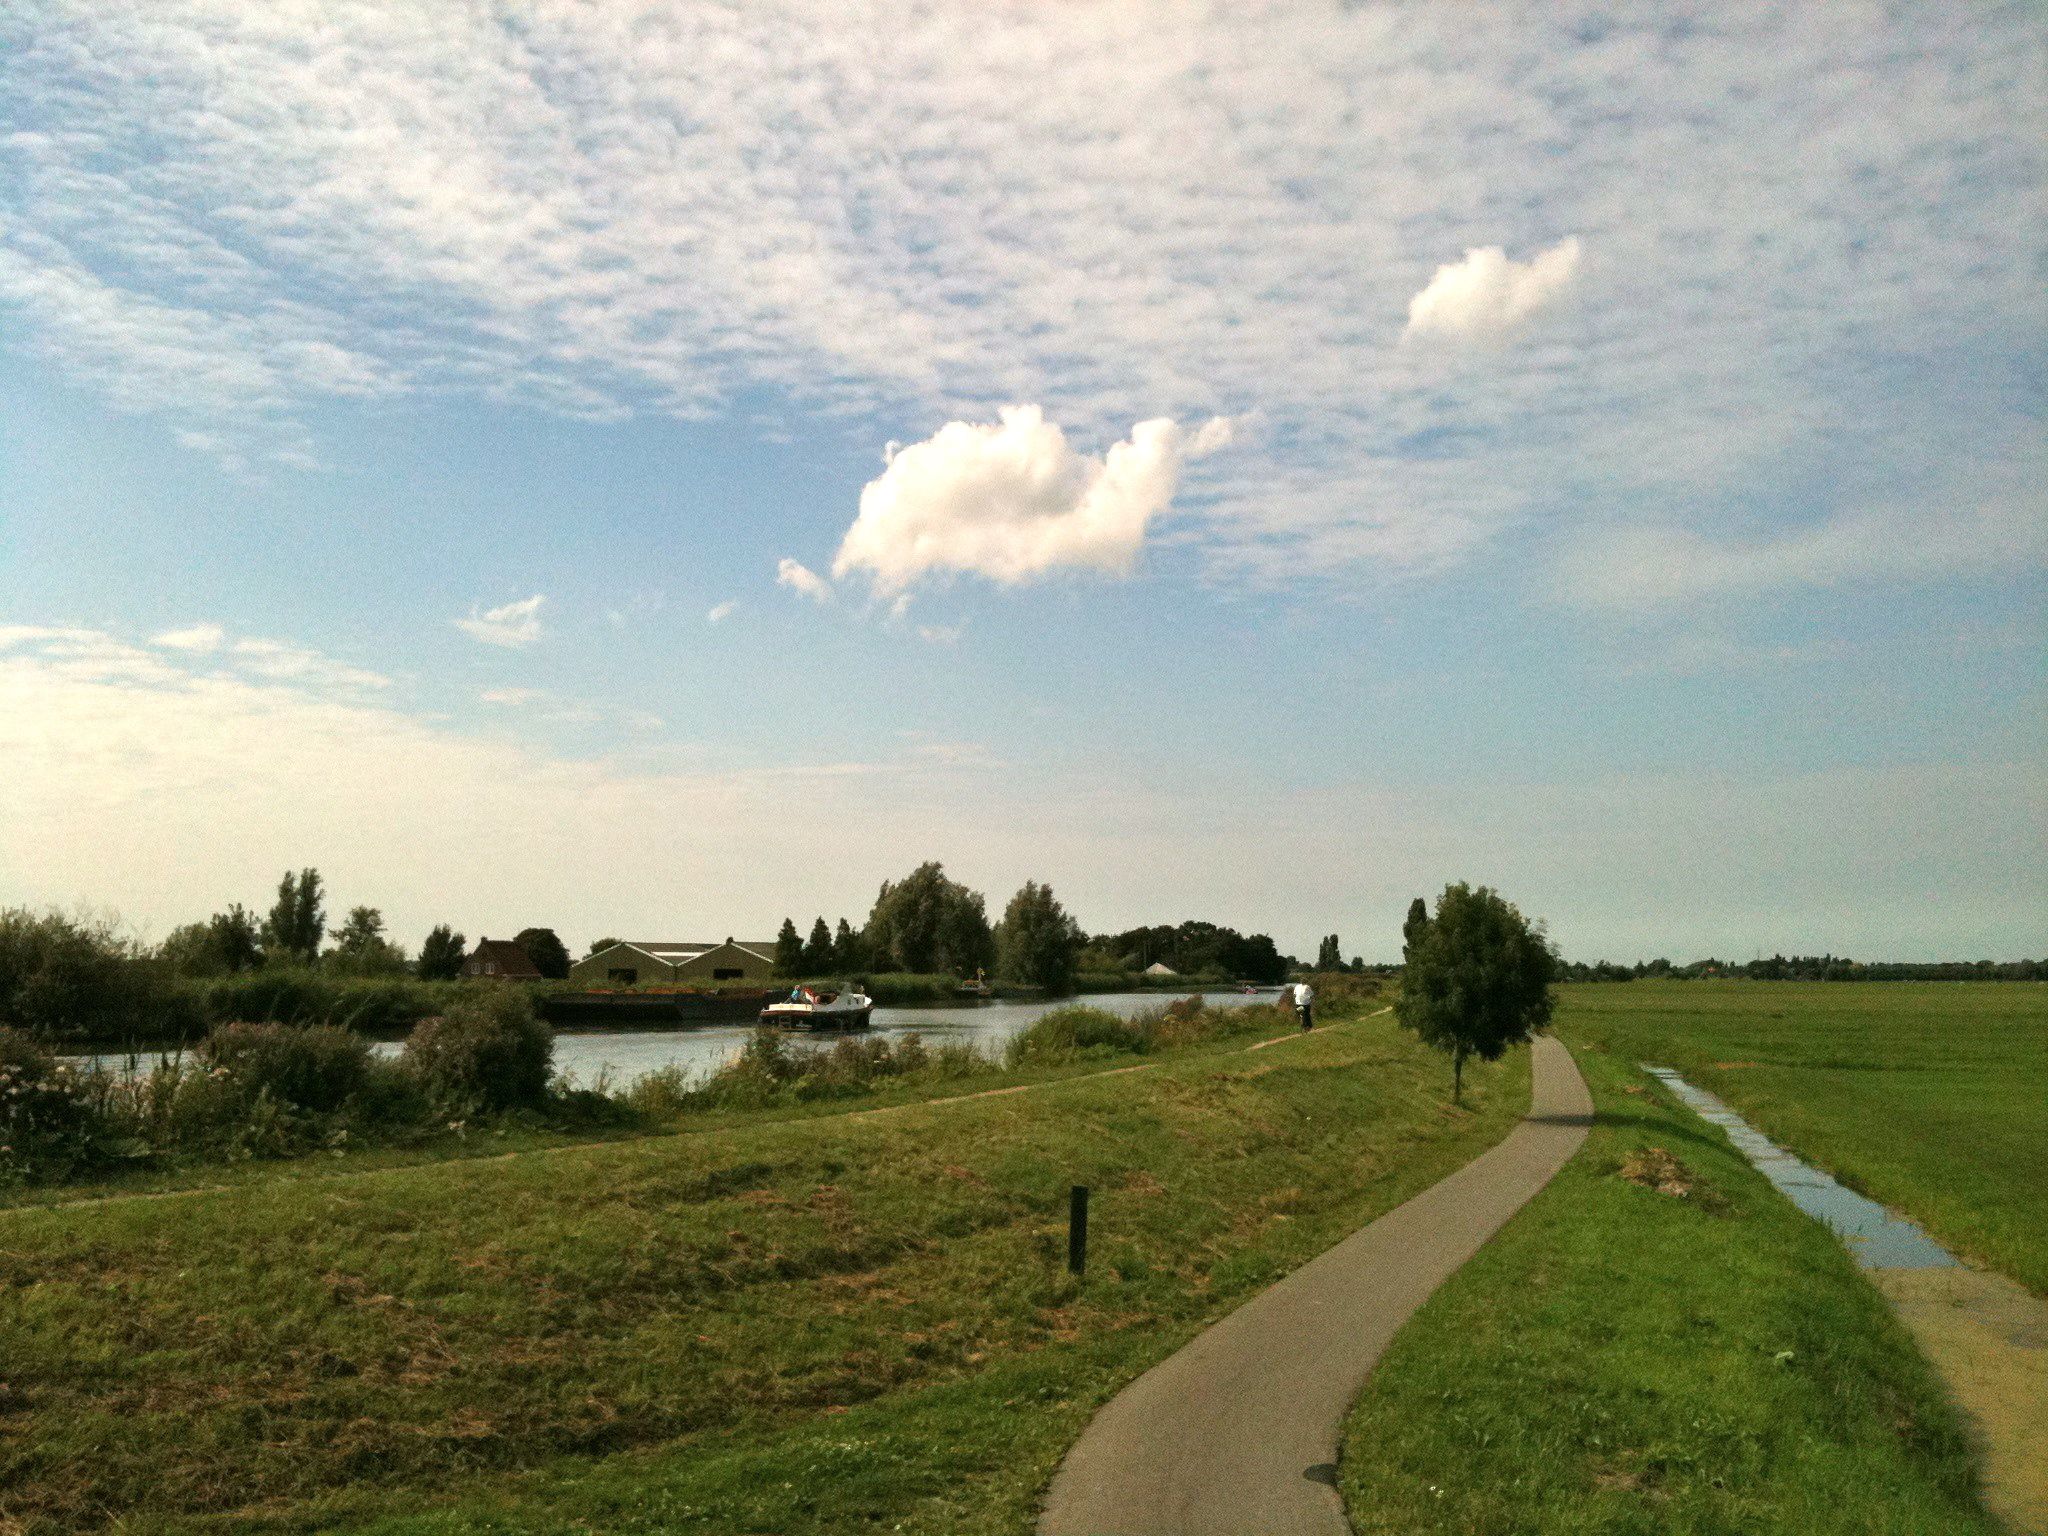
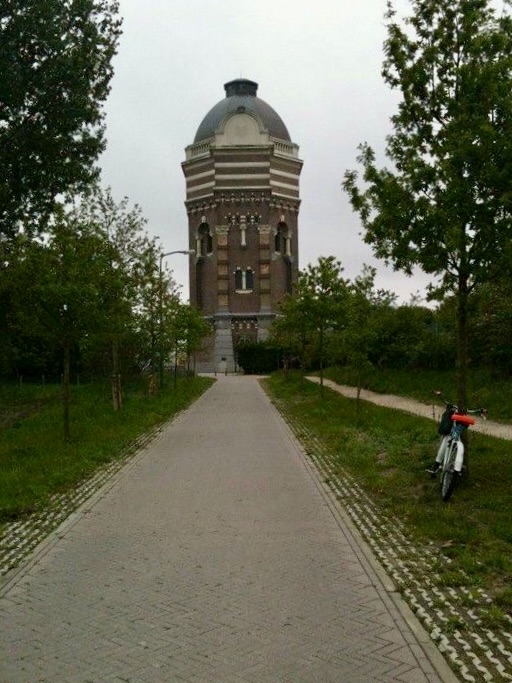
I was keen to measure my effort a bit better this time.  My goal was to keep my pulse below 150 bpm.  I wanted to see if I could get to the summit without overheating.  It was 25° C / 77° F when we started.  Most of the climb is shaded so I stayed relatively cool.  I needed my Sweat Gutr in the 84% humidity though.  There was still a haze of moisture in the air as I rode past this brave little fellow.  The rest of his peanut gallery friends had scattered into the trees as I approached.

IMG_0937

It was no surprise that my jersey was soaked by the time I had traversed the last of the 600 meters / 1,970 ft to the summit.  I didn’t feel as hot or as breathless as I had the week before though.  I had kept my pulse below 150 bpm as planned, except while getting up the 7.5% kicker near the top.  It was a surprise that I got to the top in a little less time than it took me the week before.  There is something in that “slow and steady” adage after all.

The problem with feeling good during a ride is that you get cocky.  There was talk of continuing on from Genting Sempah to Janda Baik.  The additional 30 km / 18.5 mi were described as “rolling”.  It sounded like such a good idea at the time that I even got Wan to change his mind about heading straight back down the way he had just come.

This is the profile of the ride between the summit of Genting Sempah to the turn-around point in Janda Baik and back to Genting Sempah.  I leave it to you to decide if I was misled.

Image

Those “rolling” 30 km added more than 450 meters / 1,470 ft to the climbing total for the day.  It was a good thing that I had rationed my efforts earlier in the day.   I needed to have something left in the tank for the 1 km drag back to the top of Genting Sempah.  The steepest slope of the entire ride.  So I continued to modulate my efforts.  The younger guys rode off ahead on the climbs.  I spent much of the time spinning on my own.  Literally.

IMG_0935

We regrouped outside the McDonald’s at the Genting Sempah Rest Area.

Photo courtesy of Yee Chun Yen

Photo courtesy of Yee Chun Yen

Then it was time to head up the final slope and collect the payoff for all that climbing.  It was time to stop holding back, stay off the brakes and chase trucks all the way down the hill.

IMG_0938

I’ll See Your JZC and Raise You an RvV!

By the time of the 2011 Witte Kruis Classic I had been living in the Netherlands for nine months.  I had done quite a bit of cycling in those months but had yet to meet anyone to ride with.  Then suddenly it all started happening.  I  linked up with Eugene and we rode the Joop Zoetemelk Classic together.  A few days later I was introduced to the Not Possibles.  A group of expatriates who meet on Saturday mornings for “no drop” rides.  I was on the bike paths with them that weekend.

Eugene couldn’t join us on the Not Possibles ride.  But he had bigger fish to fry.  Around the time we registered for the Joop Zoetemelk Classic he suggested that we try and get into the Ronde van Vlaanderen (Tour of Flanders) sportif.  The Ronde is one of the monuments, a classic one-day road race on the European spring professional calendar.  The professionals would be racing from Bruges to Ninove.  Amateurs could ride the full 250 km course the day before the race.  Eugene and I set ourselves a more modest goal.  The profile for the 75 km route showed almost 600 meters of climbing.  We thought that was enough, especially as we had climbed a whopping 13 meters the weekend before during the Joop Zoetemelk Classic.

We had left it a bit late to register.  More than 15,000 cyclists participate in the Ronde every year.  I was frankly surprised that we got places with only two weeks to go before the event.  Finding accommodation was another matter.  I enquired about rooms at a number of hotels and B&Bs in the Ninove area.  I was told that I might just be in time to reserve a room for the 2012 event.  But a room in two weekends time?  “Ha ha ha ha”!  “Ha ha ha”!  I got literally laughed at.

So I felt very fortunate to score two rooms at the Schauvliege B&B outside Ghent.  We would have a 40 km drive to the start, but that was infinitely preferable to leaving at 4am to make the trip all the way from Den Haag.

My biker chick and I left Den Haag on Friday afternoon.  We picked up Eugene and his bike in Rotterdam on the way to Belgium.  We got to Sint-Denijs-Westrem in  time to have a gentle ride around the B&B before dinner.  Here we are with Madame Schauvliege and our fellow house guests.  These two guys had just flown in from Ireland to ride the Ronde.  I suppose if I had flown in from Dublin I would have opted for the 130 km route also.

RvV Irish Guys 1

Zulfa drove us to the start at the crack of dawn.  Well, not quite all the way to the start.  A few thousand other cyclists were ahead of us on the road.  So we had a 5 km warmup ride.  By the time we got to Ninove I wished I had left my jacket and long-fingered gloves in the car.  Eugene was wearing his Swift club jersey and arm warmers.  A much better choice of cycling kit.

RvV 2011 JM Start Hi-Res

We set off into the crisp morning air.  After a few kilometers the terrain turned into rolling countryside.

RvV Countryside

All very picturesque, but we were somewhat disturbed to discover that what looked and felt like some of the famed Flandrian hellingen (hills) were nothing of the sort.  These were the equivalent of bunny slopes at ski resorts.

Gentle Climb

The early kilometers were the calm before the storm.  The combined storm of cobblestones and greater than 10% inclines.  The cobbles were literally tooth-rattling.  So much so that all manner of items were shaken free of jersey pockets and off bicycles as their owners bounced along, hands in a death-grip on handlebars.  The climbs were wall-like in places.  This is the iconic Kapelmuur, just over a kilometer long with a maximum gradient of 19.8%.

RvV 2011 JM Kapelmuur 1 Hi-Res

Eugene got to the top of this climb before I did.  A scenario that was repeated all day long.  Here he is taking photographs of the suffering riders below him.

RvV 2011 Kapelmuur 07

You can tell from our pained expressions in this video that we had our share of suffering too.

Eugene and I spent the evening talking about doing the 130 km route the next time.  I reckon this gentleman had already made his room reservation for 2012.

RVV 2011 Costume

Thermal Shock

I had a week to recover from the culture shock of the Witte Kruis Classic before I embarked on my second organised ride in the Netherlands.  I knew the Joop Zoetemelk Classic would be a better experience in at least one respect.  I would have company.  A mutual friend had connected me to Eugene N.  A fellow Malaysian living in Rotterdam.  We signed up for the 150 km event.

Joop Zoetemelk held the record for the most Tour de France finishes until that achievement was bettered by George Hincapie this year.  Perhaps more impressively Joop won ‘La Grande Boucle‘ in 1980, came second six times and finished fourth three times.  He was also World Champion in 1985.

Joop started his cycling career with the Swift club in Leiden.  A look inside the clubhouse reveals a long and illustrious history.

JZC 2011 Swift Club 01

The 2011 event was the fifth time the Swift club had organised a ride in Joop Zoetemelk’s honor.  The 150 km route was an anti-clockwise loop from the Swift clubhouse around the Groene Hart (Green Heart) between Leiden and Utrecht.

This is the route map for the 2011 JZC

I may have been ready this time for the minimalist directions and infrequent rest stops, but I wasn’t prepared for the weather at the start.

JZC 2011 Start 02

It was a damp 1° C / 33° F.  Eugene and I were bundled up like a pair of Michelin men.  The first 30 km or so was just plain miserable.  My feet and hands were freezing despite the wool socks and double gloves.  My glasses fogged up so badly in the mist that I had to take them off.  The sun eventually broke through the mist so by the time we got to the first rest stop it was brighter, though not necessarily any warmer.

We followed local practice by going indoors for coffee and apple pie.  We didn’t want to offend anyone.

JZC 2011 Stop 1 03

That was at kilometer 56.  We had a very pleasant surprise at kilometer 91.  An unexpected rest stop!  With sports drinks and krentenbollen (raisin buns).  Outdoors this time, but it was a bit warmer by then.  Not that you can tell from what Eugene was wearing.

JZC 2011 Stop 2 02

The route was quite well sign-posted with large arrows at junctions.  It also helped that Eugene and I managed to stay with other riders for most of the time.  Trust us to miss a turn anyway.  That was a 5 km diversion that we did not need.

The length of the ride was beginning to tell on both of us by the time we got to the final rest stop at Leimuiden.  We had what was looking like a long 30 km to go.  So another indoor stop was much appreciated.

JZC 2011 Stop 3 01

The final leg of the ride took us through Rijpwetering, where Joop Zoetemelk was born.  This statue commemorates his World Championship win.

Joop Zoetemelk statue

9 km later we were a pair of happy campers.

JZC 2011 Finish 02

We had helped each other make it through a very cold start and a middle section where cramps threatened to cut short our ride.  This was our longest ride in the Netherlands to date so we were both pleased to have finished.  I don’t know about Eugene but I still wear the event jersey on occasion.  Fortunately it is better suited to more tropical climes than what we found in Leiden that morning.

JZC 2011 Shirt

Culture Shock

I did my first organised ride in the Netherlands in early March 2011.  The Witte Kruis (White Cross) Classic was a 100 km clockwise loop through South Holland.  Much of the route covered new ground for me.  I had ridden to Kijkduin and Meijendel but my wheels had yet to traverse points further east like Benthuizen and south like Oud Verlaat and Schipluiden.  I had yet to find any cycling buddies in Den Haag so I rolled up to the start by myself.  I had done a number of organised rides in Texas so I had a preconceived idea of what this ride would be like.

Things were different right from the get-go.  We were all given timing chips to mount on our front forks.  For many participants this wasn’t just a jaunt through the countryside.

WKC 2011 Transponder

The Dutch idea of a supported ride turned out to be a bit different from what I had experienced in Texas.  I had come to expect lots of people giving directions along the route, or at the very least, large signs.  This is what we had to guide us during the Witte Kruis Classic.

WKC 2011 Direction

All was well until I had a puncture after about 60 km.  Everyone else in the group I had tagged onto kept riding.  Once back in the saddle I could see one rider ahead of me in the distance.  I put my head down and started chasing.  5 km later I caught up to a group of five riders.  We were at a T-junction in Terbregge.  With nary a tiny painted arrow on the road in sight.

We knew that we were about 6 km from the rest stop.  Between us we managed to figure out which way to head and after a couple of kilometers we picked up the white arrows pointing us toward the rest stop at the RWC Ahoy.

Which brings me to my next supported ride, Dutch style, surprise.  I don’t recall having ridden more than about 35 km / 20 mi before coming upon a rest stop on my Texan rides.  The one and only rest stop during the Witte Kruis Classic was at the 55 km / 34 mi point.

The location of the rest stop was an eye opener in itself.  We were on the premises of the Rotterdam Wielrennen Club Ahoy.  Not only does the RWC Ahoy have a nice clubhouse . . .

WKC 2011 RWC Club House

but it also has its own racetrack.

WKC 2011 RWC Ahow Racetrack

There was a race in progress, complete with electronic timing board and race announcer.  This was my first glimpse of the serious side of Dutch amateur cycling.

After a much-needed drink, some food and a comfort break I set out off again to the roar of aircraft landing and taking off from the adjacent Rotterdam The Hague Airport.

At the 85 km mark there was a three kilometer timed sprint.  I had forgotten about that little feature of the ride.  Not that I was in any state to ride any faster at that point.  All I wanted to do by then was to just finish.

This photograph was taken in the dunes south of Kijkduin.  Before I realised that the ride was 10 km longer than advertised.

WKC 2011

I did not enjoy the last 10 km to the finish.  Especially knowing that I had a further 8 km to get home, having cycled to the start.

I felt a lot better after a shower and lunch.  I did like the ride, despite being on my own and those extra kilometers.  I now knew what to expect on my next organised ride, which was the Joop Zoetemelk Classic the following weekend.  In addition to windmills that is!

WitteKruis

CSI Kuala Lumpur

I have finally closed my Creak Source Investigation.  The case started on Sunday 7th October 2012.  The date of my first ride in Malaysia.  The scene was Jalan Gombak, heading up toward Genting Sempah.  My steel bicycle started creaking at the bottom of the climb and continued to do so all the way to the top.  I posted my initial case report on Saturday 13th October.

My assumption that I had cured the creak was premature.  On the very next ride the creak returned, seemingly louder than before.  The rasping still seemed to be coming from the chain rings or bottom bracket.

Alchemy ISKY 1 1

While working on the bike at Van’s, YC and I noticed that two of the chain ring bolts were slightly stripped.  We didn’t have any spares so we reinstalled the stripped bolts.  Could those damaged bolts be the source of the noise?  Or could there be something wrong with the bottom bracket?

I went to another bike shop to look for a second opinion and to buy some replacement chain ring bolts.  The shop mechanic also thought it was a problem with the chain ring bolts.  That shop didn’t have any SRAM bolts in stock either.  So I still had a creaking bike.

Alzheimer’s must be setting in.  It was another week or so before I remembered that I had a spare crank set.  With sound chain ring bolts.  I had replaced the standard crankset on my titanium bike with a compact crank.  It was a relatively simple task to swap cranksets.  I also removed the bottom bracket cups, cleaned out the threads on the cups and the frame, applied grease and reinstalled everything.

The bike still creaked.

If I were Horatio Caine, or Mac Taylor, or D.B. Russell, I would have access to some sort of scanning device that would locate the source of the creak.  Sadly I do not. To paraphrase The Who, “Where are you? I really want to know”.

Having eliminated the bottom bracket and chain rings as the source of the noise it was time to widen the investigation.  The next option was to look at the rear of the bike.  I removed the cassette from the rear wheel.  The cogs and freewheel hub splines got a good cleaning.   Grease went on the splines before the cassette went back on the hub body.  I checked that the bolts connecting the seat stays and chain stays were properly torqued.  Then the rear wheel went back on.

The bike still creaked.

It was time to call a friend and expert.  Who better to put on the case than James Flatman?  He built the bike for me.  His suggestion was to go over the entire bike, no matter how far away from the apparent source of the creak a particular component was.  So I started with removing the stem and bar.  I had upgraded those three months ago so they didn’t need cleaning.  I made sure the bolts were properly torqued.

The bike still creaked.

Next on the list was the seat post, seat post collar and saddle.  The seat post came out of the seat tube and the saddle came off the seat post.  I saw why it is recommended that the seat post gets an annual cleaning.  Despite regular bike washes there was a surprising amount of grit and dirt around the seat collar bolt and the saddle rail mounting.  The seat post needed a wipe down too.

All the moving parts on my bike were now freshly greased or oiled.  All the bolts were tightened to specification.

The bike still creaked.

I was running out of leads.  I checked the pedals.  The bearings turned smoothly and silently.

Perhaps the bike had been banged around during shipping.  I inspected the frame.  Fortunately there weren’t any cracks.

The only thing left to check was the rear hub.  I Googled the instructions for how to disassemble an Easton R4 rear hub.  The Easton Cycling site has videos to go with this drawing.

R4

Diagram courtesy of Easton Cycling

Off came the rear wheel, for the umpteenth time in this investigation.  I removed the cassette from the hub body.  Then removed the hub body from the hub shell.

I had cracked the case at last.

The pawls on the hub body were completely dry, as were the splines in the hub shell.  So every time the pawls engaged with the splines, i.e. every time I put pressure on the pedals, there was a metal-on-metal creak.  The spring-loaded pawls are the black parts in the photo below.

Easton Pawls

I removed and cleaned the pawls, the retaining spring and the splines in the hub shell.  Everything got a good coat of grease before reassembly.

I took my bike out for a 70 km ride.

The bike doesn’t creak.

No Chip Seal Here

I bought my first bike in Houston.  My early solo rides were on the few bike trails along the Columbia Tap to Trail and Brays Bayou.  Then I met the Six Thirty group.  The majority of our group riding was done on city streets.  In most cases there were no bike lanes.  Where there were bike lanes you tended to stay out of them.  I remember Washington Avenue having a bike lane in name only.  What had been designated as a bike lane was badly rutted filled and with debris.  So we took our chances toward the center of the lane.

We also rode on the farm-to-market roads outside Houston.  There was less traffic on them, which was a plus.  They tended to be chip sealed, which was a minus.  Chip seal has a layer of aggregate embedded in the bitumen or asphalt.  On that surface we were were modern-day Rough Riders.

The Dutch cyclist has the good fortune to have 29,000 km of bike paths.   The Dutch cyclist is truly blessed to have 29,000 km of bike paths that are almost without exception well-maintained.  The majority of the paths are asphalt.  Those are generally the smoothest.  Some paths are made of concrete slabs or pavers.  Those sometimes have cracks and bumps in them.  Then come the brick bike paths, which run the range from smooth to bumpy.

Bike paths in towns and cities are usually red.  This differentiates the bike paths from the road where bicycles and motor traffic share the same road-space.  This one is asphalt.

Bike path

In the center of towns and villages the surface is occasionally brick.  Ideally the bricks form a smooth surface.  Sometimes though you are in for a rough ride.

Kinderdijk Ride Brick Road

Concrete pavers often appear around the edges of towns.  This a section of the new bike path on the beach south of Kijkduin.  The dashed center line indicates that this is a two-way path.  The surface is good enough for the Not Possibles to hit 45 kph / 28 mph or more when the wind is right.

Katwijk Pavers

Outside towns the paths are almost always asphalt.  Usually smooth and fast, although this section of the LF 1 near Monster is due for resurfacing.

Hoek Van Holland 02

This smooth asphalt path is in Midden Delfland.

Kinderdijk Ride Seat View 1

Where the paths follow roads the two are usually separated.  Like this one in Noordwijk.

IJmuiden aan Zee Nordwijk Trees

Now that I am in Kuala Lumpur I am back to riding on city streets and sharing the roads with other traffic.  Riding in Kuala Lumpur is a lot like riding in Houston.  Except there is no chip seal here.

Where Do I Go From Here?

The Netherlands is criss-crossed with a network of dedicated bike paths.  Every part of the country is accessible by bicycle.  If your bucket list includes riding every path, you would have to cycle about 29,000 km.  There isn’t anywhere that you can’t cycle to.  It was clear from my “Bicycling 101” class that all I had to do was wheel my bike outside the front door, choose a direction and start pedalling.  And be sure to avoid the 53 ways to pick up a road rules fine.

I used a Garmin Edge 705 GPS cycle computer in Houston.  It came with a detailed road map and points of interest.  So I could use the unit to navigate with exact, turn-by-turn directions to any address or intersection.  I used my Edge more for tracking where I had been rather than for planning routes.  Nevertheless I installed a map of the Netherlands.  If nothing else I would be able to see on the screen exactly where I was hopelessly lost.

The best thing about the unit is that when maps and sign posts fail, it will get me back to where I began my ride.

Garmin Edge 705

I quickly discovered that I would have little use for the navigation functions on my Edge 705 in the Netherlands.  The 29,000 km of bike paths are sign posted.  And since the Dutch are nothing if not meticulous, they didn’t stop at just one sign post system.  They have four that I know of.

The first type of sign post is much like what you would see on normal roads.  Signs point in the direction of cities and towns, listing the distance to each.  A more distant major destination is listed on the bottom of each ‘finger’, and the closer, minor destination is shown on the top.  Once a destination is listed, every subsequent sign along the route will list that destination until you reach it.

The sign posts for cyclists feature red or green lettering on a white background.  The options shown in green are less-direct alternatives that offer scenic routes through the Dutch countryside.

Maassluis to Hoek van Holland Ride 02

The second type of sign post for cyclists sits low to the ground and is mushroom-shaped.  These signs are located in more rural areas where the bike paths intersect away from roads.  Each of the four sides has direction and distance information for destinations nearby.  The sign below with the red lettering on a white background is a newer one.  The older style has the same shape but features black lettering on a white background.

Mushroom

The third system of providing directions for cyclists is the Bicycle Node Network (Fietsknooppuntennetwerk).  Each junction on the cycling path network has been given a unique one or two-digit number.  You need a map showing all the ‘knooppunten’ or nodes.  These maps also list the distance between nodes so you can work out how far away your destination is.

Planning a route from the starting node to the ending node is a simple matter of making a list of all the intermediate nodes that you want to cycle through.  There is a list of online route planners at fietsen.123.nl to help with this.

Knoppunkt Map 2

Each junction or node is marked with a sign showing the node number and a map of the immediate area.

Knoppunkt Map

Signs like this show you which way to go to the next closest nodes.

The fourth system is a network of long-distance, or LF (Lange afstands Fietsnetwerk) routes.  There are currently 30 LF routes covering some 4,500 km in total.  These routes include the LF 1 North Sea Route, which starts in the south near Sluis at the Belgian border, and continues up the coast to Den Helder in the north.  The Not Possibles often cover sections of this route between Hoek van Holland and Zandvoort during their Saturday morning rides.

The LF routes are marked in both directions with rectangular white signs with green lettering.  In this case the sign pointing in the opposite direction reads “LF 1a”.

LF1

With few exceptions the various wayfinding systems on the bike paths served me well.  I would pick a destination and let the signs show me the way.  Confident that if I did get lost, which happened on a few occasions, I could always access the menu on my Edge 705 and select “Back to Start”.

Bicycling 101

The Netherlands is home to about 16.7 million people.  Depending on whom you ask the Dutch own between 14 million and 18.5 million bicycles.  Whichever number you take, that’s a lot of bicycles squeezed into 33,800 sq km of land.  My biker chick and I fit the demographic at the upper end of the range.  Two people and three bikes.

Every year in April some 200,000 twelve year-olds in the Netherlands take a “Verkeersexamen” (traffic test) that includes a section on safe cycling.  I wasn’t twelve at the time but thought it would be a good idea if I also got a proper introduction to cycling safely on Dutch city streets and bicycle paths.  I signed up for an individual half-day “Cycling in Den Haag” session run by Het Fietscollege.

As soon as our freight was unpacked I “Dutchified” my Trek with mudguards, a rear rack and a rack box.  A chain guard and panniers followed soon after.  This was the bike for riding to the supermarket and for doing errands on.  Rain or shine.

Commuter Bike

So this was the bike I rode to the Valkenboskwartier to meet Marja Popper, my cycling instructor for the morning.  She took me on a loop around Kijkduin as she explained how to ride in the city.  For example to always signal before making a turn by extending your left or right arm. And that cyclists can proceed when the bicycle traffic lights are green without worrying about other traffic crossing their path.

Traffic light

And how to negotiate junctions with an advanced stop box like this one, where cyclists can occupy the space in front of motor vehicles while waiting for a green light.

Bike Box

Marja explained  the meaning of the road signs that cyclists encounter.  “Uitgezonderd” means “except”.  In this case the sign indicates no entry for all vehicles except bicycles.  I saw variations of this sign a lot.  Very often there are short cuts accessible only by bicycle.  Just one of the ways that the Dutch make cycling the most convenient mode of transport in towns and cities.

Uitgezonderd

This sign means that cyclists must use the bike path and not cycle on the road.

fietspad

This sign means cyclists can turn right on a red light.

rechtstaf

These “sharks teeth” markings indicate who has the right of way.  If the teeth point toward you then you must give way to whatever is coming from your right or left.  At this junction cyclists have the right of way.

Sharks Teeth

She talked about the rules of the road for cyclists.  For example cycling on the pavements is forbidden.  If there is no cycle lane or path, cyclists must use the road.  Interestingly in these instances cyclists may occupy the center of the lane and other traffic has to follow behind.

Marja made one final point as our lesson came to a close.  Paul Simon may have 50 ways to leave your lover.  The Dutch have 53 ways to fine you for breaking the rules of the road.  On a bike without a bell Mel.  €30.  Riding in a bus lane Jane.  €45.  Didn’t give way to a tram Sam.  €85.  Ran a red light Dwight.  €130.

That knowledge alone was worth the cost of my Cycling 101 session.

Welkom in Nederland

On Tuesday 20th April 2010 I did a last Tuesday ride around the streets of Houston with the West End Six Thirty group.  Our bikes (my road and hybrid bikes, and the biker chick’s cruiser bike), along with the rest of our belongings, had long since departed Houston bound for  Rotterdam.  I had Tom B. to thank for loaning me a bike for the Tuesday ride.  On Thursday I joined the group at Jax for the post-ride meal.  On Friday I collected my passport and visa at the Netherlands consulate, dropped our car off at the freight company, and took a taxi to George Bush Intercontinental Airport to catch my 3.30pm flight.

On Saturday morning I flew into a damp and chilly Amsterdam Schiphol airport.  Den Haag, our home for the next few years, was no drier nor warmer.  I had arrived with a suitcase full of what I had been wearing the week before in Houston.  I had shorts, t-shirts and sandals.  What I should have packed were sweaters, scarves and boots.  My first purchase in the Netherlands was a Nike sweatshirt.  I would have bought gloves too, but the shop assistant told me that winter was over!

The weather stayed pretty ugly for the next few weeks.  Usual Dutch spring weather in other words.  It was five or six weeks before it warmed up enough for me to consider a bike ride.  By then I had found Bikes For Rent.  I reserved a bike for the weekend.  Then I crossed fingers and toes hoping that the weather would not revert to wet and windy.  Fortunately Saturday dawned dry and reasonably warm.  Warm enough for my tropical blood at least.  I rode away from Bikes For Rent on a three-speed Johnny Loco.

Johnny Loco Three Speed

I had a map of the bike route to the beach.  The map was helpful but I soon found that the bike paths in the Netherlands are very well signposted.  The cycling infrastructure is really very good.  The bike paths are very well marked and maintained.  “Yes” everyone checks for bicycles before opening car doors.

Bike path

Cyclists even have their own traffic lights.

Bike light

The path to the dunes and the beach took me past the Scheveningen water tower.  Built in 1874, the tower contains 1 million litres of drinking water and has the largest storage capacity of all the water towers in the Province of Zuid-Holland.  It is still in use today.

It wasn’t the brightest of days so the North Sea looked pretty raw.

The North Sea

I didn’t expect to see World War Two gun emplacements facing out to sea along the dunes.

Eastward view

On the way home through Scheveningen I saw a few more signs of just how much the bicycle is the go-to mode of transportation for many in the Netherlands.  I’ve seen bike racks before, but these two boys on the right took racks to another level.

Surfboard racks

You can leave your bike in a guarded bike parking areas like this one for less than €1.

Guarded bicycle parking

The route back home took me past the Vredespaleis or Peace Palace.  Andrew Carnegie donated USD1.5 million in 1903 (the equivalent of USD40 million today) to fund the construction of the Vredespaleis.  Today the building houses the International Court of Justice (which is the principal judicial body of the United Nations), the Permanent Court of Arbitration, the Hague Academy of International Law, and the extensive Peace Palace Library.

The Peace Palace

This was a very nice welcome to riding in the Netherlands.  I couldn’t wait for my road bike to arrive.

What’s In Your Tool Kit?

I have carried a SRAM PowerLock chain connector on my rides for a few years now.

SRAM Powerlock

Today it was finally put to use.  I salvaged Syihan Nik’s Reverse Broga 1o5 ride after his chain snapped at the top of the N30 climb.  The broken chain is visible near the white line on the road.

Syihan Nik Snapped Chain

Photo courtesy of Syihan Nik

Syihan was very appreciative at the time, only 25 km into the ride.  By the end of the ride he may have wished I had left him to the SAG wagon.  By 11am the thermometer read 32°C / 90°F but in the sun it felt more like 38°C / 100°F.

During this repair I also used my Pedro’s 6-Pack chain tool for the first time.

Pedros Six Pack Chain Tool

I started carrying the 6-Pack, and the PowerLock, after reading a few “What you should carry with you on rides” articles in the likes of Bicycling Magazine and Road Bike Rider.  I chose the 6-Pack because it neatly combines a chain breaker with a 5mm hex wrench, a flat bladed screwdriver and 3.2, 3.3 and 3.5mm spoke wrenches.  Adding a spoke wrench to my tool kit was a case of shutting the stable doors after the horse has bolted.  I broke a spoke in the middle of a ride and didn’t have a spoke wrench with me.  By the time I got home I had worn through the sidewall where my wobbly front wheel rubbed against the fork.

My on-bike tool kit has evolved over the years.  I have gone through a variety of multi-tools and tire levers.  One of the small pleasures of cycling is trying out new gadgets and tools.  In addition to the two items above I currently haul these around on all my rides.

Lezune RAP-6

The Lezyne RAP-6 fits comfortably in the hand.  It comes with 3, 4, 5 and 6 mm Allen keys, a Torx T25 bit and a #1 Philips bit.  Apart from tire levers this tool has seen the most use.

These are my tire levers du jour.

Lezyne Matrix Levers

The Lezyne Matrix levers are the smallest but still usable tire levers I have found.  I particularly like the narrow edge on the hooks.  They make easy work of getting under the bead of a tight tire.

Apart from a spare inner tube I also carry a Park Tools Super Patch kit.  This is another yet-to-be-used item, but one of these days I will have two flats on one ride.  Or be in a group  that has run out of spare inner tubes.

Park Tools Super Patch

The last item in my on-bike tool kit always gets used.  I had a rear puncture with 9 km to go on the Reverse Broga 105 today.  These Zogics Citra Wipes got the chain lube and tire grime off my hands and left them soft and smelling citrus fresh!

Citrawipes

There is one more essential tool on my bike.  I used to carry CO2 canisters and an inflator of some sort (I have been through a few iterations of inflators).  I have never been caught with an empty CO2 canister but it would only be a matter of time.  So I have settled on a Lezyne Pressure Drive hand pump.  If nothing else a hand pump adds to my green credentials!

Lezyne Pressure Drive

Everything other than the pump fits into a tool roll.  The PowerLock, 6-Pack, Super Patch kit and Citra Wipes are in the zippered pocket under the inner tube.

Tool Kit Unwrapped

Rolled up and ready to strap under my saddle.

Tool Kit Wrapped

The pump lives in a bracket that sits under the down tube bottle cage.  My on-bike tool kit is not an American Express card, but I don’t leave home without it.