Category Archives: Gear and Tools

So How Much Do You Spend on Cycling?

cost-of-cycling-banner

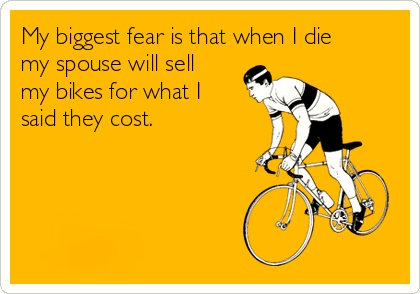
Graphic courtesy of http://www.someecards.com

This is a popular meme, available on mugs, T-shirts, hip flasks, canvas, posters and probably anything else that can be printed on.  Fortunately I don’t need to resort to creative accounting with my Biker Chick.  I can spend what I like on cycling.  And she can spend what she likes on her hobbies.  It is a good partnership.

But how much has this hobby cost me?

The biggest chunks of change went, of course, into the purchase of my bikes.  I have owned four road bikes since I started cycling in early 2010.

I think of the cost of my bicycles in terms of cents per kilometer ridden (CPK).  The more a bike is ridden, the lower its cents per kilometer figure, and the more value I am realising from that bike.

My first two bicycles have been sold.  The sale date CPK for my steel Alchemy, bought in January 2010, is USD 0.20 per kilometer.

alchemy-isky-1-1

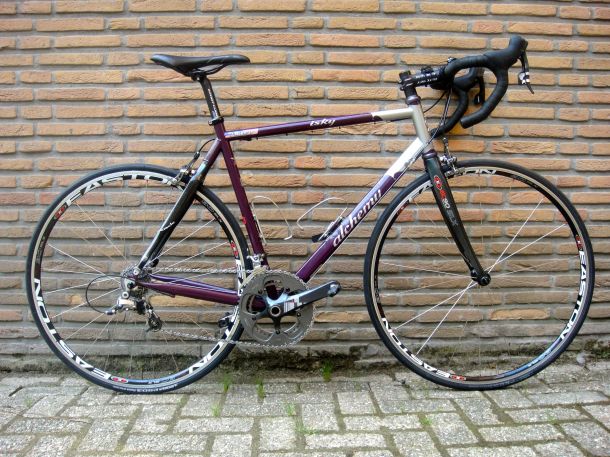
My titanium and carbon Alchemy, bought in November 2011, ended at USD 0.38 per kilometer.

alchemy-isky-2-2

I put 32,700km into those two bikes before I sold them in August 2015.  Their CPK figures are after deducting the selling prices from the purchase prices.

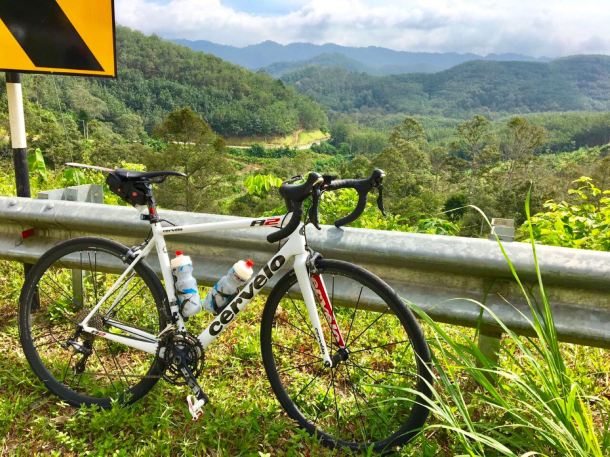
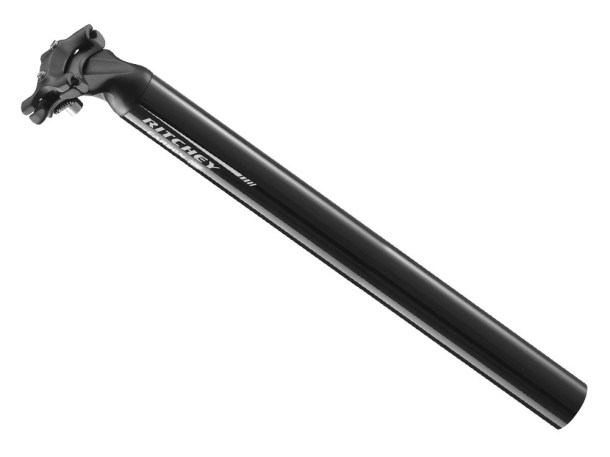
Bike number three, my titanium Ritchey Break Away bought in March 2013, is currently at USD 0.53 per kilometer.

Ritchey Breakaway Ti

And my titanium Alchemy Eros, bought in July 2015, is already at USD 0.52 per kilometer.

alchemy-eros-full-side

Photograph courtesy of Alchemy Bicycle Co.

So far I have ridden a combined 23,000km on the Ritchey and the Eros.  The CPK for the Eros will go down faster than that for the Ritchey because I ride the Eros a lot more.  I already have more mileage on the Eros than I do on the Ritchey.

You could argue that defining the cost of my bikes in terms of cost per kilometer is a fudge.  Just another form of creative accounting that masks the true purchase price.  I like cost per kilometer.  It is a bit like depreciation of a fixed asset, but linked to the usage of that asset.  If I can get the CPK of my bikes down to USD 0.20, the money to buy those bicycles will be money well spent.

So that is the my fixed cost of cycling.  The bicycles themselves.

Then there is the variable cost.  The cost of everything else that goes with cycling.

Over the years, the second largest amount of money I have spent has been on clothing and shoes.  Not helped in the least by the need to buy separate gear for winter and summer temperatures.  While I lived in Houston and Den Haag I owned cold weather versions of everything:  cycling shoes, shoe covers, socks,  bib longs, tights, long sleeved jerseys, base layers, arm warmers, jackets, gloves, hats, and even a balaclava mask.

cost-of-cycling-cold-weather-gear

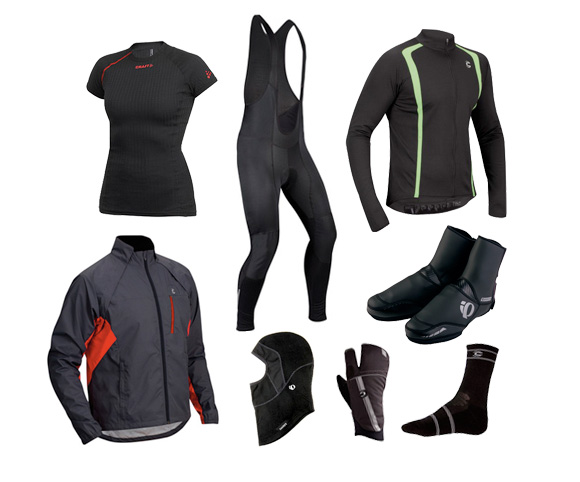
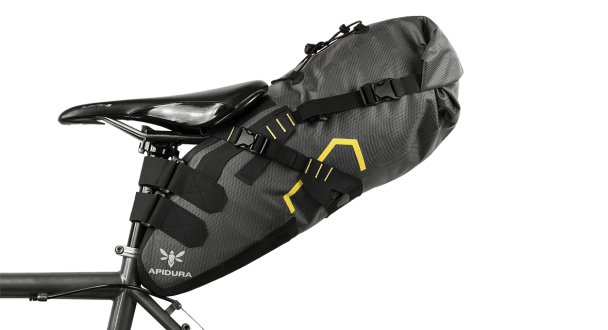
Photograph courtesy of algerbikes.com

Next come accessories, gadgets and upgrades.  I’ve bought helmets, saddle bags, saddles, mini pumps, CO2 inflators, bottles and bottle cages, lights, bells, bike locks, and rear-mounted and roof-mounted bicycle car racks.  I’ve bought bike computers, and an indoor trainer. I have so far, however, resisted the gadget du jour, a power meter.  I have upgraded a set of wheels and a handle bar, and switched a standard crankset for a compact crankset.

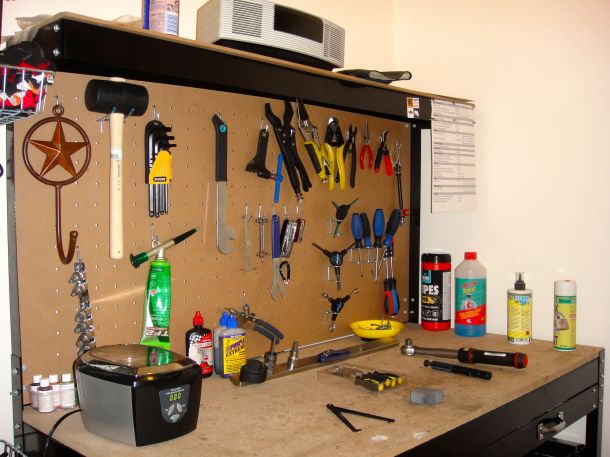
All cyclists end up owning some tools.  At the bare minimum, they have tire levers, a set of hex wrenches and a floor pump.  Those who do their own bicycle maintenance also own a selection of other tools.  These could include a cassette removal tool, a pedal wrench, a chain whip, a chain breaker, a torque wrench, spoke wrenches, cone wrenches, torx wrenches, cable cutters, a bottom bracket removal tool, and perhaps even a wheel truing stand.   I don’t have a truing stand, but I do have a work bench and a repair stand.

There is a surprising amount of money hanging on that pegboard.

tool-bench

In the maintenance vein are the costs of keeping my bicycles on the road.  I regularly spend on consumables like tires, inner tubes, chains, brake pads, cables, bar tape, and bearings.  I also had to buy new shifters to replace the ones broken in crashes, and replace a cassette that had been damaged by my riding for too long on a worn chain.  If you take your bicycle to a shop for a general service, that costs too.

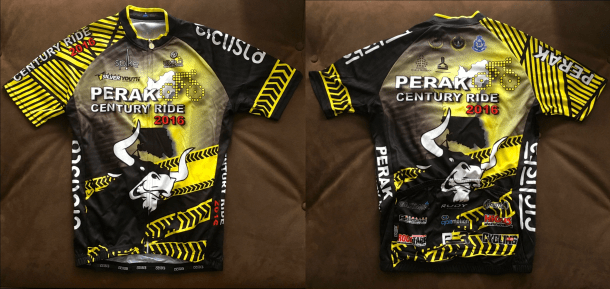
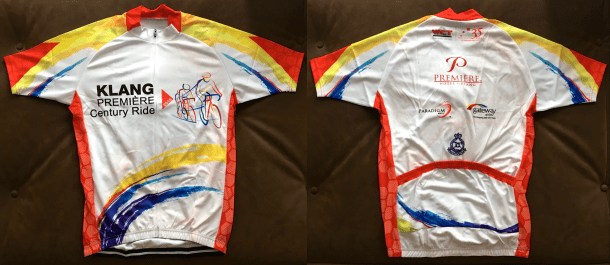
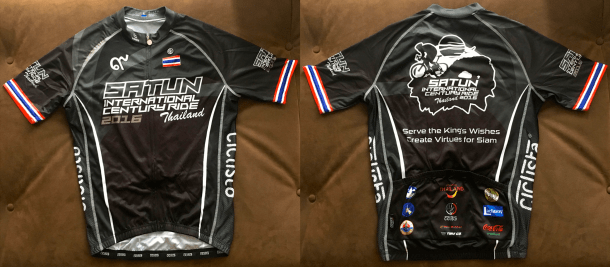
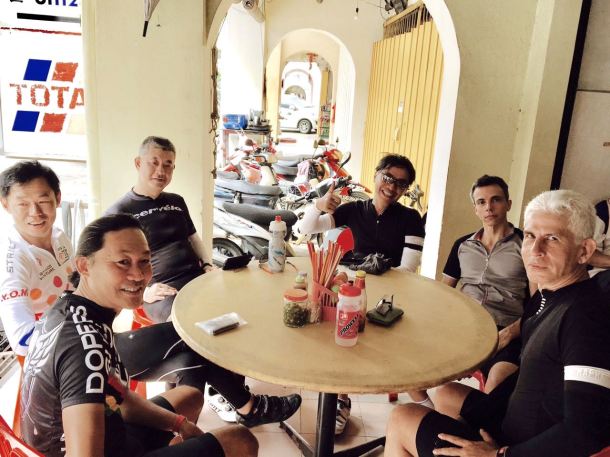
Finally, riding in organised events is challenging and fun, but not free.  There are registration fees, and if the event is in another state, travel and accommodation costs come into the picture.

So it turns out that I have spent quite a bit on my hobby to date.  I estimate that over the seven years I have been a road cyclist, I have spent about USD3,000 per year on clothes, gizmos, parts and spares, etc.  And will probably continue to spend similar amounts in future years.

cost-of-cycling-spend

Photograph courtesy of http://www.imoney.my

I will be the first to admit that my fixed and variable costs are higher than they could have been.  I could still be riding that steel Alchemy, and not bought three other bicycles.  I own more jerseys and bib shorts than are really necessary.  The wheels that I upgraded from were perfectly serviceable.  I could do more bike maintenance myself, rather than sending the bikes to a shop.

However I enjoy researching all the latest and greatest gear, making a selection from the myriad of choices, and then owning and appreciating a quality jersey, or bicycle component, or tool.  It adds to the appeal of cycling.

But it could be worse.  Much worse.  I could be into high-fidelity sound reproduction for instance.  A Sennheiser Reference Orpheus Headphone System, anyone?

cost-of-cycling-sennheiser

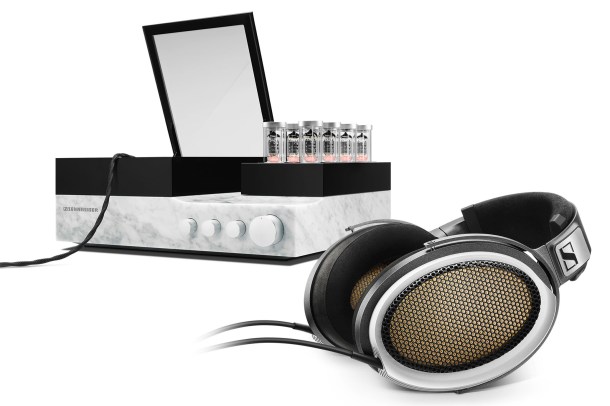
Photograph courtesy of Bloomberg


My Local Bike Shop (LBS)

Wikipedia defines local bike shop or local bicycle shop as a small business specializing in bicycle sales, maintenance and parts.

To become my local bike shop, the business has to meet a few more criteria.

  1. It has to be not more than 5km / 3mi from home.
  2. The staff are there because they love it and really want to be there.
  3. The staff are knowledgeable and keep up to date on the latest technology.
  4. The staff provides exceptional customer service.
  5. The shop provides value for money.
  6. The staff do not unnecessarily upsell, when a simple repair will suffice.
  7. Points 2 to 6 come together to create a “je ne sais quoi” that makes me want to go back there.

My first LBS was West End Bicycles in Houston, Texas.  The story of how I found West End Bicycles, in 2009, is here.

lbs-west-end-bicycles

Photograph courtesy of West End Bicycles

West End Bicycles has been in business for thirty one years now, and long may they prosper.  I moved away from Houston in 2010, but have been back a few times over the years to ride the BP MS150.  Most recently in April 2016.  Every time I visit Houston I make sure to call in at West End, which is my favourite LBS to this day.

I moved from Houston to Den Haag, The Netherlands.  It took me a year to find a group of like-minded cyclists to ride with.  By which time my bike needed a full service.  David Porritt introduced me to Tom Schouten Wielersport.

lbs-tom-schouten-wielersport

Photograph courtesy of Tom Schouten Wielersport

Like West End, Tom Schouten Wielersport is an owner-operated bike store.  Tom was always there to talk to and connect with his customers.

The personal touch matched the quality of service provided.  My bike felt like a new one when I got it back.  All the cables had been replaced.  The hubs, bottom bracket and headset had been cleaned and greased.  The wheels had been trued.  It had new bar tape.  It was cleaner than it had been since the day I took delivery of it.

The only downside?  It cost me €175 / USD187 / RM833.  Enough to convince me to attend a bicycle maintenance course!

There were a few other bike shops within a 5km radius of the Benoordenhout area where I lived.  Which would not be considered unusual in cycling-mad Holland.  Van Herwerden and Mammoet Rijwielen were two that I used on occasion when I needed an inner tube or a bicycle light.  Tom Schouten remained as my go-to LBS when my bike needed work that I couldn’t do myself, like replacing a broken spoke.

In 2012 I moved back home.  My first ride in Kuala Lumpur was with a group from Van’s Urban Bicycle Co.

lbs-vans-urban-bicycle

Photograph courtesy of BaikBike.com

It was during that ride up to Genting Sempah ride that my bike developed a nasty creak.  Read about getting that creak fixed at Van’s here.

Van’s Urban Bicycle Co. met most of my criteria for an LBS, except the “local” part.  The shop was in Petaling Jaya.  More than 15km / 9mi, through city streets, from where I lived.  Six months later the shop had moved to Kampung Tunku, which was even further away.

As time went by I gravitated to a group of road bike riders, rather than the folding bike riders that Van’s catered to.  Those roadies introduced me to Meng Thai Bicycle Centre.

lbs-meng-thai-bicycle-centre

Photograph courtesy of Meng Thai Bicycle Centre

Like Van’s, Meng Thai Bicycle Centre ticked all the boxes, sadly except for the accessibility one.  The shop is in Kota Damansara, about 20km / 12.5mi away.  To make things worse, the traffic on the way there is usually terrible, and once there, parking spaces around the shop are very difficult to come by.  Which is a shame, because Husher and his team at the shop have that je ne sais quoi.

About a year ago Lee and another mechanic moved to their new branch in Kota Kemuning.

the-tandem-men-out-meng-thai-all-mark

Photograph courtesy of Mark Lim

The drive there and parking is much easier, but the Kota Kemuning shop is 40km / 25mi away.  Though I must admit that, despite the distance, that shop is relatively easy to cycle to from where I live.  Up onto the MEX Highway, and then onto the KESAS Highway to Kota Kemuning.  Nevertheless, Meng Thai Cycle is not local.

There is one bike shop that is a 6km / 4mi ride away from home.  I went there twice.  Once to address a mechanical issue, and once to buy an inner tube.  Both times I came away disappointed.  I didn’t feel that the mechanic knew what he was talking about with respect to the mechanical issue, and I was charged 30% above the market rate for the inner tube.  I will never go there again.

They say that good things come to those who wait.  A new bike store opened 2.5km / 1.5mi away in December 2016.  The Bike Artisans.

lbs-the-bike-artisans-2

Photograph courtesy of Adrian Goh

Jeff Liew has certainly given his bike shop a generous dose of je ne sais quoi.  Helped in no small measure by the drool-worthy bike frames, kit and accessories carried by The Bike Artisans.  Brands include Pegoretti, Stelbel, Look, Cervélo, Slide Away, Moulton, Black Sheep Cycling, PEdALED, Warsaw Cycling, Apidura, Kask, Tacx and MCFK Carbon.

Jeff is clearly passionate about the products in his shop, and he is happy to chat about all things cycling.  Lim is the in-house mechanic.  I am very happy with the shifting tuneups he did on both of my bikes.

And despite the high-end gear in the shop, an inner tube sells for the market rate.

I’ve found my Kuala Lumpur LBS.

lbs-support-your-local-bike-shop

Graphic courtesy of redbubble.com

Grow Your Jersey Collection One Ride at a Time – 2016

This is my fourth annual gallery of jerseys and T-shirts that were given out by event organisers.

You can look at previous year’s galleries here:

2013

2014

2015

The first event jersey for 2016 was collected in April at the BP MS150.  This is normally a  two-day 150mi / 241km charity ride from Houston to Austin.  In 2016 inclement weather forced the organisers to reduce the ride to one day.  I was a part of the team representing Hess Corporation, a company I worked for from 2006 to 2010.

I don’t have the 2016 Hess jersey.  I must have left it in Houston.  Here are my friends and I, in what is one of the better Hess jersey designs that we have worn over the years.

hess-bp-ms150-2016

The RHB Shimano Highway Ride LEKAS was at the end of April.  The unique thing about that event was that it was held at night, on a closed highway, under LED street lights.

lekas-2016

Next was the Perak Century Ride in May.  I didn’t know the significance of the bull that featured prominently on the event jersey was.  Reader Hanafiah Aris pointed out that it is not a bull, but a seladang, or gaur in English.  Hanafiah also reminded me that the Perak  state soccer team is nicknamed the Seladang.

perak-2016

I have a jersey from the Klang Premiere Century Ride that was held in July.  I didn’t ride in that event though.  I opted to do the two-day BCG Tour from Klang to Port Dickson and back, which happened on the same weekend, instead.

klang-premiere-2016

The next event jersey that I “earned” was from the Campaign For A Lane ride in Penang, at the end of August.  For the first time the organisers required participants to wear the event jersey during the ride.  If not riders would not get support at the water stops and at the finish.

cfal-2016

Participants got a finisher’s T-shirt as well.

cfal-t-shirt-2016

The Putrajaya Century Ride was held on the first weekend in September.  This was one of the more elegant jersey designs of the year.

putrajaya-2016

The last organised ride with swag was the Satun International Century at the end of November.  It was a rather subdued affair because Thailand was in mourning following the passing of King Bhumibol Adulyej.

satun-2016

There was a T-shirt for that event too.  The design was very much like the event jersey.

satun-t-shirt-2016

As I have done in previous years, I will offer these jerseys to anyone who wants one.  Better that they are worn regularly by others, rather than sitting at the back of my closet.

I wonder what event jerseys 2017 will bring.

Apidura Rackless Packing Systems

apidura-banner-prettydamned-fast-com

Graphic courtesy of prettydamnedfast.com

A couple of my cycling buddies are experienced bike tourers.  As in riding across China, or riding from the Malaysia – Thai border to Ho Chi Minh City in Vietnam, carrying all they need with them on their bicycles.  They own touring bicycles. Touring bicycle frames are differentiated from ‘standard’ road bike frames by having

  • A more relaxed geometry to provide a comfortable ride and stable handling
  • Mounting points for the attachment of mud guards, carrier racks, panniers and three water bottles, and
  • More clearance in the frame to accommodate 28mm or wider tires

As the rest of us followed their progress enroute, and heard their post ride stories, the thought of doing a bike tour ourselves started to appeal.  After all, if The Tandem Men can ride around the world unsupported, we could surely do a multi-day ride, albeit something much less ambitious.

Those thoughts coalesced into a plan to spend four days riding through southern Thailand. For our first foray into the world of self-supported tours, we decided on the ‘credit card’ variety.  We would carry basic cycling gear and clothing, then pay for things like meals, supplies and overnight accommodations as we travelled.

This lightweight approach would allow us to ride our road bikes.  All we needed were some ‘rackless’ touring bags.  Leslie pointed toward Apidura for the bags.

I had first come across the Apidura name in a feature on the Rapha website.  Rapha had partnered with Apidura on a series of rackless packs.  The feature made interesting reading.

Apidura was founded by Tori Fahey.  An experienced cycling tourist, she took some time off work in 2011 to race in the Tour Divide (a 4,400km continent-crossing race from Canada to Mexico).  In an interview published online in The Guardian, she says “It was through my trip from Canada to Mexico that I discovered pannier and rack systems and my revelation from the trip was that I was never going to use them again.”

So, in 2013, Apidura was born, producing storage solutions for people looking to travel the world by bike, race across continents and carry all they need to do so.

Today Apidura produces a range of packs and accessories.

apidura-full-range

Graphic courtesy of Apidura

I bought three items, all of them the dry versions designed to keep water out, even in a sustained rain.

Saddle Pack Dry (14L)

apidura-saddle_pack_dry_14l_straight_on_bike

Photograph courtesy of Apidura

Handlebar Pack Dry (14L)

apidura-handlebar_pack_dry_14l_straight_on_bike

Photograph courtesy of Apidura

Accessory Pocket Dry (5L)

apidura-accessory-pocket_dry_perspective_on_bike-1

Photograph courtesy of Apidura

All five of us on the southern Thailand tour had Apidura saddle packs.

s-thailand-tour-3-apiduras-on-ko-yo-island-2-leslie

Photograph courtesy of Leslie Tong

s-thailand-tour-3-apiduras-on-ko-yo-island-marco

Photograph courtesy of Marco Lai

The Apidura saddle packs meet four important criteria:

  1. They are easy to pack, and then to compress and close.
  2. They attach simply and securely to the seat post and saddle.
  3. They do not adversely affect the handling of the bike.
  4. They are waterproof.

We tested the waterproofness early on, when we were caught in a torrential tropical downpour.  It was so wet that our brakes were almost useless, and it was too dangerous to keep riding.  Despite the deluge, not a drop of water got into the packs.

s-thailand-tour-1-torrential-rain-leslie

Photograph courtesy of Leslie Tong

I was the only one with the handlebar pack and the accessory pack as well.  The handlebar pack was just as easy easy to pack, close, and attach to the bars.  The accessory pack clips neatly to the handlebar pack, and together have negligible impact on bike handling.

The only thing to watch for with the handlebar pack is that it doesn’t press on the cables in front of the bar enough to actuate the front brake.  That happened to me, and the only solution was to lighten the load in the handlebar pack.

Apart from that niggle, the Apidura packs performed brilliantly.  The large 14 liter / 3.7 US gallon capacity saddle pack accommodated a full set of cycling kit, a pair of sandals, a pair of shorts, two tee shirts, a small foam travel pillow, toiletries, a spare inner tube, tire levers and a multitool, and a rain jacket.  With room to spare.

One trip is not enough to satisfy a fifth criteria, that of durability.  The materials list from the Apidura website, however, points to products designed to cope well with the rigours of bike touring in all conditions.

Dimension Polyant VX21 is the main body fabric. This 4 layer laminated fabric offers a combination of superior waterproofness, light weight, ultra high abrasion and tear resistance, and low stretch.

Ultra-durable hypalon is used in high abrasion, high stress areas to provide additional protection against friction and puncture.

Woojin buckles are used in the fastening system for enhanced reliability.

HDPE structural support to reinforce the shape of the pack, ensuring that it does not interfere with the ride.

I must report that I managed to separate the top and bottom parts of a clip on the handlebar pack to which a strap from the accessory pocket is attached.  I pulled too hard on the strap to tighten it.  Fortunately Marco was able to maneuver the two parts of the clip back together again.

While the Apidura packs are clearly built tough, care must be taken when tightening straps.

So far so good though.  I think I speak for all five of us when I say that we are very happy with our Apidura packs.  I recommend  them highly to anyone interested in a rackless packing system.

apidura-logo

Logo courtesy of Apidura

Small Chainring + Biggest Cog

The first road bike I owned was equipped with a standard 53 / 39 chainring and an 11 – 25 cassette.  That was seven years ago in the flatlands of Houston, Texas.  I was fifty two years old.

alchemy-isky-1-1

Two years later I moved to Den Haag.  North Holland is not noted for hills, but South Holland and Belgium are.  A trip in April 2011 to the Ronde van Vlaanderen sportif introduced me to the many short, sharp hellingen which have made that race one of the Monuments of professional cycling. The Muur van Geraardsbergen featured that year, with its maximum gradient of 19.8%.

There were other hilly events to be ridden in the year to come.  One was the Amstel Gold sportif down in the corner of South Holland that shares a border with Belgium to the west and south, and Germany to the east.  Another was the sportif which preceded the 2012 UCI World Championships, held that year in Limburg, South Holland.

My first encounter with the hills of Belgium convinced me that I needed lower gearing on my bike the next time I ventured south to ride.  A few months later I had a second road bike.  Equipped with a compact 50 / 34 chainring and an 11 – 28 cassette.

alchemy-isky-2-2

At the end of 2012 I moved back to Kuala Lumpur.  Where any ride to the north or east of the city means venturing into the foothills of the Titiwangsa Mountains.  These mountains are molehills compared to the Pyrenees, the Alps, or the Rockies, but they do present more than enough of a challenge for my now fifty nine year old knees.

My rides these days are on a bike with a compact crank and an 11 – 32 cassette.

alchemy-eros-full-side

Photograph courtesy of Alchemy Bicycle Co.

I use the 34 tooth chainring – 32 tooth cog combination quite a lot.  On yesterday’s ride from Batu Lapan Belas to Titi and back for instance.  This is the elevation along the route we took.

titi-elevation

Graphic courtesy of veloviewer.

The climb to the summit of Genting Peras “officially” starts at the Simpang Peras T-junction.  The warm up for the climb proper is the 50 meters / 165 feet of elevation over the 1.5km / 1mi on Jalan Sungai Lui before Simpang Peras.

This is Lay, Eugene and I heading into the mist on the lower slopes of Genting Peras.

titi-04-danial

Photograph courtesy of Danial

9km / 5.5mi and 404 meters / 1,325 feet of elevation later Marco and the rest of the group were catching our collective breaths at the summit.

titi-05-danial

Photograph courtesy of Danial

The first time I did this ride, I thought that the 13km / 8mi from the summit to Kampong Kongkol was all downhill.  Imagine my surprise when I found that the descent is broken into three sections, with 200 meters / 656 feet of climbing between sections.

Of course we had to take the scenic way from Kampong Kongkol to Titi.  Through Kampung Chennah and Kampong Puom.  That is the loop to the right in the elevation graphic above.

It is a very pretty ride down into the valley formed by the Sungai Kongkol to Kampung Chennah, and then along the Sungai Kenaboi until Kampung Temelang.  The road is bordered by a series of small villages, rubber plantations, goat farms, oil palm estates and a durian orchard.  Then you have to pull yourself out of the valley and back up to Jalan Kuala Klawang – Semenyih.

titi-03-evelyn

Photograph courtesy of Evelyn Bird

The view back across the valley is worth the climb.

titi-07-simon

Photograph courtesy of Simon Soohu

There are a number of good Hakka kopitiams (coffee shops) in Titi.  We were very ready for our breakfast of pan mee, soft-boiled eggs, toast with kaya and iced coffee by the time we sat down.

titi-02-evelyn

Photograph courtesy of Evelyn Bird

Titi is one of those small Malaysian towns far from a major highway, where time passes slowly.  As illustrated by the sign and chick blinds at this shop across the road from our kopitiam.  Along with the usual necessities:  clothes (baju), shoes (kasut), and fabric (kain), Ho Keng Kee sells a much more unusual item.  Rubber tapping knives (pisau penoreh).

titi-06-evelyn

Photograph courtesy of Evelyn Bird

You don’t come across this in your local supermarket.

titi-rubber-tapping-knife

All that remained after breakfast was the little matter of 650 meters / 2,130 feet of climbing back to the summit of Genting Peras.

In preparation we filled our bottles with fresh coconut water and ice from a stall in Titi.  Notice the pink funnel.  They must fill a lot of bottles for cyclists.

titi-coconut-water-eugene

Photograph courtesy of Eugene.

Then it was small chainring + largest cog time for the 13km / 8mi from Kampung Kongkol to the summit of Genting Peras.  We regrouped and had a bit of a rest at the summit.  Then we all rolled safely down the mountain and over the final 11km / 7mi to Batu Lapan Belas.

The odds are I will be in the small chainring + biggest cog during my next ride.  My knees aren’t getting any younger.

N8 Endurance Drink Mix

N8 Endurance Banner

Graphic courtesy of Egonutritions Sdn Bhd

A couple of weeks ago, a representative of N8 Sports Nutrition emailed me.  He had read my posts about hydration and sports drinks.  He asked if I would review N8 Endurance, a drink mix product that hydrates and improves recovery for cyclists, runners, and other endurance athletes.  N8 Endurance is one of a range of sports nutrition products manufactured and marketed by N8 Sports Nutrition.

The product is designed to help endurance athletes increase stamina, reduce muscle fatigue, improve recovery, prevent cramping, and remain hydrated throughout their chosen activity.

N8 Endurance provides Branched Chain Amino Acids to aid in muscular recovery and muscular efficiency, Electrolytes to prevent or minimise muscle cramping, a “Smart Carb” in the form of Palatinose to sustain energy levels, and Creatine Monohydrate to increase muscle growth, muscular endurance and recovery.

I said I would be happy to review N8 Endurance.  Within a few days a complimentary box of the product was at my doorstep.

N8 Endurance is in powder form, packed in single serving sachets.  There are 20 sachets per box.

N8 Endurance Sachets

Photograph courtesy of bicyclebuysell.com

The directions for use are straightforward.

RACE DAY/ ACTIVITY DAY

Take 1 sachet of N8 Endurance with 250ml of water 30 minutes before your activity. Mix another sachet with water in your tumbler/hydration bag/ or water bottle to be consumed throughout your activity. Consume 1 sachet for every 45-60 minutes of activity.

CRAMP PREVENTION

Take 1 sachet of N8 Endurance with 250ml of water the day before your activity before bed. Take 1 sachet of N8 Endurance with liquid of choice when you are about to experience muscular cramp.

I have not had problems with cramps for some time now.  Probably due to increased fitness levels and proper hydration.  So I followed the Race Day / Activity Day directions.

The powder dissolves rapidly in water.  The product is not effervescent, so there is no pressure buildup if you cap your water bottle immediately.

N8 Endurance has a pleasant, light, blackcurrant flavour (the only flavour available).  When I first tried it I thought the taste was too light.  However after a few sips I appreciated the lighter taste as compared to other sports hydration products.  N8 Endurance has no lingering aftertaste.  Nor does it have that slightly bitter taste that products using artificial sweeteners tend to have.

A pleasant tasting product is important.  It is hard to finish the recommended 500 to 600ml of fluid an hour if you don’t like the taste.

I have done four rides so far with N8 Endurance in my water bottles.  The total distance was 300km, with 4,700 metres of climbing.  All the rides were in the morning.  A 100km ride finished in the heat of the day at 1.30pm.

My conclusions about the effectiveness of N8 Endurance are of course qualitative and unscientific.  I can only compare how I felt while riding and consuming N8 Endurance with how I have felt while using another hydration product.

With that proviso in mind, I can say that N8 Endurance did a good job of keeping me hydrated.  I didn’t feel unusually thirsty after my rides, despite sweating a lot.

I did not suffer any cramps, so the electrolytes did what they were supposed to do.

My energy levels stayed high, even after 1,200 metres of climbing.  That must have been due, in part, to the Palatinose.

Overall I felt good while riding, although I do admit that I felt like throwing my bike into a drain during the long climb in Hulu Yam.  Just as important, I felt pretty good the day after each ride too.  It is hard to say for sure without scientific analysis, but I do think that the Creatine Monohydrate made my recovery a little easier.  At 58 years of age I can use all the help that I can get.

So in summary, I think N8 Endurance does what it claims to do.  Help endurance athletes go further, stronger, longer, faster.

N8 Endurance Recommended

N8 Endurance is available at these locations:

Fitness Zone
Taman Selayang Utama

Johnson Fitness
1 Utama
Sunway Pyramid

Anytime Fitness
Solaris Mont Kiara
QLIQ Damansara
Oasis Ara Damansara

Anabolic Gym
Aman Suria Damansara

Merican Muay Thai Gym
Solaris Mont Kiara

One More Rep Fitness Centre
Ampang

Body Factory
PJ21 Commercial Centre

Ultimate Gym
Wangsa Maju, KL

Muscle Brothers Gym
Desa Sri Hartamas

Yokkao
Taman Danau Desa

Fever Fitness
Teluk Intan

For further information please contact:

EGONUTRITIONS SDN. BHD.
G-36 Aman Suria Damansara, PJU 1/45,
47301 Petaling Jaya, SEL, Malaysia

Telephone: +(60)3-7804 8970
FAX: +(60)3-7804 0970
E-mail: sales@n8.com.my


Watch Where You Went

Relive Where Did You Go

Cycling GPS units, also called cyclocomputers, from manufacturers like Garmin, CatEyeLezyzne, Sigma Sport, Wahoo Fitness, PolarMagellan and others have become ubiquitous.  Almost every road cyclist I see has a GPS unit on their handlebar, or on their wrist.

Those that do not often rely instead on a GPS app from the likes of Strava, Cyclemeter, Ride With GPS, Map My Ride, or Endomondo, running on a mobile phone.

Not many of us use our cyclocomputers or mobile phones to navigate whilst riding, although units with mapping capability are invaluable when you get lost.  Instead we use these devices to keep a record of where we have been, when, and how fast we rode.

As soon as we can after a ride, we download the ride data from our cyclocomputers to a website like Strava, Garmin Connect, or Ride With GPS.  Those using mobile phone apps or a wireless capable cyclocomputer just wait for their devices to do the uploads automatically.

Strava is very popular ride tracking site.  Cyclists log into to Strava to look at ride statistics.  What was our average speed?  How much climbing did we do?  Did we set any PRs?  Did we bag any KOMs?  Shown together with the ride statistics is a map overlaid with the route we just rode.

Relive Strava Map Screen

Screen Capture courtesy of Strava

An exciting newcomer to the ride visualization scene is Relive.cc. 

Relive Splash Screen

Rather than just displaying a static map of your ride, Relive.cc takes the ride data from your Strava account and creates a movie of your ride.  This is the Relive movie of my ride last weekend.

Much more interesting to look at than the Strava map above.

If I had attached geotagged photographs to my Strava ride record, those photographs will have displayed at the appropriate spots in the movie.

Now that I have linked my Strava account to Relive.cc, I get movies of my rides within an hour of uploading my ride data.

You’ll be seeing more of those movies in my ride reports from now on.  For “reliving” your rides, this app is

Relive Cool

Graphic courtesy of designyoutrust.com


FSA K-Force Light SB25 Seatpost

Posted on
Seatpost In Action

Graphic courtesy of Road Bike Review

I have written a few posts about my Alchemy Eros.  Starting with A Bicycle for the Cognoscenti Adventure, followed by My New Best Bike:  the Alchemy Eros, and 4,000 km / 2,500 mi Update:  Alchemy Eros.

A common theme in the two later posts is that the trade-off for a stiff and sharp handling titanium frame is a ride that is sometimes jarring.  I have owned, and still own in the form of a Ritchey Break-Away Road Ti / Carbon, Ti bicycles that are more comfortable.

I lived with the tradeoff between frame stiffness and comfort until I read an online article in VeloNews titled Getting the Most From Your Post.  First published in June 2012, the article is somewhat dated, but still relevant.  The article attempted to determine the role the seatpost plays in rider comfort.

In its typically thorough fashion, VeloNews set out to answer this question by testing 14 seatposts of different materials, setback and design philosophy. At Boulder’s Microbac accredited test laboratory, they measured vibration damping over small bumps with an accelerometer, and they measured linear deflection (flex) under body weight in two dimensions.

The winner was the FSA K-Force Light SB (Setback).  VeloNews judged the FSA seatpost to be the best choice for long road rides.   The FSA seatpost has excellent vibration damping, which makes it noticeably more comfortable, especially on long rides, dirt roads, or concrete or asphalt with lots of small cracks and expansion joints.

The seatpost that came with my Eros is the Ritchey Comp Carbon.

Ritchey Carbon Comp

Photograph courtesy of Ritchey

This seatpost was not one of those tested, but three other Ritchey seatposts, the WCS Carbon SB, the WCS Aluminium SB, and the WCS Carbon Straight, are among those in the Velonews review.  The Ritchey seatposts came in sixth, tenth and last respectively.

The Comp Carbon sits at the lower end of Ritchey’s seatpost offerings.  I thus assume that it would score even lower than its siblings on the VeloNews test.

Eager to soften the ride of the Alchemy Eros, I bought an FSA K-Force Light.

FSA K-Force Light

Photograph courtesy of Full Speed Ahead

I have the version with the same 25mm of setback that my Ritchey Comp Carbon has.  For purely aesthetic reasons I opted for the black and grey graphics rather than the red and white.

VeloNews had discovered that a setback post will give you greater pedaling efficiency and more high-frequency vibration damping.  My usual routes don’t have big bumps, where the greater flex of a straight seatpost is an advantage.

I have ridden 370km / 230mi on the FSA K-Light.  The ride quality of my Eros has noticeably improved.  Even with 10psi more air pressure in each tire.  There is much more vibration damping now.  My Eros rides much more like I would expect a Ti frame to ride.  So my qualitative impression so far matches the quantitative findings at VeloNews.

I have a 240km / 149mi ride, split over two days, this weekend.  I am looking forward to a more comfortable long-distance ride than I have had before on the Alchemy Eros.

4,000 km / 2,500 mi Update: Alchemy Eros

Alchemy Eros Full Side

Photograph courtesy of Alchemy Bicycle Company

I wrote an early review of my Alchemy Eros in October 2015.  At that time I had ridden the bike 1,400 km / 870 mi.  Today it has more than 4,000 km / 2,500 mi on it.  I have had some long days on this bike, including a 220 km / 137 mi brevet.

My impressions from last October still hold true.  This is a stiff frame with sharp handling, thanks to the large-diameter titanium tubes and the excellent welds, which meet the American Welding Society guidelines.  It tracks precisely through turns.  I have yet to induce any shimmy at high speeds.  This frame flexes very little, if at all.  The integrated rear derailleur dropout helps in that regard.

The tradeoff for this degree of stiffness is that the frame does transmit road vibration to the saddle and bar.  This is not a silky-smooth riding Ti bike.  I continue to steer around as many of the ruts, cracks, patches and other rough stuff on the roads as I can.

Fortunately the wheels that were specified with the bike, ROL Race SLs, certainly help to smooth out the ride quality of this frame.

Photograph courtesy of ROL Wheels

Photograph courtesy of ROL Wheels

The rims are 23mm wide, which allow me to use 25mm Continental Grand Prix 4000s.  I can run 80psi in the rear and 70psi in the front, which certainly helps dampen road chatter.  The ROL Race SLs are not super light at 1,555grams for the wheel set , but they are excellent value for the USD675 asking price.  The build quality is excellent, and the wheels have taken some significant hits – potholes and the like – without any ill effects.  The wheels are as true today as they were when I took delivery of this bike.

A few days ago the bike went in for its first tuneup since it left the Alchemy Bicycle Company.  The SRAM drivetrain needed a slight adjustment to offset the normal cable stretch / housing compression that happens during a new drivetrain break-in period.  And the Cane Creek 40-Series IS headset that came with the frame had loosened slightly, probably from clattering over speed bumps and the like.

I reckon it will be another 4,000 km before this bike needs another tuneup.  Assuming I don’t inflict any damage on the bike by dropping it, or, heaven forbid, crashing it.  By then I will be looking to replace the chain, and perhaps the brake pads.  In the meantime, this “Twin Towers” Eros will continue to be my ‘go to’ bike.

Photograph courtesy of Alchemy Bicycle Company

Photograph courtesy of Alchemy Bicycle Company

Sweaty Eyeballs

Sweaty Eyeballs Creativeallianceorg

Graphic courtesy of creativealliance.org

The bane of every cyclist.  It is hot.  You sweat. The sweat drips into your eyes. It stings your eyes and smears on your glasses, impairing your vision.  Usually just as you are approaching a pothole or a sharp corner at speed.

I started cycling in Houston, Texas.  Where summer temperatures are consistently in the mid 30s C / 90s F.  So it wasn’t long before I was looking for a way to keep sweat out of my eyes.  I settled on a Sweat GUTR.  A soft plastic headband with a lip across the front which channels sweat away from your eyes and glasses.

SweatGUTR_0001_Hydro-White

The Sweat Gutr worked well, but it had one shortcoming.  My forehead gets oily as I sweat.  The smooth plastic headband would start sliding down my forehead, breaking the seal between skin and band and allowing sweat to leak into my eyes.

I either had to keep pushing the band back up above my eyebrows, or tighten the band.  A tighter band solved the slippage problem in exchange for a pressure headache.  I settled for pushing the Sweat GUTR back up my forehead when necessary.  Once the dog days of summer gave way to cooler autumn days, my Sweat GUTR stayed in a drawer.

Then I moved to the Netherlands, where even on the hottest days, sweaty eyeballs are much less of a problem.  My Sweat GUTR continued its stay in a drawer

It came out of the drawer when I got home to Malaysia.   But the average humidity of 80% or more made the slippage problem worse than it had been in Houston.  The Sweat GUTR was soon consigned to the back of a drawer, never to be used again.

For a while I resorted to wiping the sweat off my brow with a bandana.  I built up quite a collection of bandanas.

Bandana

They weren’t a particularly effective solution.  Too often I was reaching into a jersey pocket for a bandana after sweat was already stinging my eyes.

A friend suggested streaks of Vaseline above my eyes.  That may have worked, but I foresaw one major drawback.  I would forget the Vaseline was there, and would smear it everywhere the first time I wiped my face.

So I relied on my bandanas.  In other words, I put up with stinging eyes.

One day a riding buddy turned up wearing a helmet liner.

Mission Enduracool Helmet Liner 1
He raved about how this particular helmet liner uses a “proprietary technology . . .  to create a prolonged cooling effect.”  Mission Athletecare website

I needed help coping with the heat.  The helmet liner was worth the price just for the cooling effect.

Now that I have worn these helmet liners for the better part of a year, I value them for more than just their cooling effect.  The helmet liner wicks away sweat from my forehead before it can trickle down into my eyes.  No more sweaty eyeballs!

The stretchy fabric stays comfortable over long periods.  No more pressure headaches!

The fabric is stretchy enough for me to stuff some ice cubes under a liner to cool my scalp on particularly hot days.

A multi-tasking piece of cycling kit.  The best kind.