Tag Archives: Garmin

Garmin Edge 1050

Photograph courtesy of garmin.com

I started using a Garmin Edge cycling computer in 2010. My Edge 705 served me well until 2016, when I upgraded to an Edge 1000. A design fault with the power button made me retire the Edge 1000 and start using an Edge 1030 in February 2018. A crash in July 2024 snapped one of the tabs on the quarter-turn mount interface on the underside of my Edge 1030. You can read about that adventure by clicking here.

I continued to use the 1030 despite it popping off the out-front mount whenever I hit a bump. The screen damage incurred during the same crash worsened progressively over the next two months. My son got me a good deal on an Edge 1050 in September 2024.

I very much like the Edge 1050.

Each generation has progressively gotten larger and heavier. Interestingly, each generation is thinner than the previous one, which illustrates the increasing miniaturisation of components. The ever-larger width and height are due to the display size nearly doubling from the Edge 705 to the Edge 1030/1050.

The key improvements of the Edge 1050 over the Edge 1030 are the increased screen resolution and the switch from a transflective LCD to a transmissive LCD with a screen brightness of 1,000 nits. The Edge 1050 has a bright, high-resolution touch screen with more vivid colours.

Specification Edge 705Edge 1000Edge 1030Edge 1050
Physical Dimensions (W × H × D)51mm × 109mm × 25mm58mm × 112mm × 20mm58mm × 114mm × 19mm60.2mm × 118.5mm × 16.3mm
Display Size (Diagonal)5.6 cm7.6 cm8.9 cm8.9 cm
Display Resolution
(Pixels)
176 × 220240 × 400282 × 470480 × 800
Weight104g 114.5g124g161g

There are also improvements inside the Edge 1050. Hardware changes include a much faster processor that delivers a smoother, more smartphone-like experience when scrolling, zooming maps, and navigating menus. The inclusion of Multi-band GNSS offers more precise tracking and positional accuracy. The basic beeper in previous devices has been replaced by a built-in speaker with an electronic bell and audio prompts.

Software improvements let you download and update maps via WiFi on the device and make contactless payments. There are hazard alerts and improved group-ride features. Lastly, the User Interface has been redesigned and is more responsive.

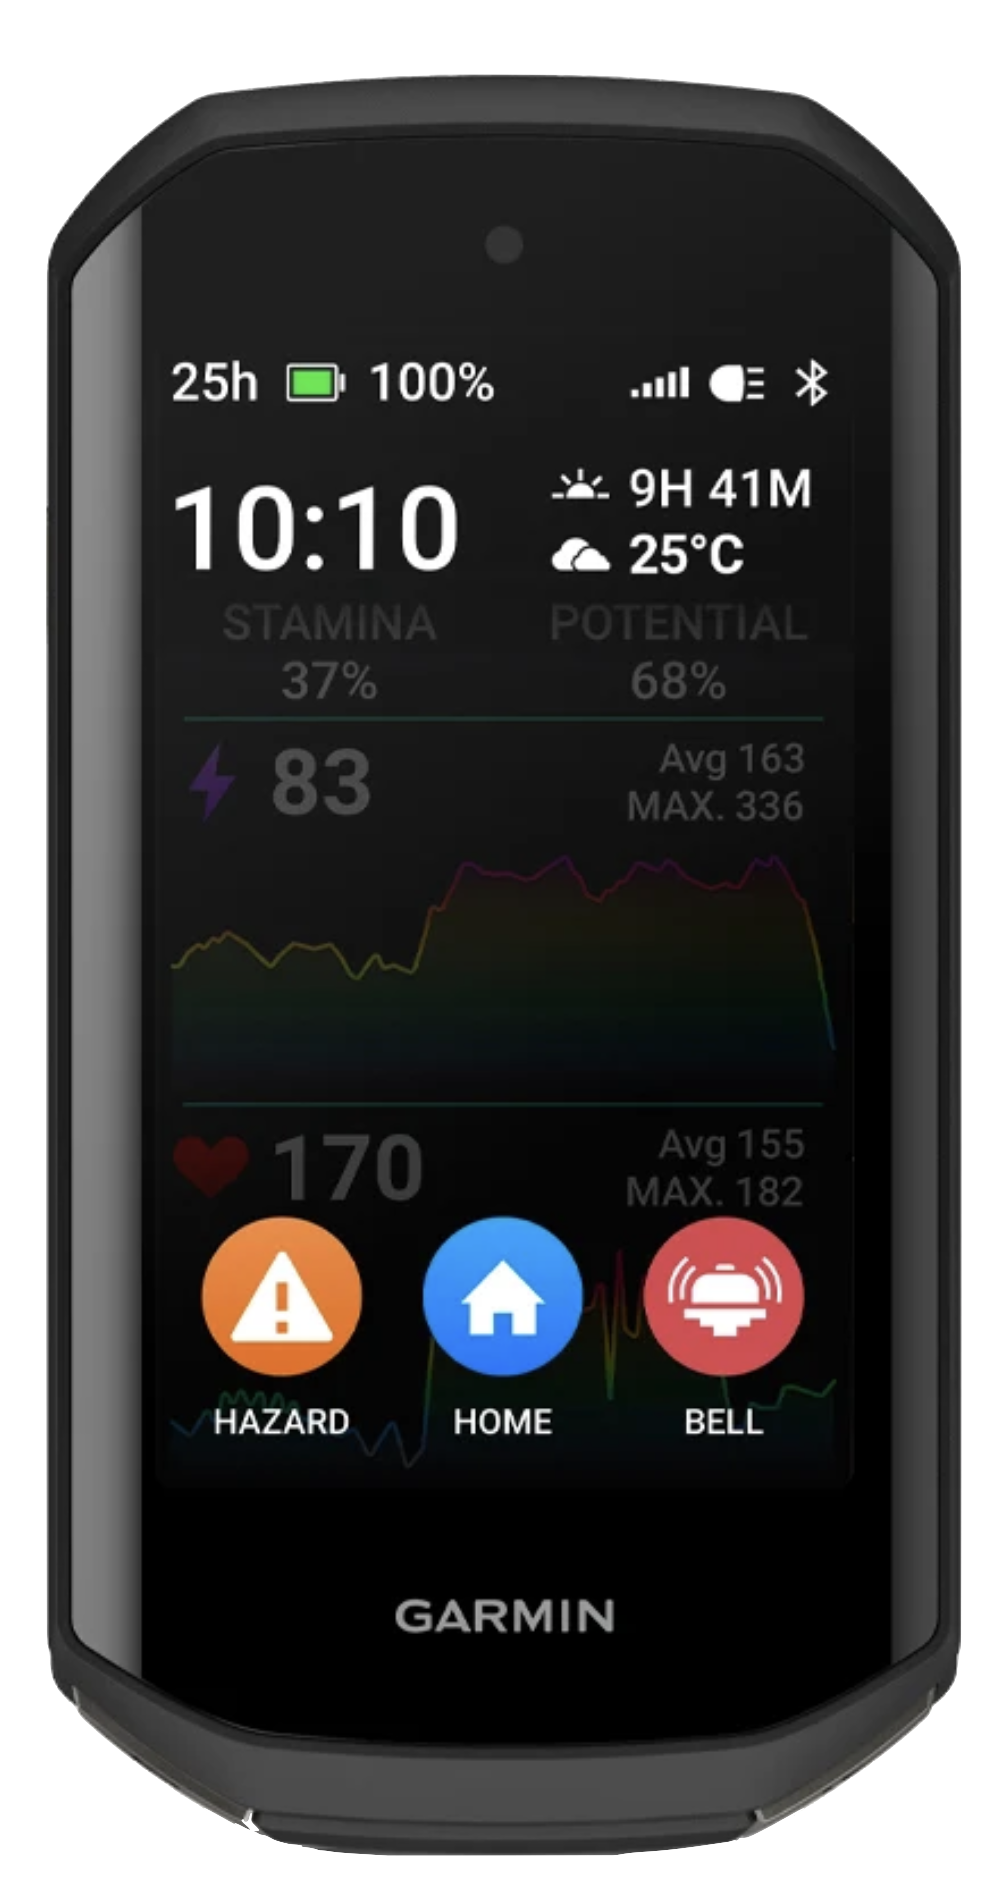
I progress through these three screens at the start of every ride. On the left is the Home screen that usually displays after the device has booted up.

In the centre is the Status widget screen. Widgets provide at-a-glance information like weather and notifications. Swiping down from the Home screen reveals the Widget screen. I usually turn on my Edge 1050 inside a car park. I use the Widget screen to confirm that my Edge 1050 has acquired a GPS satellite signal.

Touching the light icon at the bottom of the Widget screen reveals the Light screen. I control my Garmin Varia UT800 front light from the Light screen.

Swiping up from any Widget screen returns the display to the Home screen. From the Home screen, I can start a ride by touching the large ROAD activity profile button, start navigating by touching the NAVIGATION button, or access the system settings by touching the MENU button.

Touching the ROAD activity profile button goes to the data screen on the left below. Data screens, widget screens and activity profiles are all easily customisable. I have customised this screen to show the data fields I use the most.

I swipe left from my preferred data screen to reveal the Music screen. I ride with Shokz bone conduction headphones. The open-ear design lets me listen to music and navigation prompts without drowning out or masking the sounds around me. I can still hear a vehicle approaching me from behind and be in conversations while using the headohones.

I use the Music screen to control which track is playing and to adjust the playback volume.

I swipe right from the data screen to access the Map screen when I want to see the layout of the roads around me.

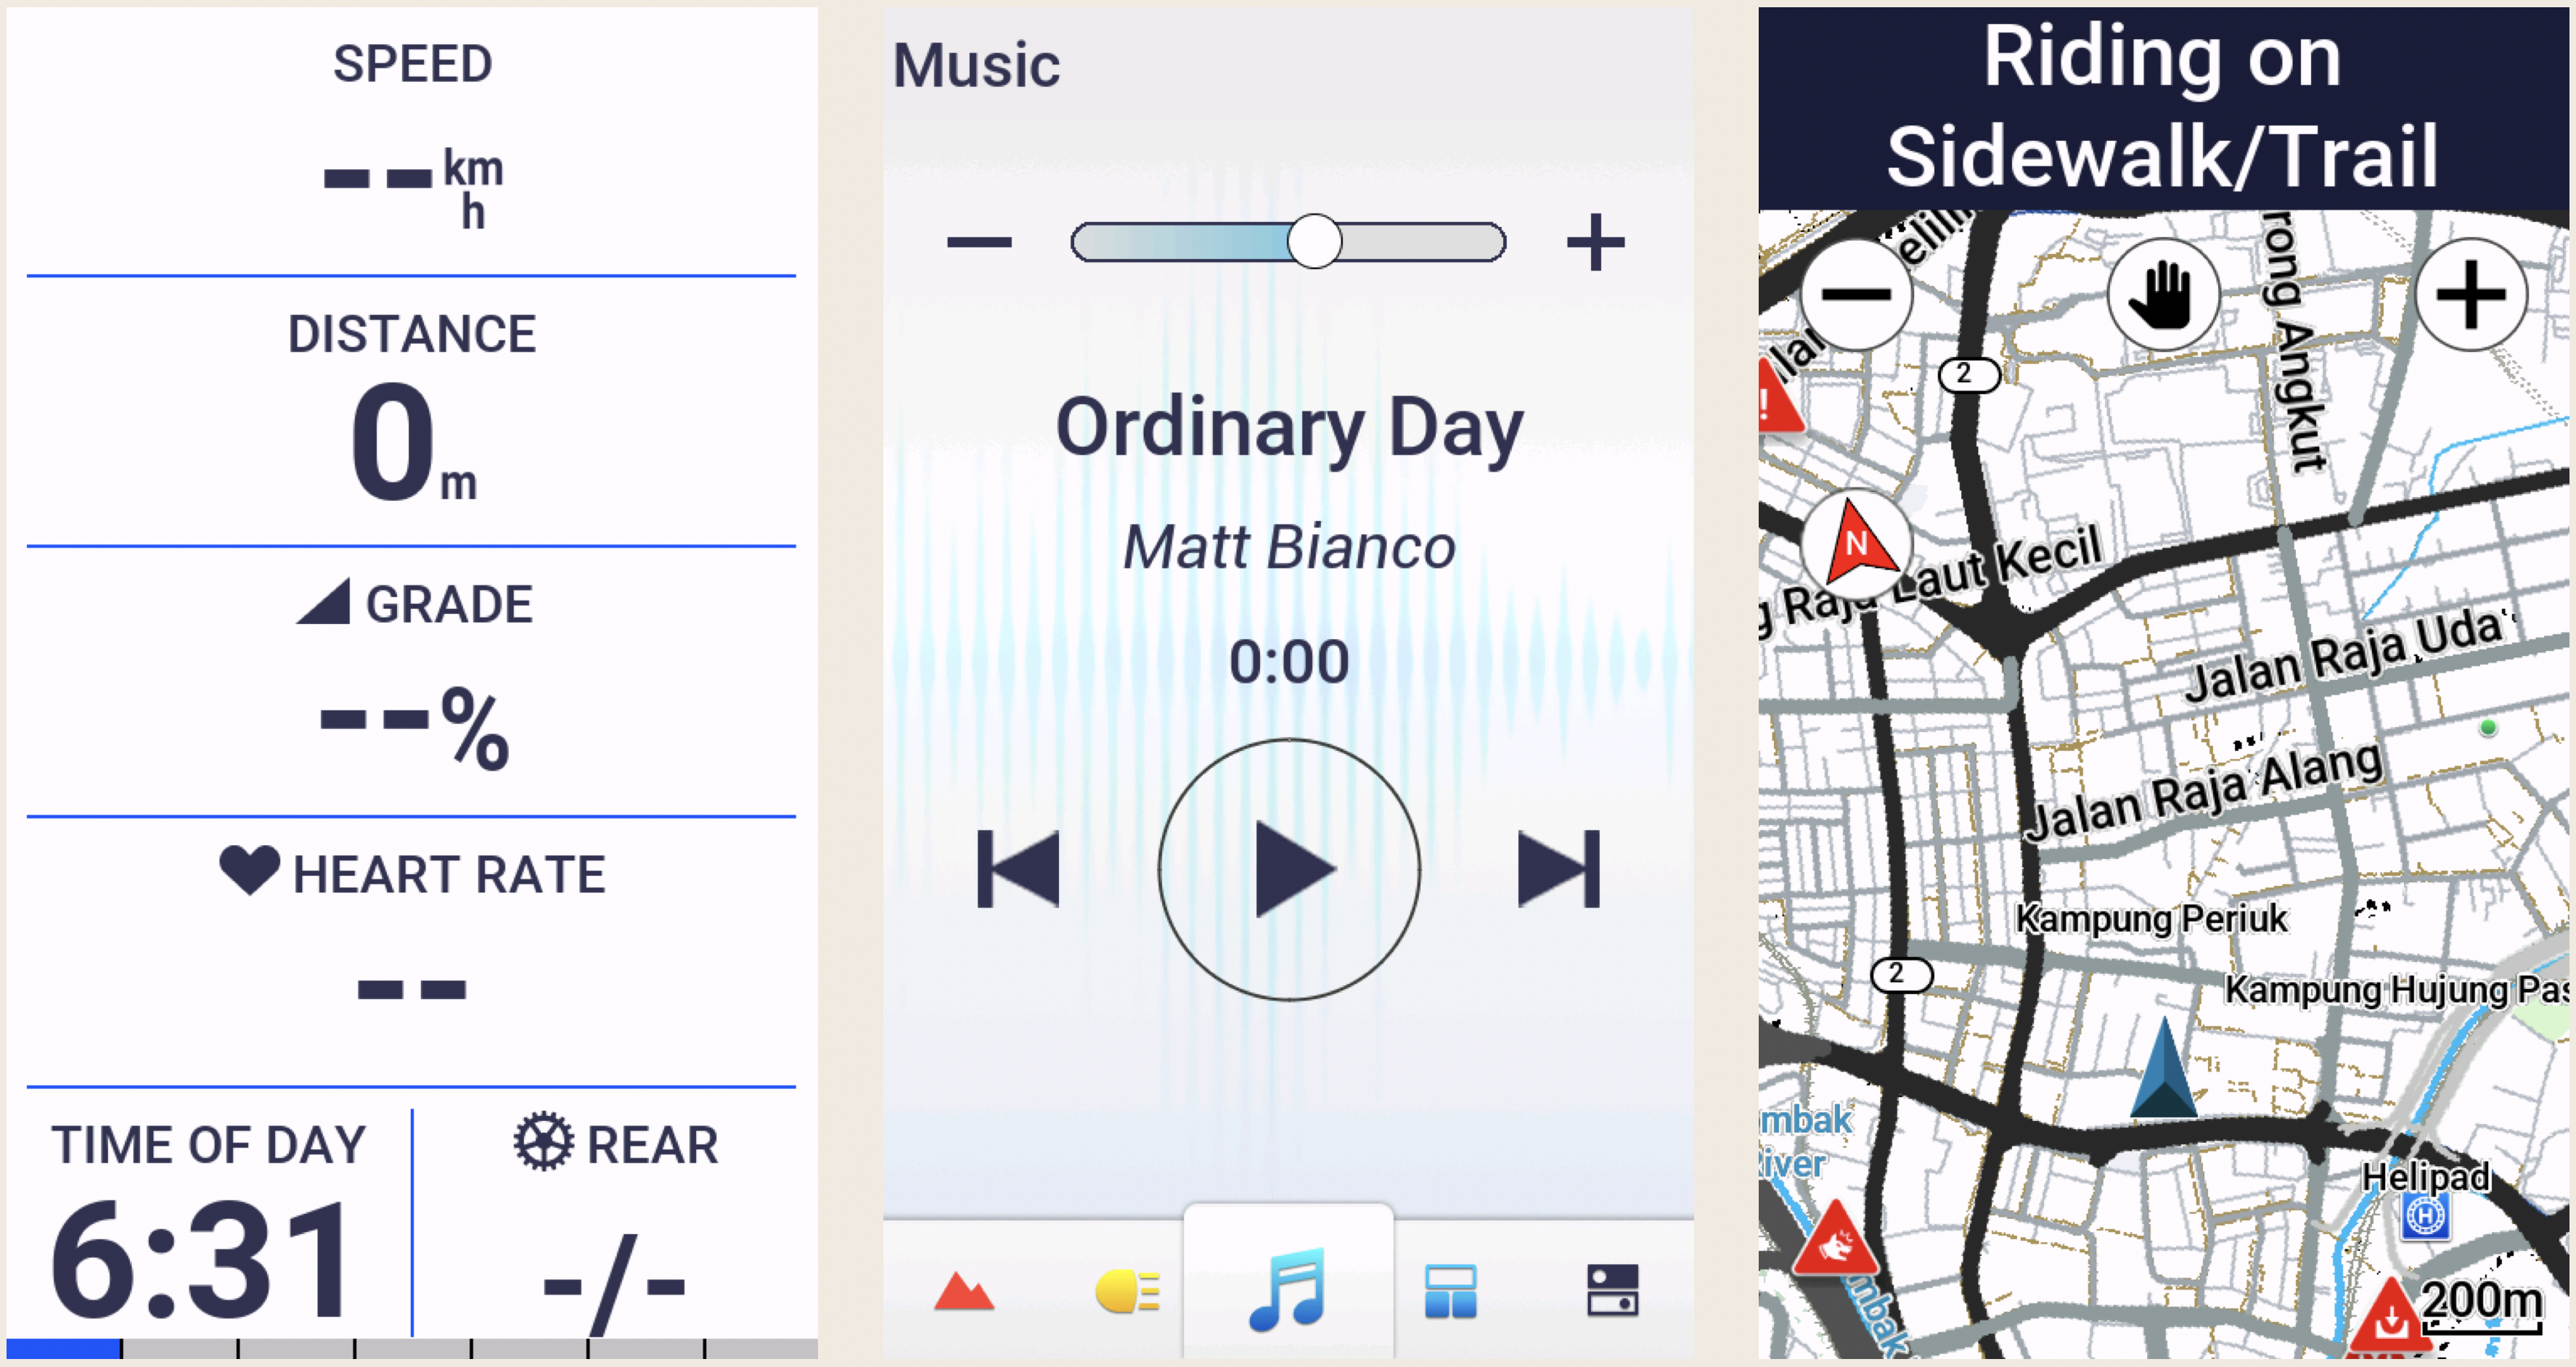
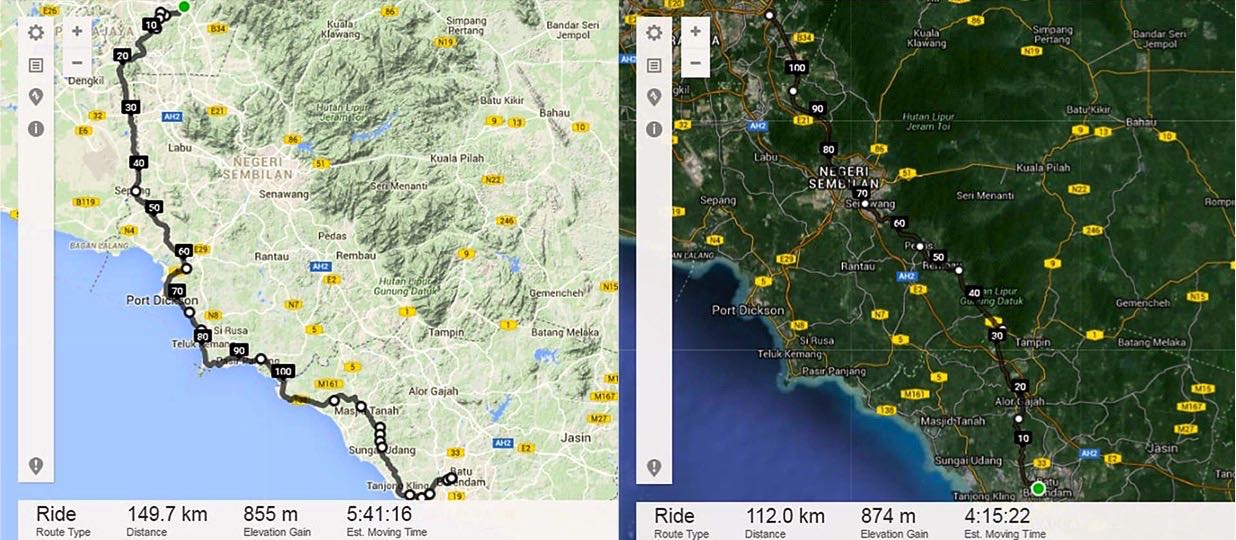
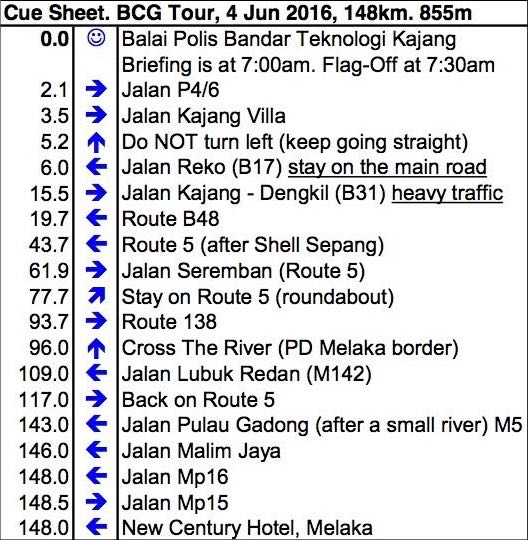
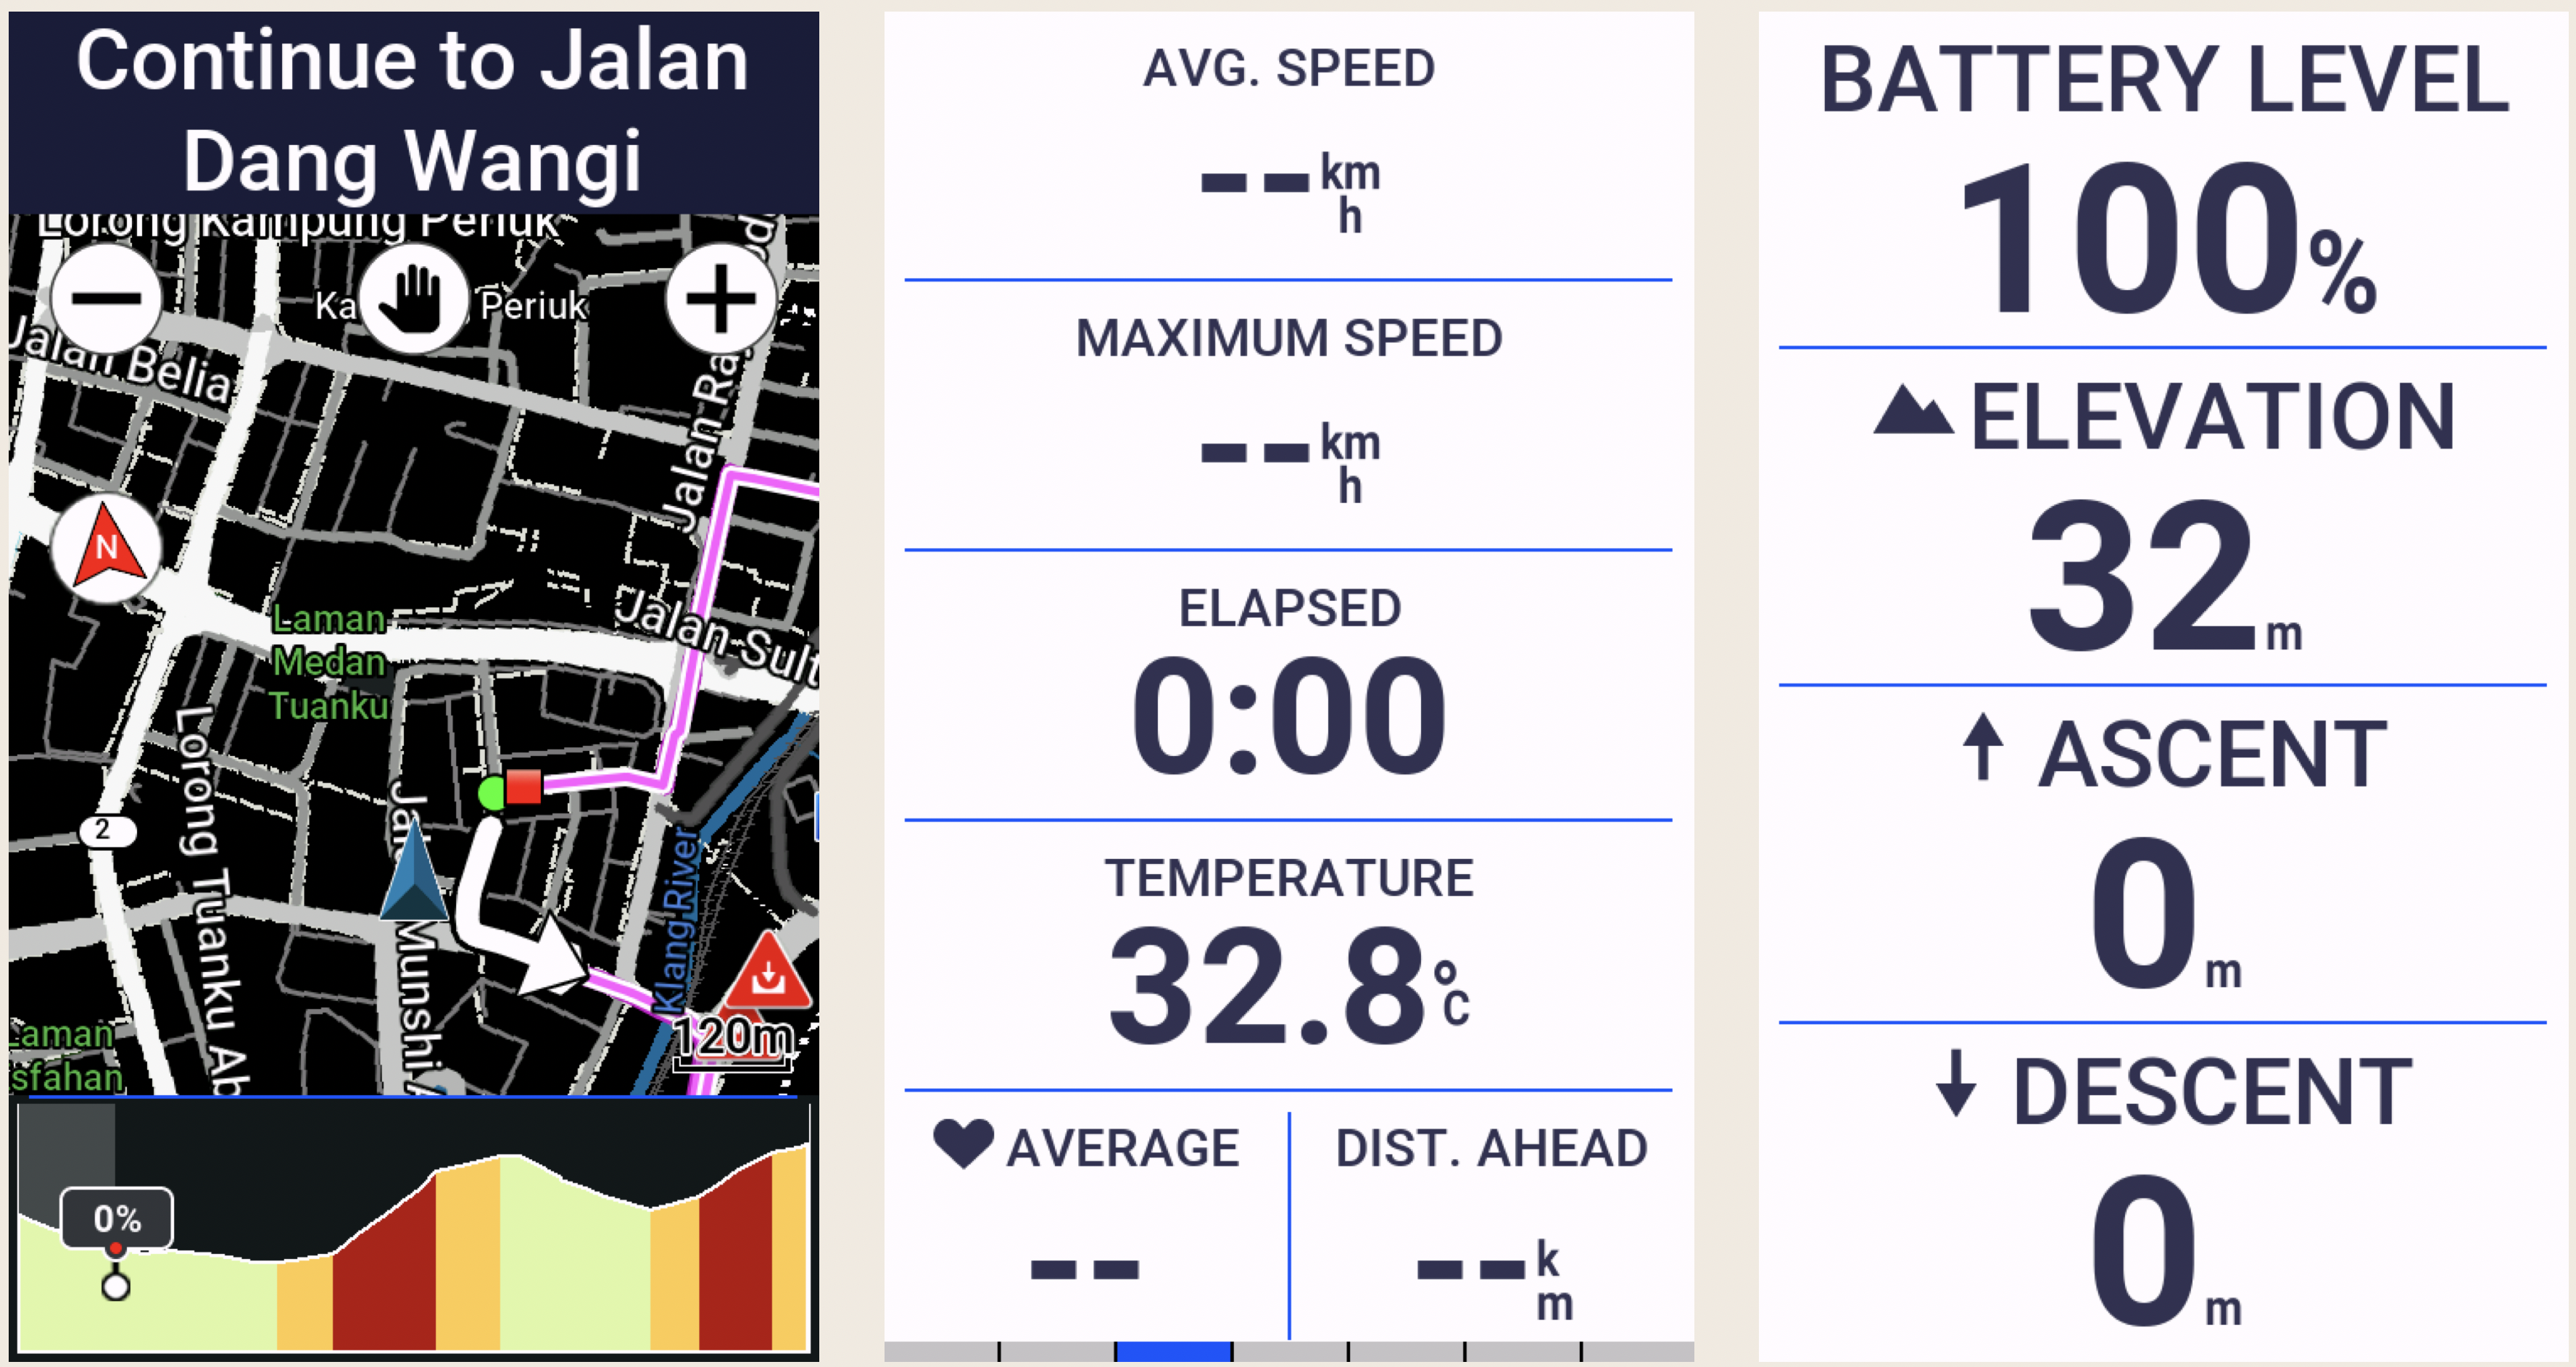
I often follow pre-loaded routes or courses that I created using the Route Planner on ridewithgps.com. I upload these custom courses wirelessly to my Edge 1050. The Map screen below is in navigation mode. The course is highlighted and a directional arrow is displayed.

If the navigation screen is not already displayed while following a course, it will pop up automatically about 100 metres before an upcoming turn.

The other two data screens display data fields that I occasionally refer to. I most often want to know the current temperature and how much climbing I have done.

I mentioned that the data screens are customisable. You can create up to 10 custom data screens for each activity profile on an Edge 1050. Each of these screens can be customised to display up to 10 data fields by default. While 100 data fields per activity profile sounds like a lot, Garmin provides 151 data fields to choose from, across the following categories, in alphabetical order:

Data TypeNumber of FieldsExamples
Cadence3Average cadence, Lap cadence
Cycling Dynamics19Time seated, Time standing
eBike5Assist mode, Travel range
Elevation12Average ascent velocity, Grade
Gears8Di2 shift mode, Gear ratio
Graphical13Graphs showing Current Power Zone, Current Cadence Range
Heart Rate17% of Heart Rate Reserve, Heart Rate Zone
Lights4Light mode, Battery status
MTB Performance6Grit, Lap flow
Navigation14Next waypoint, Time to destination
Other11Temperature, Number of laps completed
Power32current power output, Average left/right power balance
Smart Trainer1Trainer controls
Speed5Average speed, Lap speed
Stamina4Current remaining stamina, Remaining potential stamina
Timer7Elapsed Time, Lap Time 
112Distance to go, Step Distance

The Edge 1050 is capable of much more than I use it for. I don’t use features like Event Adaptive Training, Livetrack, Cycling Dynamics, and Garmin Group Ride Radio.

The features I do use work very well. Heart rate tracking, turn-by-turn navigation, Bluetooth, Wi-Fi and ANT+ connectivity, and the built-in speaker.

The bell, which can be rung from the Timer overlay screen, is an appealing new feature. The initial implementation of this feature was a bit clunky. It required tapping the screen to view the timer overlay, and then tapping the Bell icon in the bottom right corner of the main menu. It often took a few pokes to accurately hit the Bell icon.

The latest software update simplifies ringing the bell. Now, double-tapping on any data screen rings the bell. Oddly, double-tapping does not work on widget screens. Nevertheless, a welcome improvement that fixes the only niggle I had with my Edge 1050.

The thing everyone wants to read about in a cycling computer review is battery life. The Edge 1050 has a claimed 20-hour battery life when used with sensors connected, navigation running, etc. This stretches out to 30 hours with the screen brightness lowered to about 20-30%.

Enabling Battery Saver Mode, which lets you reduce backlighting, hide the map screen and allow the device to enter sleep mode during an activity, extends the claimed battery life to about 70 hours.

I highly recommend the Edge 1050. Some may quibble over the size and weight of this device. I want a large, bright and high-resolution screen on my cycling computer. The Edge 1050 gives me that display in a package that weighs less than a McDonald’s Big Mac.

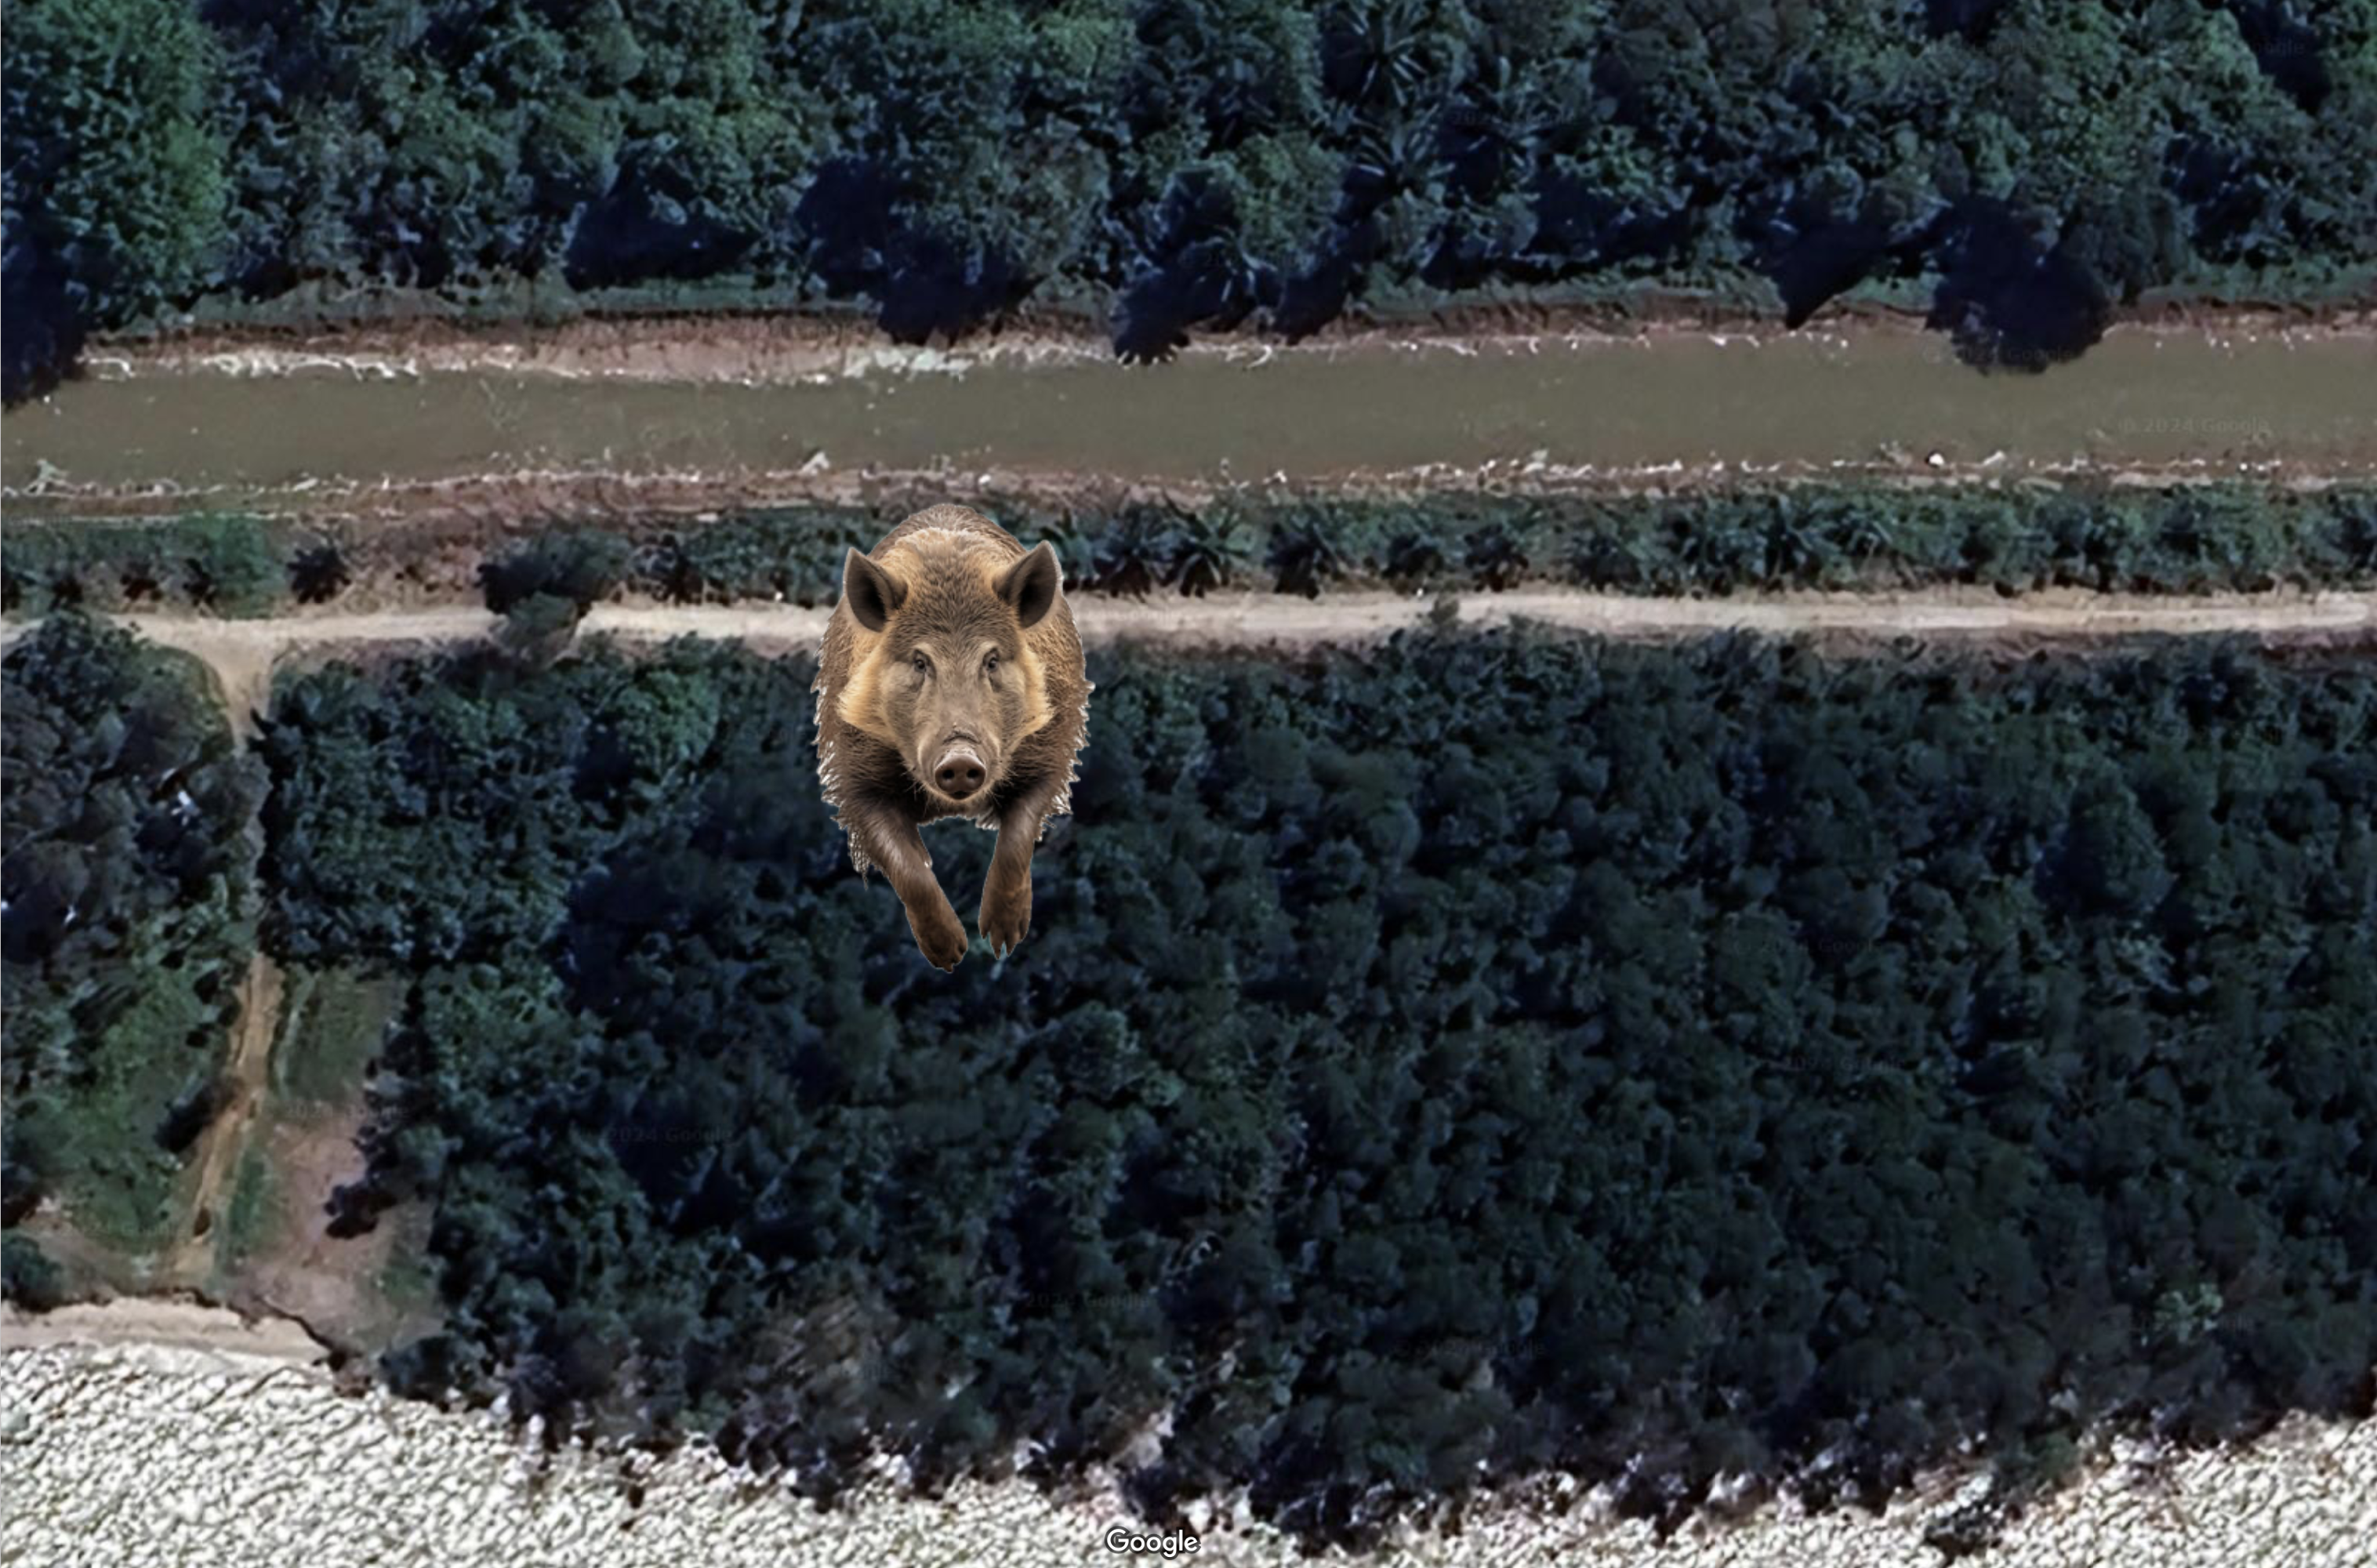
In closing, one feature of the Edge 1050 that I hope to never use is the replaceable quarter-turn mount interface. I would rather not hit another wild boar.

AI-generated image courtesy of gemini.google.com

That Did Not Start As Planned

My Biker Chick had a three-day work event at Avani Sepang Goldcoast Resort. I tagged along with my bicycle.

I mapped a ride for each of those three days. The first was from the resort to the Sungai Pelek ferry crossing and on to Kuala Lukut.

Map courtesy of ridewithgps.com

When I mapped this ride I didn’t know that 1.5 km into my ride the road turns into a fairly narrow gravel path. The gravel path runs counterclockwise for 7 km. Nor did I realise that the path paralleled a canal.

Map courtesy of ridewithgps.com

I was on my bike at 5:40 am under a full moon.

The path looks innocuous in daylight. I took this photograph the next day.

Not so at night. Despite the full moon, it was pitch-black. The only light on the path was from my Garmin Varia UT800 front light. The UT800 was bright enough to illuminate the path ahead, but nothing was visible outside the light beam.

I was focused on avoiding the stones on the path when what looked like a rock rose into the air. That gave me a shock. More rocks took flight as I progressed along the trail. Birds were sleeping on the open ground. My post-ride research into the birds of the area identified the birds as being Blue-Breasted Quail.

Photograph courtesy of flickr.com

Just as I got used to birds flying up ahead, a dark shape shot out of the undergrowth in front of me. Before I knew it I was over the handlebar and on the ground. Whatever I hit disappeared without a sound.

Subsequent conversations with a few resort staff identified the animal as a wild boar. Hunting kept the wild boar population in check in the past. Today there is much less hunting and the wild boar population has increased.

I think the boar was drinking from the canal beside the path when I came along and disturbed it.

Map courtesy of google.com
Photograph of wild boar courtesy of stock.adobe.com

I was on the ground just 3 km into my ride. The heels of both palms were scraped and bruised. The little finger of my right hand throbbed. Both of my wrists were sore. Other bumps and bruises would reveal themselves later. I am still sore and aching after three days.

I brushed the sand off my hands and knees.  My right shifter had been pushed inward and clogged with sand when my bike hit the ground.  I straightened the shifter and cleared out the sand. I was in the middle of nowhere. There was nothing else to do but pedal on.

1,200 metres later I reached down for my bidon. It wasn’t there. It must have fallen out of the bottle cage when my bicycle somersaulted.

I backtracked, hoping to find the bidon where I had hit the wild boar. I wasn’t sure where I had fallen so I rode until I was sure I had passed the crash site. I didn’t find my bidon. It must have landed in the undergrowth beside the trail.

Map courtesy of google.com

At kilometre 8.5 I got back onto the asphalt. My hands and wrists hurt, but not enough to dissuade me from continuing on my planned route. I came across a row of shops at kilometre 22. A 7-Eleven was open. I bought drinks, and plasters to dress the scrape on my left palm.

That is when my Biker Chick sent me a WhatsApp message asking “Did you forget your water bottle?”, accompanied by this photograph.

I was embarrassed at forgetting it, but happy that I still had a bidon. Onward to the Sungai Pelek ferry.

If only I could get to it. I rode through the housing area in Sungai Pelek toward the path that leads to the ferry as I had done many times before. Except this time access to that path was blocked by a construction site.

No signs were pointing toward a new route. I spent fifteen aimless minutes looking for the way to the ferry. Then a lady watering the plants at her front gate gave me the directions I needed.

The green line shows the new route to the ferry
Map courtesy of ridewithgps.com

More gravel on the way to the ferry, but this time no startled quail and charging wild boar.

The sun was rising, and the rest of my ride was trouble-free.

I am used to seeing monkeys during my rides.

Now I have something new to watch out for.

Image courtesy of microsoft.designer.com

Watts Next?

Graphic courtesy of outsideonline.com

When you buy a complete road bicycle, including pedals, it is ready to ride. Sort of. To ride safely, you need front and rear lights and a bell. To ride for more than thirty minutes, you need bottle cages and some bottles. If you don’t want to fill your jersey pockets, you need a saddle bag to carry a spare inner tube, a multi-tool, etc. And if you want to keep track of how far and how fast you rode, you need a cycling computer.

Thus equipped, you are ready to tackle most rides. You will be tempted to upgrade various components, but you don’t need to add anything else to your bike. But when did “need” get in the way of “want?”

You may want a power meter. A valid reason to add a power meter to your bike is you are a competitive cyclist who wants to train using power. Most of us want to add power meters because they are cool pieces of technology. And we like cool technology.

Power meters came into being in 1989 when Ulrich Schoberer started selling crank spider-based power meters. At the time Schoberer Rad Messtechnik (SRM) was the only power meter game in town. And the prices were eye-wateringly high.

Since then the power meter market has grown to include hub-based, crank arm-based, bottom-bracket based and pedal-based power meters.

Graphic courtesy of dcrainmaker.com

Examples of the various types of power meter are pictured below.

Prices have come down. SRM is still the price leader at about USD2,350 for the SRM Origin. Alternatively, a Quark DZero spider-based power meter costs USD399. At this price, you need to supply the chainrings and crank arms.

One downside of hub, spider, crank arm and bottom bracket-based power meters is that they cannot easily be switched between bicycles.

Pedal-based power meters are increasingly popular because they can be swapped from one bike to another with minimum fuss. However, power meter pedals are not available for all pedal interfaces. The Assioma Favero Duo, Garmin Vector, and SRM Look Exakt are Look pedal compatible only.

Lately, there has been a buzz around pedal-based power meters. In February, SRAM announced that it acquired Time, a French pedal manufacturer. SRAM owns Quark and Powertap. They have announced that the Powertap P2 power meter pedal will no longer be available. Will a Powertap P3 power meter pedal come soon, or even a Time pedal-based power meter?

Favero has hinted that it will launch a version of its Assioma Duo that will be compatible with Shimano SPD-SL pedal bodies.

Photograph courtesy of cyclingtips.com

Also, on the compatibility front, it seems Garmin is about to expand its range of power meter pedals to encompass the three most popular systems: Shimano SPD-SL road, Look Keo road, and Shimano SPD mountain bike interfaces. With a new name – Rally, instead of Vector.

Photograph courtesy of cyclingtips.com

Finally, Wahoo just announced the launch of its Speedplay pedal range. Wahoo acquired Speedplay two years ago, and there has been much speculation about the platform’s future. Along with four updated pedals, Wahoo announced the Powrlink Zero. Few details are available, apart from a Summer 2021 launch and the photograph below.

Graphic courtesy of dcrainmaker.com

If a SRAM Time-compatible power meter pedal hits the market, users of almost all pedal interface types – Shimano SPD-SL, Look Keo, SpeedPlay, and Time – will have a power meter pedal option.

Price remains a barrier to entry to the world of power meter pedals. A set of SRM Exakts cost USD1,699. Garmin Vector 3s go for USD1,000. There is no word yet on the pricing for the various Garmin Rally power meter pedals. A set of Favero Assioma Duo pedals costs about USD650. The expected retail price for the Wahoo Powrlink Zero is USD1,000.

Despite being a life-long SpeedPlay user, I don’t think a set of Wahoo Powrlink Zeros will be on my Watts Next list.

I Am Sure I’ve Earned That Second Roti Canai

Posted on

Calories Banner

My friends and I cycle for exercise, and for social interaction.  Some of that social interaction takes place while we are on our bikes. At least it does when we are riding at a moderate enough pace where talking whilst pedalling is physically possible.

Regular readers will know that most of that social interaction occurs over food.  Be it pre-ride, mid-ride, post-ride, or any combination of the three.  What the group wants to eat is often what determines where we ride.  For example, a hankering for roti canai will take us to Kundang.

Roti Canai Flat Bread, Indian Food, Made From Wheat Flour Dough.

Photograph courtesy of therakyatpost.com

Once in a while, the number of calories burnt during the ride is used as justification for a second roti canai, or whatever else has tickled the taste buds at the time.  Whatever calorie burn the Garmin bike computer reported must surely exceed the calories in two roti canai!

Calories Burned Bicycling com

Graphic courtesy of bicycling.com

Unfortunately, bike computers don’t do a good job of estimating the number of calorie burnt.  These devices use proprietary algorithms to calculate calorie burn.  You are going to get different results from different devices, depending on the algorithms and the technology they use.  There is no single international standard on how calorie burn should be measured.

Another contributor to inaccuracy is what I will call user “error”.  The algorithms all use data like rider height, weight, gender, fitness class, etc. to estimate calorie burn.  If a rider misstates their weight, for example, the estimated calorie burn will be less accurate.

The figures in the chart below are based on a 68kg / 150lb rider (so obviously not me) in constant motion; not including coasting, drafting, and descending.

Calories Burned Cycling Bicycling com

Graphic courtesy of bicycling.com

Lastly, accuracy is much improved with heart rate information.  So if you ride without a heart rate monitor, your Garmin will present you with nothing more than a rudimentary guesstimate of your calorie burn.  And more than likely overstating the number of calories you burnt.  Riding with a heart monitor reporting spurious data will also skew your calorie burn number.

DC Rainmaker has an informative blog post on this subject that you can read at How Calorie Measurement Works on Garmin Fitness Devices.

Even if we did have accurate calorie burn information, we would not necessarily be able to match our caloric intake to our caloric output.  Most of us have no idea of how many calories are in a plain roti canai (approx. 300), or a serving of nasi lemak (approx. 400), or in a Big Mac (approx 560), or in a bowl of cendol approx. 200).

Those figures come from MyFitnessPal, and are approximations.  Add egg to that roti canai, or a piece of fried chicken to that nasi lemak, and the calorie count will go up.

Calories Eating Bicycling com

Graphic courtesy of bicycling.com

Now I know that two plain roti canai and two bowls of cendol contain at least 1,000 calories.  Given my weight, height, and age, I have to ride at 26 to 32kph / 16 to 20mph for between an hour and 70 minutes to burn 1,000 calories.

It is a good thing that my social interactions while cycling are usually spread over three hours or so of pedalling at a decent pace.  So I do earn that second roti canai after all.  Plain of course!


BCG Tour Kajang – Melaka – Kajang Day 1

Posted on

BCG Tour Kajang - Melaka - Kajang Banner

Johan S and Danial AM of BCG Tour held their second event on June 4th and 5th.  This time from Kajang to Melaka, and back again the next day.

Unlike the inaugural tour from Ijok to Teluk Intan, this time the outbound and inbound routes were different.  It was about 149km / 93mi to Melaka, and 112km / 70mi back to Kajang.

BCG Tour Kajang - Melaka - Kajang Melaka Route

Or in my case, the outbound ride would have been 149km if I had followed the excellent cue card that was given out at the start.

Kajang Melaka 04jun16


I downloaded the .gpx files for the routes to my Garmin 705.  I should have just stuck with the cue sheet for the ride to Melaka.  Rather than just following the downloaded route, my Garmin directed me down an alternate route.  The Garmin did guide me to the New Century Hotel in Melaka.  But from the 117km / 72mi point it took me along a path very different from the one so carefully planned by the organisers.  More on that later.

Twenty of us met at the start point near the Bandar Teknologi Kajang Police Station.

Mark, Leslie and I grabbed a quick drink before we went to the pre-ride briefing.

BCG Tour Kajang - Melaka - Kajang Day 1 Start Mark

Photograph courtesy of Mark

The pre-ride briefing by Danial was thorough, and with our safety on the road in mind. Johan chipped in as well, in between taking the photographs.  Unless otherwise indicated, the photographs featured in this post are courtesy of Johan S.

In a delightfully retro gesture, Danial had a bulb horn rather than a whistle or a gun to start us off with.

BCG Tour Kajang - Melaka - Kajang Day 1 Start Danial

We followed Johan’s car for the first 20km / 12mi as he guided us along the busy roads out of Kajang and through Semenyih and Bangi.  A départ fictif.  Just like in the major bike races!

Once Johan released us, the pace quickened.  All the riders who were in front of Mark and I, which was most of the group, missed the left turn off Jalan Kajang – Dengkil onto the much quieter Selangor State Route B48.  So the two of us were riding alone for about thirty five minutes.

BCG Tour Kajang - Melaka - Kajang Day 1 Duo

BCG Tour Kajang - Melaka - Kajang Day 1 Duo 2

The rest of the group steadily made up ground on us.

BCG Tour Kajang - Melaka - Kajang Day 1 Chasing Pack BCG Tour Kajang - Melaka - Kajang Day 1 Chasing Pack 2

Mark and I were caught 5km / 3mi from Sepang.  The faster riders pulled ahead.  By then the bunch had broken up into smaller groups as riders settled into the pace that best suited them.

BCG Tour Kajang - Melaka - Kajang Day 1 Sepang


Leslie had caught us too.  The three of us, and Max, made our first stop at the Shell petrol station in Sepang.  We caught our breath and shared a litre of 100Plus as the rest of the group sailed past and onto Federal Route Route 5 toward Port Dickson.

We got going again at about 9.30am.  All hopes of a cool morning were evaporating in the sun that had broken through the cloud cover.  It was going to be a hot one.

At about 10:30am, as we approached Port Dickson, Leslie, Mark and I diverted off the published route onto Jalan Seremban.  That took us to the Port Dickson Waterfront.  More specifically to the McDonald’s there.  Mark and I, along with some other Flipsiders, had stopped at that McDonald’s three years ago, during our ride to Tanjung Tuan for the Raptor Watch 2013.

Why McDonald’s?  The Brekki Wrap with Sausage is the bomb after 70km / 43mi on a bike.

Mc Donalds weekday breakfast special brekkie wrap with sausage rm4 Possible To Earn RM30,000 A Month For Malaysian Blogger From the World of Advertisement Starting From McDonald's Ads

Photograph courtesy of Golden Arches Restaurants Sdn Bhd

And there is air-conditioning.  And a sea view.  What’s not to like?

BCG Tour Kajang - Melaka - Kajang Day 1 PD Leslie

Photograph courtesy of Leslie

By the time we  got back on our bikes at 11:15am the sun was out in full force and almost directly overhead.

BCG Tour Kajang - Melaka - Kajang Day 1 Sun

The shadows were getting shorter and shorter as we made our way through Port Dickson and past the Wan Loong Temple.

BCG Tour Kajang - Melaka - Kajang Day 1 PD Wan Loong Temple Leslie

Photograph courtesy of Leslie

Staying hydrated and cool become all important as the “feels like” temperature edged towards 40°C / 104F°.  An hour after coming out of the air-conditioned McDonald’s we were looking for some shade and another drink.  Others were looking for the same thing.

We found it at Kampung Sungai Raya, at the junction of Selangor State Route 5 and Federal Route 138.  There was a row of roadside stalls selling various drinks.  Leslie, Mark and I  downed two glasses of iced coconut water each in quick succession.

Someone else was thirsty too!

BCG Tour Kajang - Melaka - Kajang Day 1 Coconut 2

An hour further down the road we were again getting desperate for shade and something cold to drink.  We started looking for a petrol station or a shop after making the left turn onto Melaka State Route 142.  It seemed like a long time before we came upon a minimarket in Kampung Jeram.  In reality it was less than 4km / 2.5mi, but in the midday heat it certainly felt further.

It had been a long time since I had done this, but it was so hot that I resorted to the ice tricks that have helped me in the past.  Ice wrapped in a bandana and placed on the back of my neck.  Ice under my skull cap.  Even ice under my arm sleeves at each inner wrist.

Ice

I was dripping all over as the ice melted, but I felt cooler and much more comfortable.  So much so that I pulled ahead of Leslie and Mark, admittedly helped in that regard because they had to stop and wait at a couple of red traffic lights that were green for me.

I should have waited for them.  12km / 7mi outside Kampung Jeram my Garmin directed me to turn left onto Lebuh Spa.  I should have stayed on Federal Route 5 to Jalan Malim Jaya.  Instead I had an unplanned mystery ride through some villages and residential neighbourhoods.

The ice on my head lasted just long enough before I rode into this.

BCG Tour Kajang - Melaka - Kajang Melaka Weather

A most welcome rain shower that kept me cool, and rinsed some of the sweat and salt out of my cycling gear.

The rain was quite heavy, but it didn’t last very long.  It had stopped by the time I popped onto Federal Route 19 with just 5km / 3mi to go.

Everyone got a bit wet before arriving at the New Century Hotel.

The rest of the afternoon and evening were spent reliving the day’s ride, eating, napping, and eating some more.

It had been an early start for Mark and I.  We had driven to Leslie’s home before 6:00am so that we could car-pool to Kajang in Leslie’s bike / people mover.  So we called it a night after dinner.

BCG Tour Kajang - Melaka - Kajang Day 1 Sleep