
I took a Bike Maintenance course in 2012 to learn how to service my bikes myself. On the final day of the course, we had to completely strip a bike down, including removing the fork, disassembling the chain rings etc., cleaning and lubricating all the parts, replacing cables as required, reassembling the bike and adjusting the shifting and brakes.
I still own a bicycle from that time, a 2010 Alchemy with mechanical shifting and brakes. I can still service that bike if I had to, although I gladly depend on my local bike shop to service my bikes for me now.

Bikes today are increasingly more difficult to service. I do not have the expertise or the tools to service a modern bicycle.
Advancements in modern road bikes make them more complex. Let us start from the top to compare my fifteen year-old bicycle with a modern one.
My bike uses externally routed cables to operate the brakes and gears.

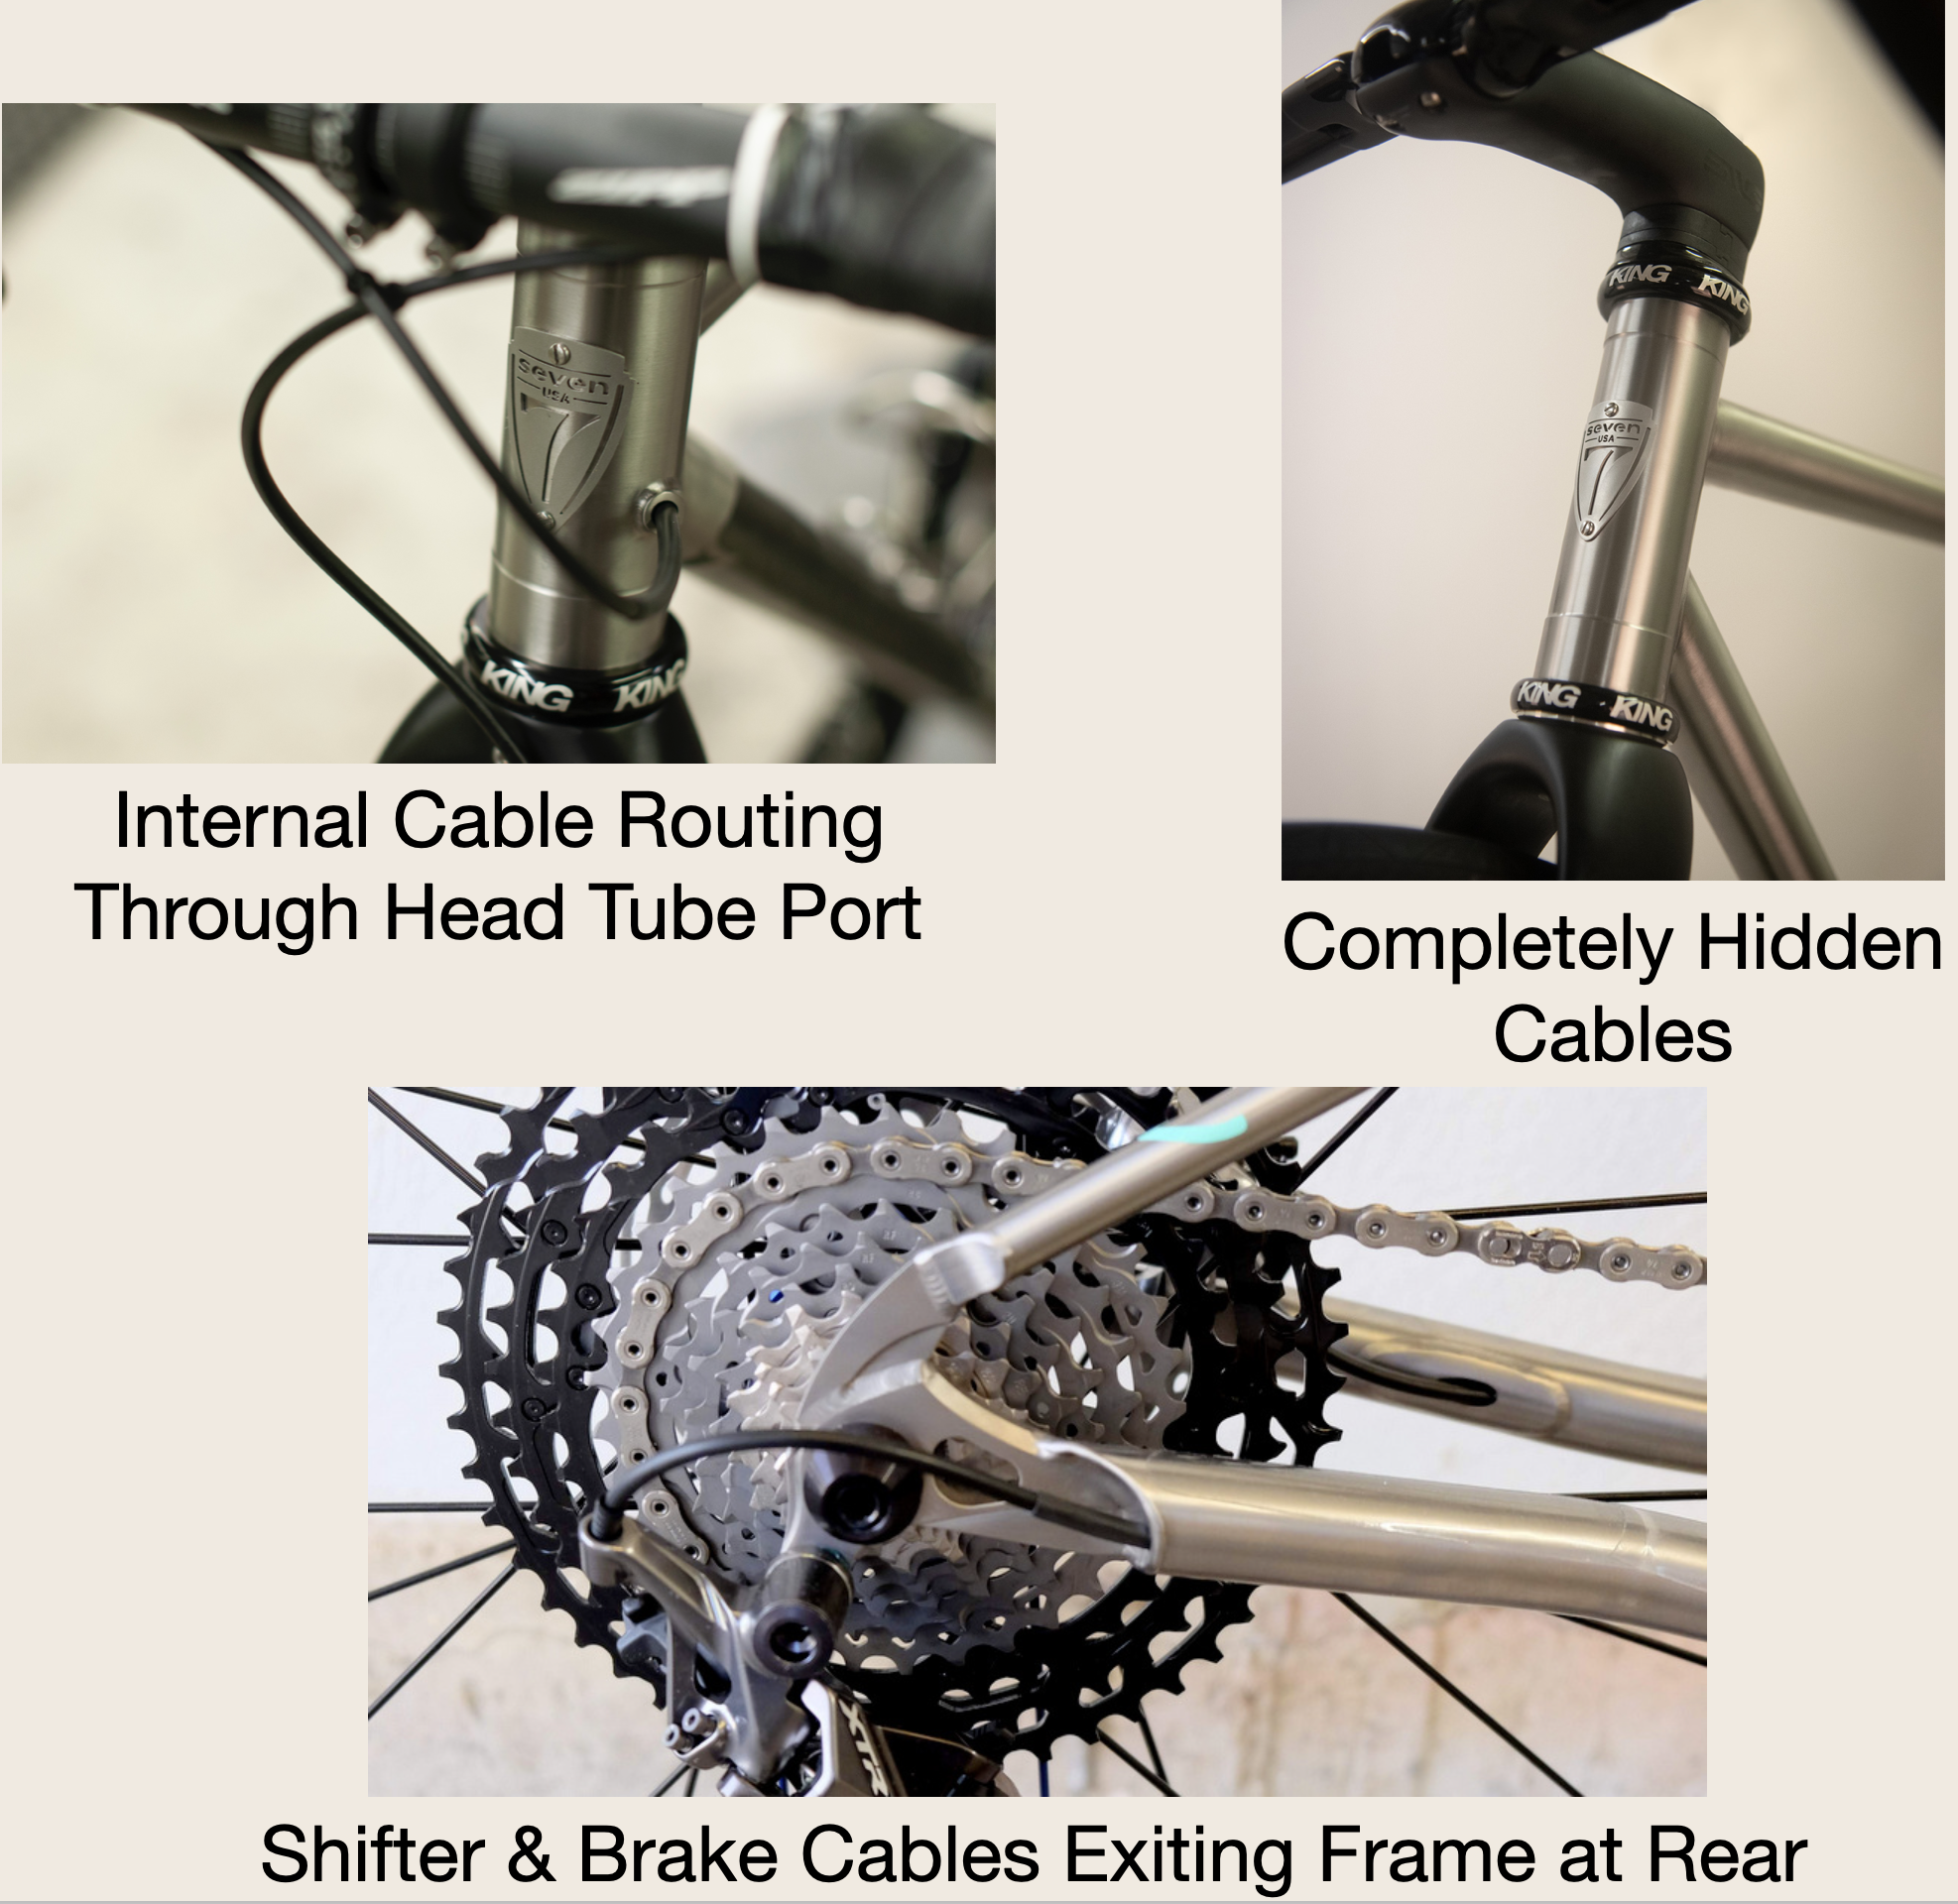
Modern bikes use either partially or completely internally routed cables.
Moving down the head tube to the brakes. My bike has rim brakes. Brakes on new bikes are exclusively disc. Often hydraulically operated.

Let’s now look at how these two advances make servicing more complicated.
When it comes to replacing cables on my bike, everything is visible so you can see what you are doing. The challenge with internal cables is that you have to thread them inside the frame blind, so to speak. Threading cables internally can be hindered by a tight curve around the bottom bracket.
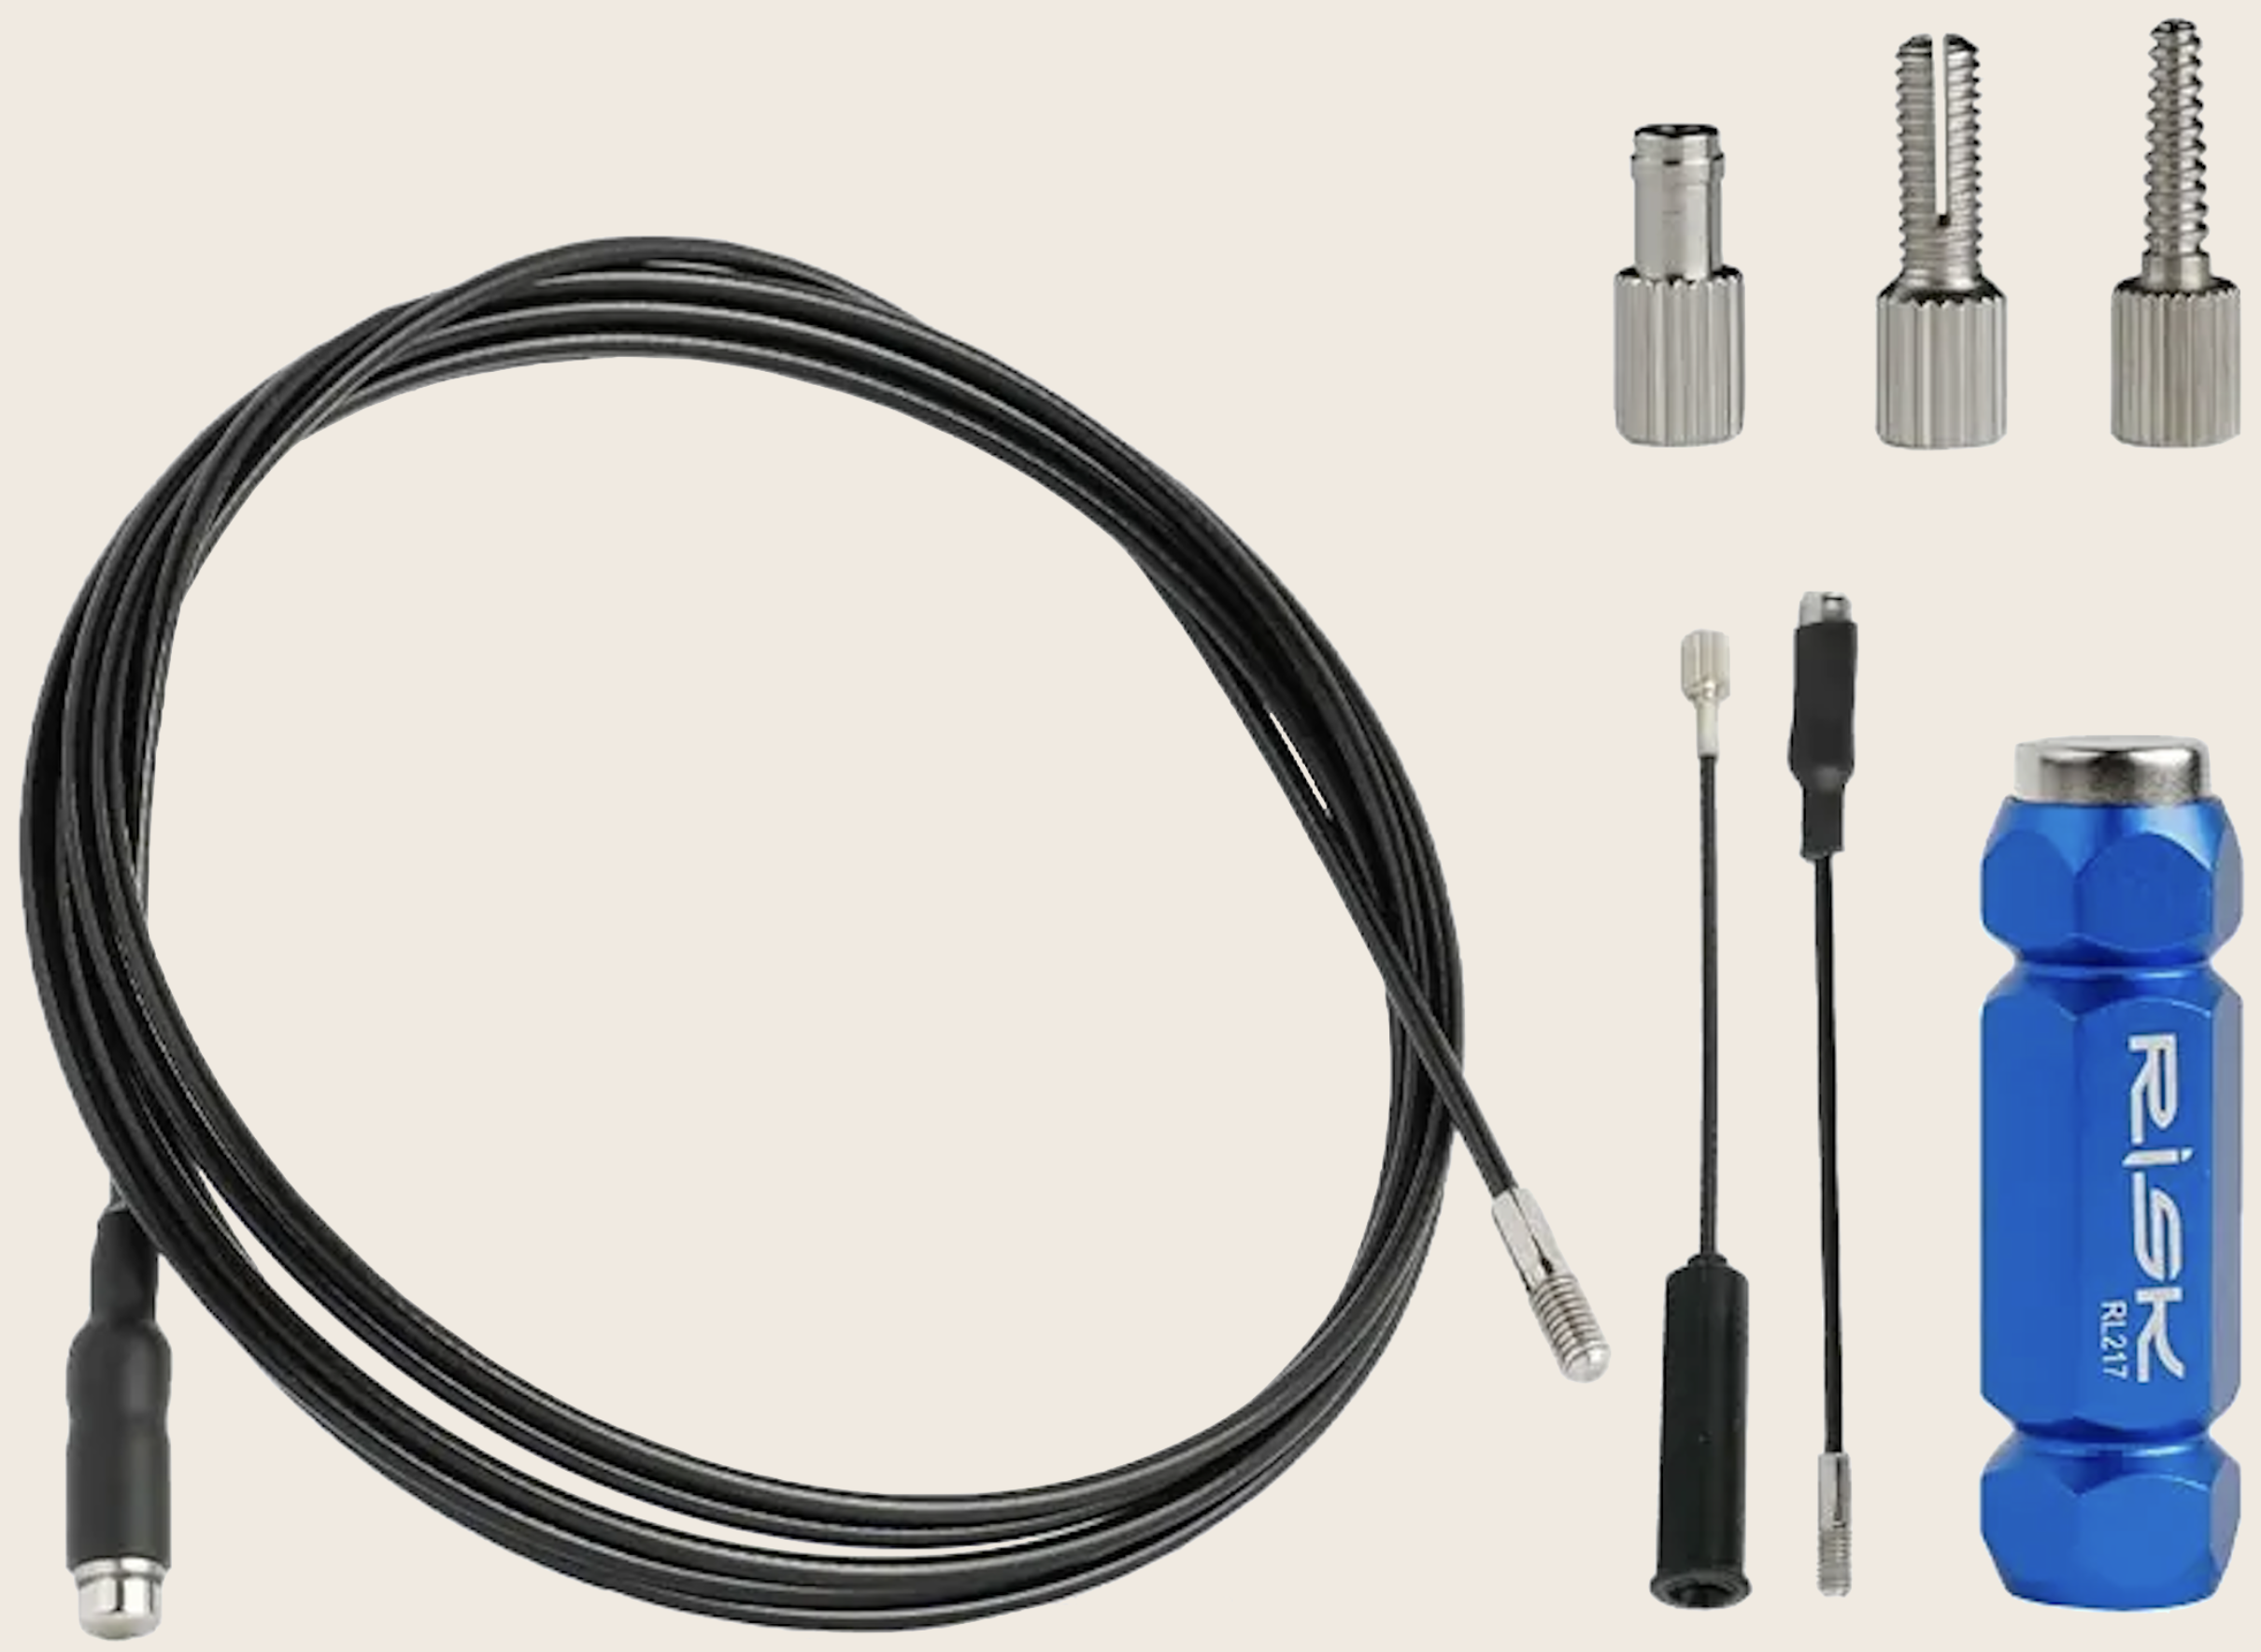
A magnetic internal cable router is often needed.
Replacing internally routed cables is more complicated when they are fully hidden. The headset often needs to be disassembled because the headset components can obstruct access to the cable path.

Then there are the brakes. Apart from infrequent cable replacement, all I need to do to service my rim brakes is to replace worn brake pads. Rim brake pads for road bikes are a standard shape. To replace them, undo the screw that holds each pad in its holder, slide the old pad out and slide a new pad into the holder and tighten the screw.

How difficult it is to replace mechanically operated disc brake cables depends on whether they are externally or internally routed.
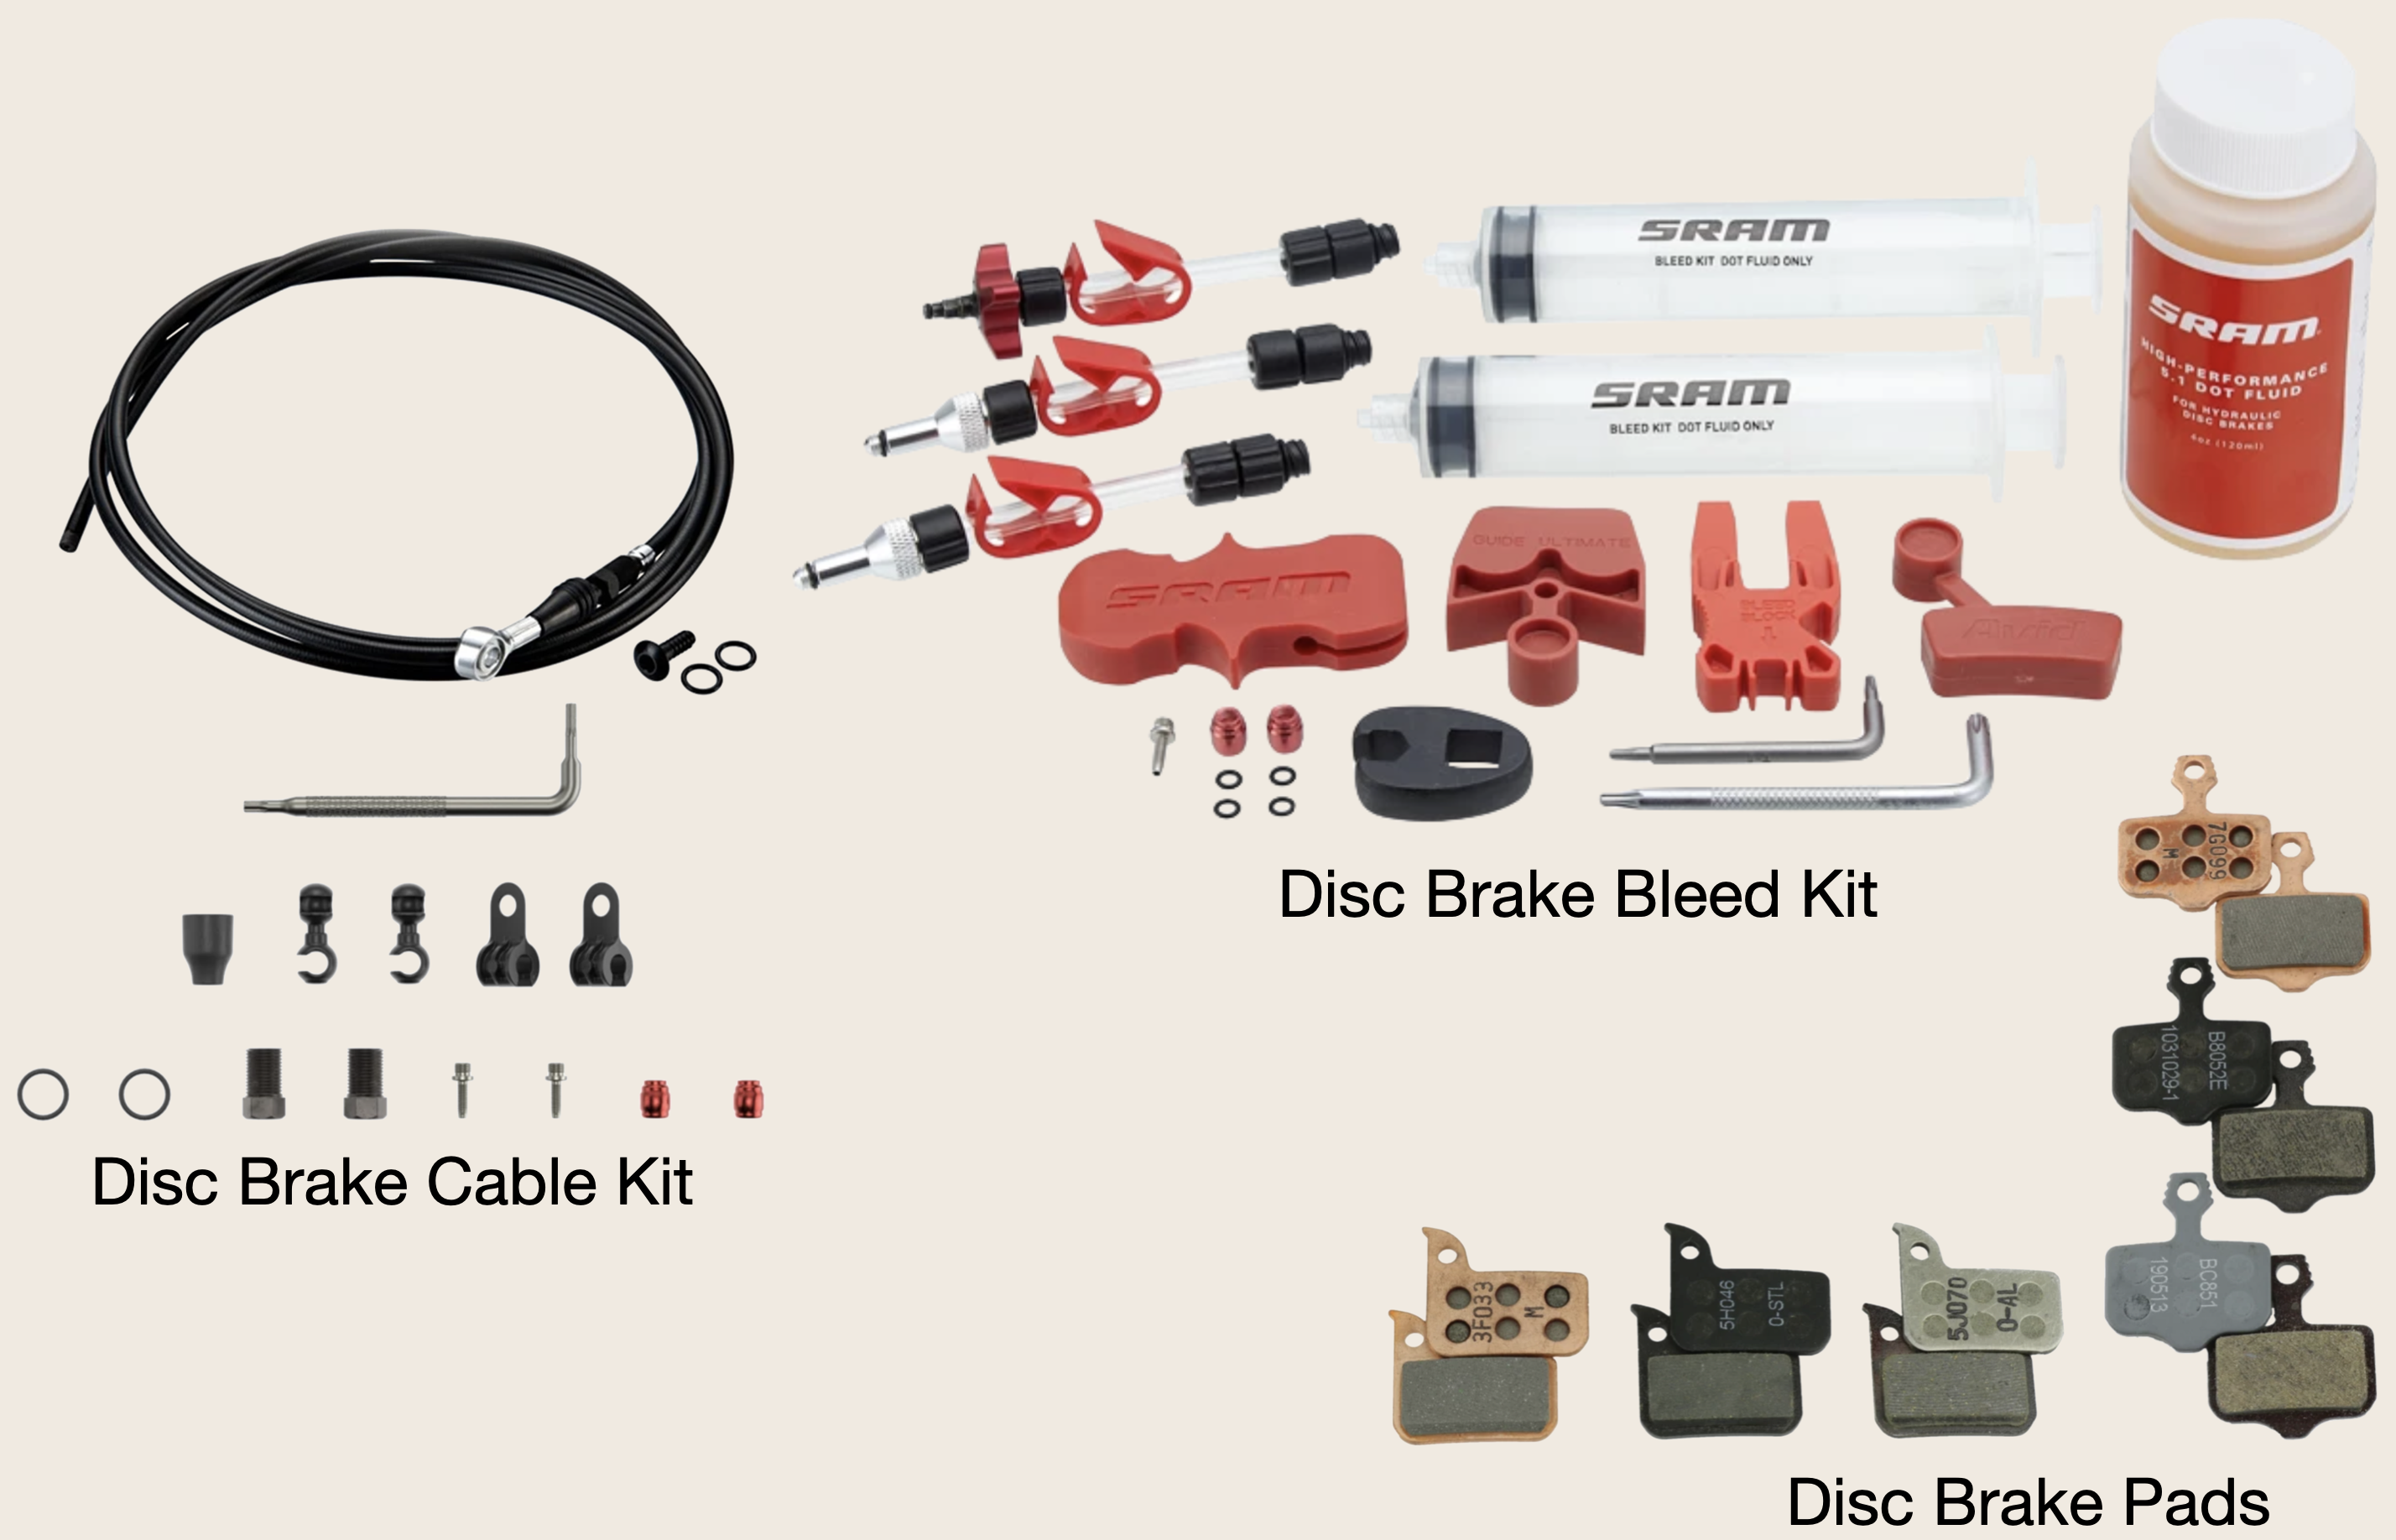
Replacing disc brake pads is a more involved process. First, you must choose the type of brake pad: sintered, organic and semi-metal. Your choice depends on the type of riding you do. You also need the right shape pads for the disc brake caliper you have on your bike.
Then you to use a tool to push and hold the brake caliper pistons apart. Woe betide you if the pistons close without brake pads in place. You must also ensure that you do not touch the pad surfaces or the disc rotor. Getting oils on the pads or rotor will adversely affect braking performance.
Lastly, you need to bed in the new pads. The bedding in process heats up the pads and rotor, transferring an even layer of material from the disc pad onto the disc rotor. Failing to bed in your disc brakes will almost guarantee to result in vibration, noise, poor modulation, and loss of power.
The brake servicing process is much more complicated if you need to replace your hydraulic brake hoses or bleed your hydraulic brakes. Bleeding requires the correct type of fluid for the disc brakes on your bicycle: mineral oil or DOT fluid. The bleeding process is too long to describe here, but you get a sense of the steps involved from the number of parts in the Disc Brake Bleed kit pictured below.
Further down the bicycle are tyres. My bike has clincher tyres and inner tubes. Many new road bicycles, particularly higher-end models, ship with tubeless-ready tyres and wheelsets. Some bikes may ship with tubes in the tyres to simplify showroom setup, but the wheels and tyres are often tubeless-ready.
You can argue that tyres do not need service. However, a tubeless setup requires semi-regular maintenance to keep it performing at its best, as brakes do.
Tubeless tyre sealant gradually dries out. Manufacturer recommendations for sealant top-off intervals range between three and six months. It is also suggested that you take your tyre completely off the rim every twelve to eighteen months to scrape out the dried sealant.
The need to regularly top off the sealant, scrape out dried sealant and the fact some tubeless tyres are tricky to mount and/or need a dedicated tubeless inflator or air compressor to seat makes tubeless setup and maintenance inherently more onerous than using clincher tyres and inner tubes.

Last year, I wrote a post titled Tubed or Tubeless Tyres? The photographs below from that post illustrate how much more stuff you need to run tubeless tyres versus clincher tyres.

I’ll stick with my fifteen-year-old bicycle. My bike mechanic and I prefer the simplicity.

